Signs of a Failing Battery and Why DIY is a Smart Choice
We’ve all felt that sinking feeling. You turn the key, and instead of a roar, you get a click or complete silence. While a dead battery is an obvious problem, the signs of a failing one are often more subtle. You might notice your headlights dimming at idle, the engine cranking more slowly than usual, or that persistent battery warning light on your dashboard. These are not minor glitches; they are your car’s way of telling you that a failure is imminent.
Ignoring these warnings can leave you stranded, but tackling a DIY car battery replacement is a smart and empowering choice. You save a significant amount on mechanic labor fees and avoid the hassle of scheduling an appointment or waiting for a tow. This guide will walk you through the process, giving you the confidence to handle this essential maintenance task yourself. If your battery seems fine but the car still won’t start, our comprehensive diagnostic article can help you explore other potential causes.
Step 1: Gather Your Tools and Safety Gear

Before you begin, a little preparation makes the job go smoothly. You don’t need a professional garage, just a few specific items. Here’s your checklist:
- A socket wrench set, typically with 10mm and 1/2-inch sockets.
- A battery terminal cleaning brush.
- Protective gloves and safety goggles.
- A new battery that matches your vehicle’s specifications.
Choosing the right battery is critical. Your owner’s manual will specify the required group size, Cold Cranking Amps (CCA), and terminal configuration. Getting this right ensures the battery fits securely and provides enough power for your engine, whether you’re driving a sedan or one of the many popular trucks on the road today. This is a vital part of any successful DIY car battery replacement.
Finally, safety is non-negotiable. Always work in a well-ventilated area like an open garage, and make sure the vehicle is turned off with the parking brake engaged. Car batteries can release flammable hydrogen gas, so preventing any sparks is your top priority.
Step 2: Disconnect and Remove the Old Battery
With your gear ready, it’s time to get hands-on. First, locate the battery. It’s usually under the hood on one side of the engine bay, but some vehicles house it in the trunk or even under a seat. If you can’t find it, your owner’s manual is your best friend. Once located, follow this disconnection sequence precisely.
- Identify the negative (-) and positive (+) terminals. The negative is usually black, and the positive is red.
- Use your socket wrench to loosen the nut on the negative (black) terminal first. Wiggle the cable clamp free and move it away from the battery post.
- Now, repeat the process for the positive (red) terminal.
There’s a critical reason for this order. Removing the negative terminal first disconnects the battery from the car’s metal frame, which acts as the ground. This simple step eliminates the risk of creating a dangerous spark if your wrench accidentally touches a metal part while you work on the positive terminal. After the cables are off, use your wrench to unbolt the hold-down clamp that secures the battery to its tray. Be prepared when you lift it out; car batteries are surprisingly heavy, often weighing 40 to 60 pounds. Lift with your legs, not your back, to avoid injury.
Step 3: Clean the Tray and Terminals
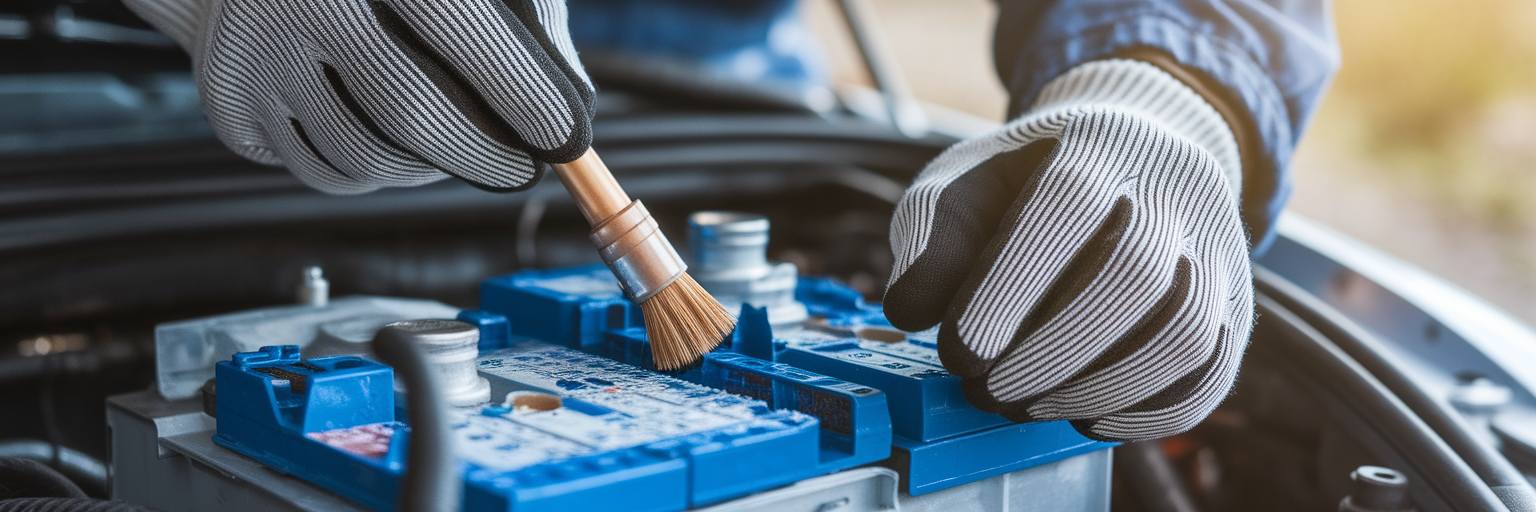
This next step is one that many people skip, but it is absolutely essential for a reliable connection. That fuzzy white or blue-green buildup you see on the old battery terminals is corrosion from sulfuric acid residue. If left behind, it creates electrical resistance that can prevent your new battery from starting the car or charging properly.
For light buildup, a wire battery brush is all you need. Scrub the inside of the cable connectors and the terminal posts until they are shiny. If you’re dealing with heavy corrosion, a paste made from baking soda and water works wonders. Apply it to the corroded areas, and you’ll see a fizzing reaction as the paste neutralizes the acid. Once the fizzing stops, wipe the residue away with a damp cloth.
Before moving on, make sure the battery tray and the cable connectors are completely dry. Any remaining moisture can cause the corrosion to return almost immediately, undoing all your hard work. A clean connection is the foundation of a successful battery replacement.
Step 4: Install and Connect the New Battery
Installing the new battery is mostly the reverse of removal, but with one crucial difference in the connection order. Carefully lower the new battery onto the clean tray, making sure the positive and negative terminals are oriented correctly. Secure it with the hold-down clamp, tightening it just enough so the battery cannot move. Do not overtighten, as this can crack the battery’s plastic casing.
Now, it’s time to reconnect the cables. This replace car battery guide follows a specific order for safety:
- Attach the positive (red) cable to the positive terminal first. Tighten the nut with your wrench.
- Next, attach the negative (black) cable to the negative terminal and tighten it.
Connecting the positive terminal first is the safest method. Because the negative (ground) cable is still disconnected, there is no complete circuit, so you cannot create a spark if your wrench touches the car’s frame. This process is standard for most vehicles with internal combustion engines, which operate very differently from the systems found in modern electric vehicles. As a final touch, apply a thin coat of dielectric grease to the terminals. This is one of the best car battery maintenance tips for preventing future corrosion.
Step 5: Final Checks and Battery Care
You’re almost done. Before you celebrate, perform a few final checks. Give the battery a gentle tug to confirm it’s secure in its tray. Double-check that both terminal connections are tight and cannot be wiggled by hand. Now, start the car. It should fire up immediately without any hesitation.
Sometimes, minor issues can pop up after a battery swap. This quick car battery troubleshooting table can help.
| Problem | Possible Cause | Solution |
|---|---|---|
| Car still won’t start or has no power | Loose terminal connections or a faulty new battery | Double-check that terminal clamps are tight. If they are, the new battery may be a dud; take it back to the store for testing. |
| Radio asks for a code or windows don’t work | The vehicle’s computer lost power and needs to be reset | Check your owner’s manual for the radio security code. For windows, you often need to run each one fully down and then fully up to reset them. |
| Battery warning light is still on | The issue may be with the alternator, not the battery | If the battery is new and connections are clean and tight, the alternator may not be charging the battery. This requires a professional diagnosis. |
Finally, handle the old battery responsibly. The U.S. Environmental Protection Agency (EPA) classifies lead-acid batteries as hazardous waste, but they are highly recyclable. Nearly all auto parts stores will accept your old battery and often provide a core charge refund. To maximize your new battery’s life, follow these simple tips:
- Avoid frequent short trips that don’t give the alternator enough time to recharge the battery.
- Keep the terminals clean and free of corrosion.
- Periodically check that the hold-down clamp is tight.