
When Subaru introduced the factory swing in place roof rail system on the fourth generation Outback in 2010, it permanently changed how everyday wagons handle weekend cargo. Yet transitioning from paved highways to corrugated backcountry trails requires a strict understanding of dynamic load limits and structural mounting mechanics before choosing a Subaru Outback roof rack for serious trail duty.
Understanding Subaru Outback Roof Rack Weight Limits and Compatibility
Every overland build starts with engineering math rather than catalog shopping. Before strapping fuel cans or recovery boards above your head, you need to identify which roof architecture your wagon left the factory with and what the underlying sheet metal can safely support.
Factory Stowable Crossbars vs Raised Wilderness Rails
Most standard trims feature integrated side rails with composite crossbars that pivot outward and lock into fixed slots. While brilliant for carrying kayaks or ski boxes on the interstate, these swing out bars prioritize aerodynamic quietness over heavy trail rigidity. As we noted in our trail comparison between the Mazda CX-50 and Subaru Outback, balancing daily highway comfort with backcountry cargo capability requires paying close attention to roof assembly design.
To prevent roof panel deformation, the official Outback roof rack weight limit varies noticeably across model years and hardware configurations. On models such as the 2017 generation, Subaru caps the total combined load for cargo, racks, and attachments at 176 lbs (80 kg). However, if you use genuine Subaru accessory crossbars, that ceiling drops to 150 lbs (67.5 kg) due to composite bar flex and clamp tolerances. Stepping up to the Outback Wilderness replaces the stowable mechanism entirely with fixed raised roof rails bolted into reinforced internal roof brackets, pushing the dynamic highway rating to 220 lbs (100 kg).
Calculating Dynamic and Off-Road Load Reductions
Static load measures what a parked vehicle can hold in camp, whereas dynamic load measures what the roof structure endures while moving at speed, braking hard, and cornering. Once your tires leave smooth asphalt for washboard gravel and rocky steps, vertical suspension rebound multiplies the downward force exerted by your gear.
Aftermarket engineering standards, including technical documentation from Rhino-Rack, mandate applying a 1.5 safety divisor for unpaved trail driving. An aftermarket pad and clamp kit rated for 132 lbs (60 kg) on paved highways must be derated to 88 lbs (40 kg) off the pavement. That 88 lb allowance includes the weight of the crossbars and trays themselves, leaving a modest margin for actual cargo.
The Rooftop Tent Question and Warranty Realities
Walk through any overland expo and you will spot standard Outbacks topped with heavy hard shell tents, yet reading the fine print reveals a costly catch. Standard Outback owner manuals explicitly warn against installing rooftop tents on integrated swing out rails. Concentrating two sleeping adults and a 130 lb tent assembly onto non-reinforced mounting points risks structural damage to the A, B, and C pillars and can void body warranty claims.
Only the Wilderness trim and select fixed rail configurations are explicitly engineered by the factory for high static camping loads, rated up to 700 lbs when parked. Before purchasing any hardware, open your owner manual and verify the exact stamping for your model year so your total setup stays safely within structural tolerances.
| Rack Configuration | Paved Highway Limit | Off-Road Trail Limit (1.5 Safety Factor) | Primary Structural Constraint |
|---|---|---|---|
| 2017 Factory Roof Total Combined | 176 lbs (80 kg) | 117 lbs (53 kg) | Roof rail mounting studs and sheet metal |
| Genuine Subaru Accessory Crossbars | 150 lbs (67.5 kg) | 100 lbs (45 kg) | Composite crossbar flex and clamp grip |
| Aftermarket Pad and Clamp Kit (e.g., Rhino-Rack) | 132 lbs (60 kg) | 88 lbs (40 kg) | Fixed point shear load under rebound |
| Outback Wilderness Fixed Raised Rails | 220 lbs (100 kg) | 146 lbs (66 kg) | Reinforced internal roof tie-down brackets |
Choosing Between Clamp-On Crossbars and Full-Length Expedition Racks
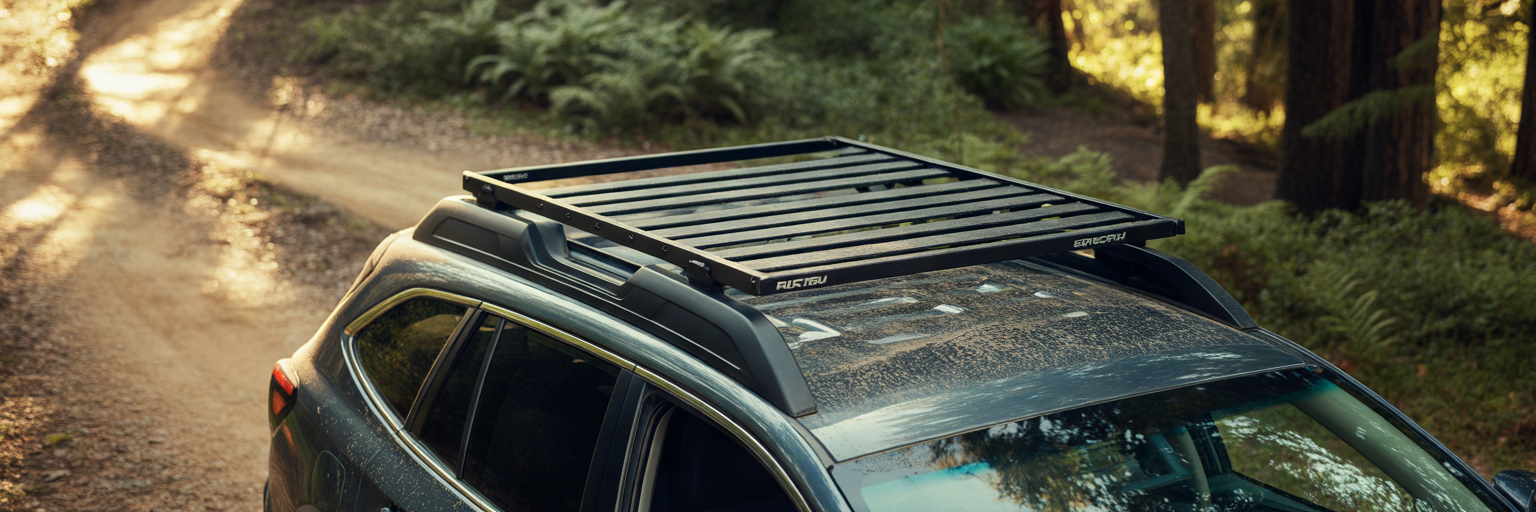
Once you know how much weight your roof can handle, the next decision comes down to mechanical architecture. Aftermarket solutions fall into two distinct camps: heavy-duty clamp-on bars from brands like Thule, Yakima, and Rhino-Rack that grip your existing side rails, or full-length modular aluminum platform racks from overland fabricators like Prinsu and Sherpa.
Aerodynamics, Wind Noise, and Fuel Economy Trade-Offs
Because most Outbacks spend Monday through Friday commuting on paved roads, everyday livability matters just as much as trail toughness. Upgrading to rigid aftermarket Subaru Outback crossbars with wing-shaped profiles keeps wind roar to a whisper and preserves highway fuel economy when you travel unloaded. As we highlighted in our guide to versatile family road trip vehicles, keeping cabin noise low and fuel stops infrequent makes long interstate stretches far more enjoyable.
Full-length expedition racks and deep tubular cargo baskets trade that sleek airflow for raw utility. Pushing an aluminum perimeter frame and ten crossbars through the wind creates noticeable aerodynamic drag, typically shaving 1.5 to 3 MPG off your highway average. Without a carefully adjusted front wind fairing sitting flush against the upper windshield glass, full-length platforms can also generate harmonic wind whistle above 60 mph.
Modular T-Slot Mounting Versatility for Trail Gear
Where full-length extruded aluminum racks earn their keep is modular organization on technical trails. Traditional two-bar setups restrict you to two fixed span points, which works fine for a plastic cargo box or kayak cradle but struggles with odd-sized overland tools.
An extruded platform spans the entire length of the roof, offering dozens of continuous T-slot channels from the sunroof to the rear hatch. You can bolt traction recovery boards flat on the driver side, mount RotopaX water containers in the center, hang a pull-out camp awning off the passenger side rail, and wire an LED light bar into the front cutout without running out of real estate.
Non-Invasive Clamps vs Permanent Rail Replacement
Your mechanical comfort level will likely make the final call between these two architectures. Clamp-on crossbars require zero interior disassembly and can be bolted onto raised rails or factory landing pads in twenty minutes, then removed just as quickly when winter ends.
Installing a full-length expedition rack on a standard Outback is a semi-permanent commitment. Because the factory plastic side rails cannot support a heavy aluminum platform, you have to drop the interior headliner, unbolt the factory rails from the inside, and bolt the new rack feet directly through the roof skin. If you tackle gnarly forest service roads every month, the full-length platform is worth the labor. If you camp four weekends a year on graded dirt, heavy-duty clamp-on crossbars are the smarter buy.
| Evaluation Factor | Clamp-On Aftermarket Crossbars | Full-Length Extruded Platform Rack |
|---|---|---|
| Installation Complexity | Reversible exterior clamp attachment in under 45 minutes | Requires interior headliner drop and factory rail removal |
| Highway Fuel Penalty | Minimal loss of 0.5 to 1 MPG when unloaded | Noticeable loss of 1.5 to 3 MPG due to frontal area |
| Gear Mounting Options | Limited to two fixed span points for boxes or carriers | Continuous T-slot channels for recovery gear and awnings |
| Roof Load Distribution | Concentrates weight on four clamp contact patches | Spreads load across all factory internal mounting studs |
Tools, Hardware, and Safety Prep Before Starting Your Installation
Working overhead on a vehicle roof rewards patience and punishes rushing. Dropping a steel ratchet onto your glass sunroof or tearing a weatherproof seal will ruin an afternoon project, so staging your workspace properly before turning a single bolt is mandatory.
Disconnecting the Battery and Protecting Curtain Airbags
If your installation involves dropping the interior headliner to remove the factory roof rails, your very first step happens under the hood. Use a 10mm wrench to disconnect the negative terminal of the 12-volt battery, wrap the terminal end in a shop towel so it cannot spring back against the post, and wait at least ten minutes before touching any interior trim.
This waiting period allows the supplemental restraint system capacitors to discharge completely. The Subaru Outback houses high-pressure side curtain airbag inflator canisters and sensitive yellow wiring harnesses directly along the inner roofline behind the A, B, and C pillars. Prying near those sensors or bumping the metal canisters with a socket extension while the electrical system is live can trigger permanent dashboard fault codes or an accidental deployment.
Weatherproofing Sealants and Workspace Preparation
Whenever you unbolt factory roof rails on a 2015 through 2025 Outback, you expose bare sheet metal holes that plunge straight into the cabin. Keeping rainwater out of your headliner requires dedicated weatherproofing consumables: a fresh tube of automotive-grade black RTV silicone sealant, rubber hole plugs for unused factory alignment holes, and medium-strength blue threadlocker to keep vibration from backing out your new stainless steel fasteners.
Clear out your garage or driveway so you can open all four doors wide. Drape thick moving blankets over the windshield and side windows to protect the paint and glass while you test fit heavy aluminum assemblies, and recruit a second person to help lift the completed rack frame onto the roof. Gather these essential tools and supplies before starting:
- Metric sockets in 8mm, 10mm, 12mm, and 14mm sizes with a 6-inch ratchet extension
- Calibrated inch-pound and foot-pound torque wrenches for precise clamping force
- Non-marring nylon panel pry tools for releasing interior pillar clips cleanly
- Torx bit drivers in T20 and T30 sizes, plus hex Allen keys supplied with your rack
- Isopropyl rubbing alcohol and clean microfiber towels for degreasing roof channels
- Magnetic parts trays to keep factory flange nuts and trim screws organized by pillar
- Two sturdy folding step stools so you and your helper can reach the roof center comfortably
Step-by-Step Guide to Installing Rail-Mounted Crossbars
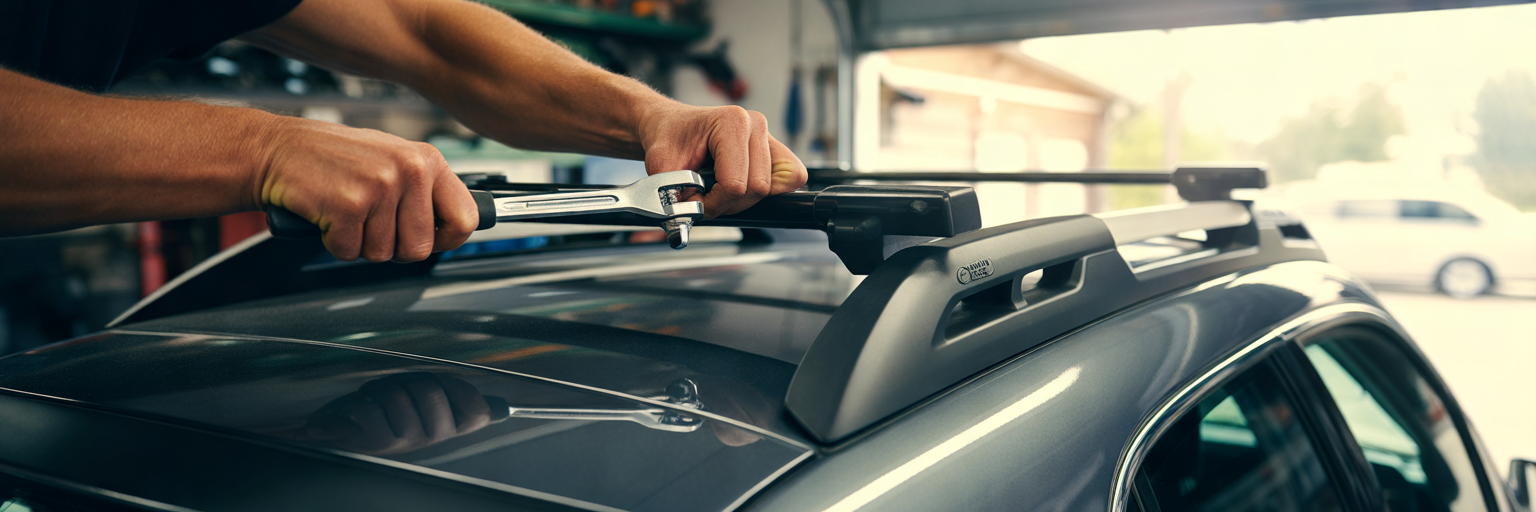
If you own an Outback Wilderness, an older generation wagon with raised side rails, or a standard trim using fixed landing pad towers, you can install Subaru Outback roof rack crossbars without touching a single piece of interior upholstery. The entire process takes less than forty-five minutes when you follow a methodical sequence.
Prepping the Factory Rails and Positioning the Towers
Start by washing the roofline and wiping down the factory rail surfaces and rubber mounting pads with isopropyl alcohol on a microfiber towel. Fine trail dust trapped underneath a rubber tower pad acts like sandpaper under vibration, slowly grinding through your clear coat and reducing clamp friction. If your Outback uses factory swing-in-place bars that you are replacing with fixed landing pad towers, flip the factory bars into their stowed position inside the side rails so they lock completely flat.
Older generation Outbacks with open raised rails, which frequently show up in our roundup of affordable used off-road SUVs, use wrap-around strap or jaw clamps. Lift the front and rear crossbar assemblies onto the rails gently. Set your front-to-back crossbar spread according to the mounting brackets on your cargo box or recovery gear, typically aiming for 28 to 36 inches between bar centers. Also verify that the front crossbar sits just behind the leading opening of the sunroof to prevent turbulent wind thrum inside the cabin.
Measuring Overhang and Torquing Hardware Evenly
With the towers sitting loosely in position, grab a tape measure to center the crossbars laterally across the roof. Measure the bar overhang from the outside edge of the mounting tower base out to the plastic bar end cap on the driver side, then check the exact same measurement on the passenger side. Slide the bar left or right until both sides match to the millimeter.
Never tighten one side completely before starting the other. Tightening a single tower all the way down tilts the crossbar geometry and puts uneven bending stress on composite rail casings. Instead, snug the bolts down in an alternating left-to-right pattern, making three passes across the car. Finish with a calibrated torque wrench set to your rack manufacturer specification, which usually falls between 4 and 6 Nm (35 to 50 inch-pounds). Close out the job with the classic mechanic shake test: grab each crossbar with both hands and rock the car vigorously on its suspension. If the entire wagon rocks with zero clicking or shifting at the clamps, your bars are trail ready.
How to Install a Full-Length Off-Road Roof Rack Requiring Headliner Removal
Tackling a full-length off-road roof rack installation on a 2015 to 2025 Outback looks intimidating because the factory roof rail bolts are hidden inside the cabin roof. By dropping just the outer edges of the headliner rather than pulling the whole board out of the car, you can access every nut safely without creasing the fabric.
Removing Interior Pillar Trims, Visors, and Grab Handles
After verifying your battery negative cable has been disconnected for ten minutes, move inside the cabin with your nylon pry tools. Start at the front by popping open the small plastic screw covers on the sun visors and unclipping the visor hooks. If your Outback is equipped with the overhead EyeSight camera housing, carefully pry down the overhead console trim panel and unplug the electrical harness, taking extreme care never to touch or smudge the recessed camera lenses.
Next, fold down the four overhead passenger grab handles and use a flathead pick or nylon wedge to release the metal retention clips holding them into the roof frame. Move along the upper A-pillar, B-pillar, and C-pillar plastic covers. Use your nylon pry tool to pop open the rectangular SRS airbag tether caps, then release the upper multi-stage retention clips just enough so the top edges of the pillar plastics pull away from the headliner by two inches. You do not need to remove the seatbelts or pull the lower pillar panels completely off the floor.
Dropping the Headliner and Unbolting Factory Roof Rails
Pull the rubber door weatherstripping lip down and away from the roofline around all four door openings and the rear hatch edge. Gently pull one side of the molded headliner down about three to four inches, letting the center rest safely on top of the front and rear headrests so the fiberglass backing board does not fold in half. For a clear visual walkthrough of navigating around the side curtain airbag canisters and wiring harnesses on 2015 to 2025 models, watch the detailed Sherpa Olympus rack installation guide on YouTube before sliding your wrench into the roof cavity.
Peering into the gap between the headliner and the steel roof skin, you will spot a row of silver 10mm or 12mm factory flange nuts securing the exterior roof rail studs. Slip your socket wrench in carefully above the silver curtain airbag tube and remove all ten nuts along both sides, placing them into your magnetic tray so none roll down inside the bodywork.
Sealing the Roof Studs and Mounting the Extruded Platform
Once the interior nuts are free, step up on your folding stools outside the vehicle to complete the exterior weatherproofing and assembly phase:
- Lift both factory roof assemblies straight up off the roof skin and set them aside, taking care not to scratch the rear spoiler.
- Scrub the exposed roof ditch channels thoroughly with isopropyl alcohol to remove years of trapped mud, pine needles, and wax buildup.
- Press the supplied rubber weatherproofing plugs firmly into the unused factory alignment holes until the flanges sit completely flat against the sheet metal.
- Pump a generous, continuous ring of black RTV silicone sealant around the base of each active mounting hole and inside the bottom recess of the aluminum spacer blocks.
- Position the new rack mounting feet over the sealed holes while your helper reaches above the headliner inside the cabin to thread the flange nuts and oversized backing washers onto the studs, torquing them snug so the silicone squeezes out evenly around the base.
- Assemble the two full-length aluminum side plates and extruded crossbars on a blanket on the ground using blue threadlocker, hoist the completed platform onto the roof feet with your helper, and torque the mounting bolts to spec.
Before reconnecting your battery, tuck the headliner edges back above the pillar tabs, snap the A, B, and C pillar clips shut, reinstall the grab handles and visors, and run your fingers along the rubber door weatherstripping to pull the outer lip seal cleanly over the plastic trim edges.
Best Practices for Securing Off-Road Gear and Distributing Load
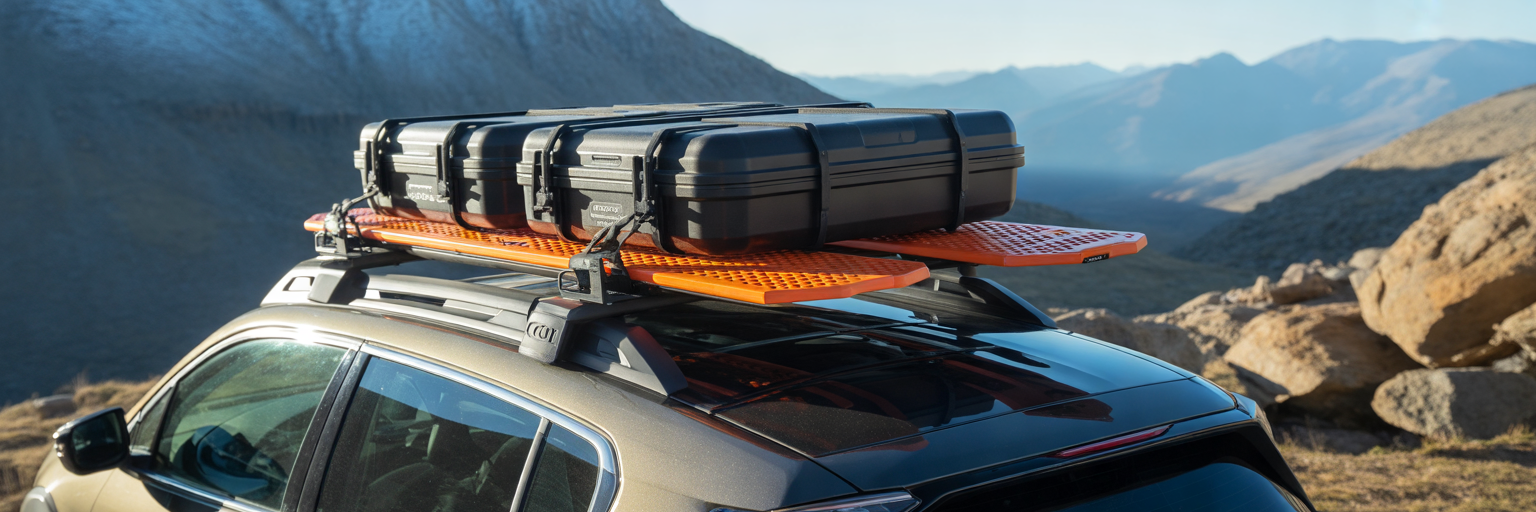
Bolting an industrial-grade rack to your roof is only half the equation. How you pack and lash down your overland equipment dictates whether your Outback feels planted on cambered dirt roads or wallows unpredictably through every corner.
Managing Center of Gravity and Unibody Flex on Trails
Every pound you place sixty inches above the ground raises the vehicle center of gravity and amplifies body roll on off-camber ledges. Always load dense, heavy hardware flat against the floor of the rack, centered directly between the front and rear axles. Items like steel recovery hitches, tool rolls, and extra water belong either low inside the trunk cargo area or bolted flush to the rack deck, while bulky lightweight items like sleeping pads, duffel bags, and camp chairs can sit higher up.
You also have to account for unibody flex when articulating over deep cross-axle ruts. Unlike dedicated body-on-frame trail rigs that we analyzed in our off-road showdown between the Jeep Gladiator and Toyota Tacoma, the Subaru Outback relies on a unitized steel shell that twists slightly to maintain tire contact on uneven ground. Never strap a rigid piece of cargo so that it bridges across the rack onto the hood or rear hatch, and leave a half-inch gap between separate hard cases on the rack so the crossbars can flex microscopically without snapping mounting brackets.
Lashing Hardware, Non-Stretch Straps, and T-Slot Mounts
Leave elastic bungee cords and hardware store ratchet straps in your garage. Bungee cords stretch under repetitive washboard rebound until heavy gear launches off the roof, while high-leverage ratchet mechanisms can easily crush plastic cases or bend aluminum crossbar extrusions if cranked too tight.
Rely exclusively on non-stretch polyester cam buckle straps rated for at least 500 lbs of working load, paired with dedicated T-slot hardware that bolts directly into the crossbar channels:
- Thread stainless steel M8 T-slot eye bolts directly into the crossbar channels right next to your cargo footprint to eliminate long, flapping strap spans.
- Mount traction recovery boards using locking steel quick-release pins bolted across two adjacent bars so they cannot chatter on corrugated gravel.
- Secure RotopaX fuel and water containers using dedicated anodized aluminum base plates and double-handle locking T-mounts.
- Anchor rooftop spare tires with a three-point Y-strap cinched down over a rubber anti-slip friction mat to prevent rotational creep.
- Bolt foam-lined weatherproof gear cases directly through their bottom hulls into the crossbar T-slots using fender washers and rubber sealing gaskets for zero-strap security.
Adjusting Your Driving Style and Maintaining the Rack on Trails
Even a properly loaded roof rack alters the way your Subaru Outback responds to steering, braking, and wind inputs. Adapting your behind-the-wheel habits and sticking to a preventative bolt check routine will keep your hardware tight and your roof leak-free for years.
Handling Crosswinds, Braking Distances, and Driver Fatigue
Expect noticeable top-heaviness during sudden evasive maneuvers and emergency lane changes. On loose mountain gravel or slick mud, that overhead weight transfers forward under deceleration, extending your stopping distances and working the front brakes harder. Increase your following distance by at least two full seconds and brake smoothly in a straight line before turning into switchbacks.
Gusty plains crosswinds pushing against tall rooftop cases also demand constant micro-corrections at the steering wheel. Combining hours of white-knuckle wind compensation on washboard trails with the physical strain of hoisting heavy boxes sixty inches overhead at camp adds up quickly, which is why exploring passive recovery tools for better energy and less fatigue can help overland drivers stay sharp and alert for the next morning’s trail stage.
Bolt Torque Schedules, Car Wash Warnings, and Seal Care
New metal brackets, rubber pads, and nylon locknuts compress slightly during their first heat and vibration cycles. Take a torque wrench on your first trip and re-check every exterior crossbar fastener and mounting foot bolt after the initial 50 miles of driving. Make it a habit to give every rack bolt a quick quarter-turn check whenever you stop at a trailhead to air your tires back up for highway speeds.
Treat commercial automatic brush car washes as strictly off-limits once you install an aftermarket roof rack. Spinning cloth bristles and heavy overhead rollers routinely snag crossbar overhangs and T-slot accessories, generating enough leverage to rip roof rail studs straight out of the sheet metal. Wash your wagon by hand or use touchless high-pressure spray bays exclusively.
Finally, work a five-minute seasonal roof inspection into your regular upkeep alongside the mechanical routines covered in our guide to keeping your car engine running for years. Check the exterior RTV silicone beads and rubber hole plugs every spring and autumn for UV cracking, feel the upper corners of your interior pillar trims after heavy rainstorms to verify zero moisture intrusion, and spray a dry PTFE lubricant into your T-slot channels so stainless steel bolts never seize inside the aluminum extrusions.