In the used car market, the most significant problems are often invisible to the naked eye. The story of a vehicle is written in its data, and your inspection starts long before you ever see the car in person. These preliminary steps act as a filter, helping you eliminate problematic vehicles from the start and focus only on promising candidates.
Foundational Research Before You See the Car
Before you schedule a viewing, your first task is to become a detective. This initial research phase is where you uncover the vehicle’s documented past, which is often more revealing than its shiny exterior. Think of it as reading a car’s biography before you meet it.
Your investigation should follow a clear process:
- Obtain the Vehicle Identification Number (VIN): This 17-digit code is the car’s unique fingerprint. You can usually find it on the driver’s side dashboard, visible through the windshield, or on the driver’s door jamb. The seller should provide this willingly. If they hesitate, consider it a red flag.
- Run a Vehicle History Report: With the VIN, use a service like CarFax or AutoCheck to pull a report. This document reveals critical information, including accident history, title status (clean, salvage, or rebuilt), odometer readings, and the number of previous owners. A salvage title, for instance, is a major warning sign of severe past damage.
- Check for Open Safety Recalls: As highlighted by sources like Consumer Reports, checking for unresolved recalls is a critical safety measure. You can do this for free on the National Highway Traffic Safety Administration (NHTSA) website using the VIN. Unrepaired recalls can pose serious safety risks.
- Research Common Model-Specific Issues: Every car model has its quirks. Search online forums and consumer sites for the specific make, model, and year you’re considering. For instance, if you’re looking at a Honda, exploring our detailed brand information can reveal common issues to watch for. This research helps you build a targeted list of what to check when buying a car during the physical inspection.
Assessing the Car’s Body and Structure
Once your preliminary research checks out, it is time for the hands-on inspection. Always inspect the car in bright, natural daylight, as shadows and artificial lighting can easily hide imperfections. Your goal here is to find evidence of past accidents or advancing corrosion that the vehicle history report might have missed.
Start with a walk-around, looking at the car from a distance before moving in for a closer look. Check for inconsistencies in paint colour and finish between different body panels. A door or fender that is slightly off-shade suggests it has been repainted, likely due to a repair. Also, examine the gaps between panels. The spaces around the doors, hood, and trunk should be even and consistent. Uneven gaps are a telltale sign of a poor repair job or underlying frame issues.
Next, focus on rust. It is important to distinguish between minor surface rust, which is often treatable, and severe structural rust on the frame or rocker panels. The latter can compromise the vehicle’s integrity and is almost always a deal-breaker. Pay close attention to common rust-prone areas like the wheel wells, under the doors, and around the trunk seals.
Move on to the glass and lights. Inspect the windshield and all windows for any cracks or large chips that could spread. Then, have a friend help you test all exterior lights. This includes the headlights (both high and low beams), taillights, brake lights, and turn signals. A non-functional light could be a simple bulb replacement or a symptom of a deeper electrical problem.
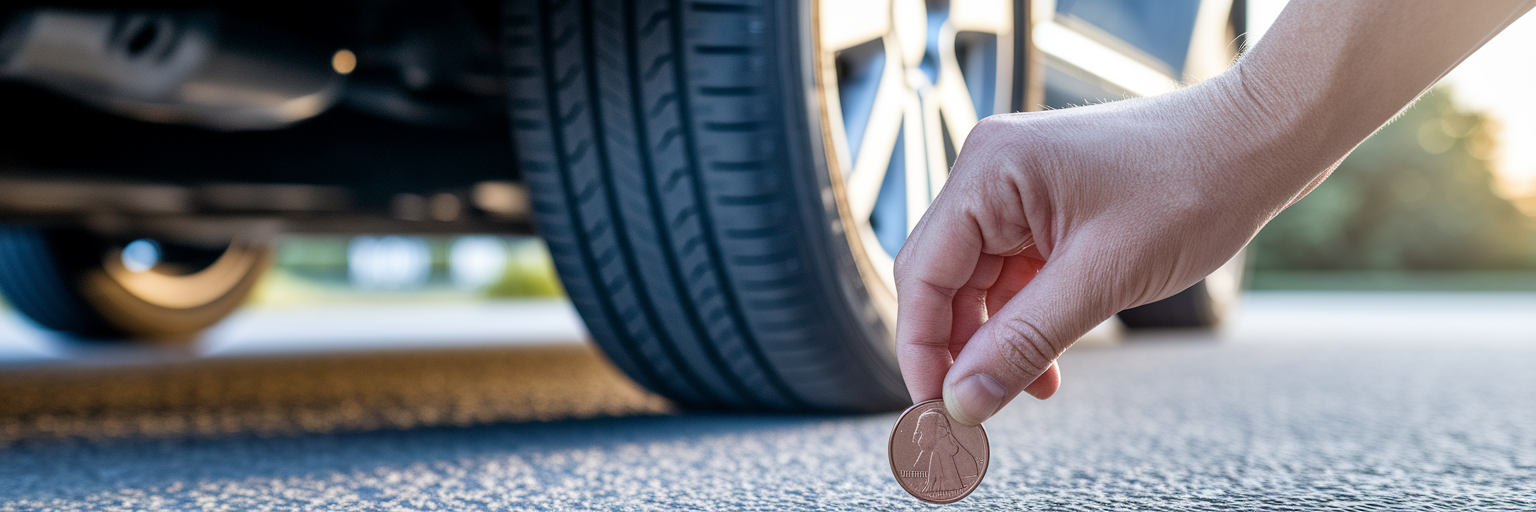
Finally, inspect the tires. Use the “penny test” to check tread depth: insert a penny into the tread with Lincoln’s head upside down. If you can see the top of his head, the tires are worn and need replacing. More importantly, look at how the tires are wearing. Uneven wear can signal bigger problems. Wear on the outer edges suggests alignment issues, while wear down the center points to over-inflation. These patterns can also be symptoms of underlying suspension issues, which might cause other problems like your car squeaking when you drive.
Evaluating the Cabin’s Condition and Functionality
After assessing the exterior, it is time to move inside. The cabin’s condition tells a story about how the previous owner cared for the vehicle. Look past any surface-level dirt and inspect the upholstery for significant rips, burns, or cracks in the seats, dashboard, and headliner. A well-maintained interior often correlates with a well-maintained mechanical history.
Do not underestimate the “smell test.” Strong, persistent odours like cigarette smoke or mildew are extremely difficult to remove. A musty smell, in particular, can be a red flag for water damage, which can lead to mould and electrical nightmares. If the car has a heavy air freshener scent, be suspicious of what it might be covering up.
Next, create a systematic used car inspection checklist for all the electronics. Take your time and test everything methodically:
- The infotainment system, including the radio, screen responsiveness, and Bluetooth connectivity.
- All power windows, door locks, and side mirrors.
- Any power seat adjustments.
- The sunroof, checking for smooth opening and closing without any strange noises.
- The horn and all interior lights, including dome lights and vanity mirror lights.
Pay special attention to the climate control system. Turn on the air conditioning to ensure it blows cold and the heater to confirm it blows hot. Listen for any unusual noises from the blower motor and check if any strange smells come from the vents. A weak A/C could mean an expensive compressor replacement is on the horizon.
Finally, turn the key to the “on” position without starting the engine. All the dashboard warning lights should illuminate briefly and then turn off. If any light—especially the Check Engine, ABS, or Airbag light—remains on, it signals an existing problem that requires professional diagnosis. A persistent warning light could be related to various issues, and if you are having trouble getting the vehicle started, it is important to understand why your car will not start.
A Basic Mechanical Health Check
You do not need to be a mechanic to perform some essential under-the-hood checks. This part of the inspection focuses on what you can see and touch with the engine off. For your safety, always make sure the engine is cool before you begin touching any components.
Start by looking for any obvious fluid leaks. Check the ground where the car was parked for any fresh drips or stains. Then, open the hood and look for wetness or a buildup of grime on the engine block, which can indicate a slow leak. A clean engine bay is nice, but a recently steam-cleaned one might be hiding something.
Next, check the essential fluids. This is a critical part of learning how to inspect a used car:
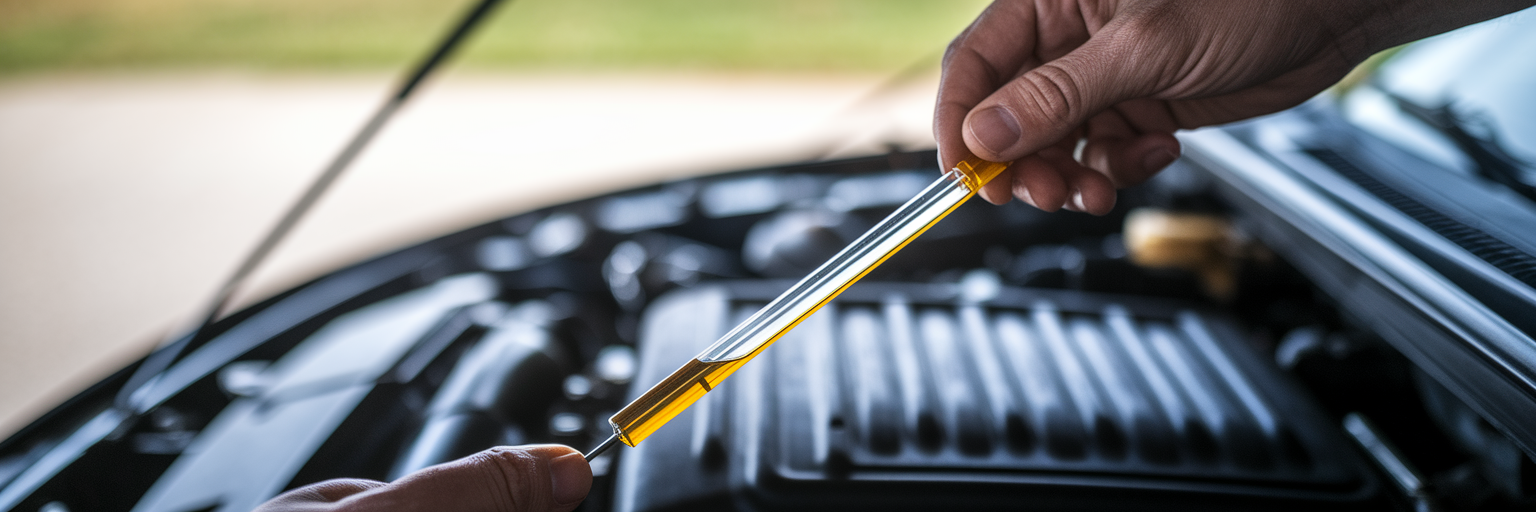
- Engine Oil: Pull out the dipstick, wipe it clean, reinsert it fully, and pull it out again. The oil level should be between the “full” and “add” marks. More importantly, check the oil’s condition. It should be brown or black. If it looks milky or frothy, this could indicate a coolant leak into the engine, a sign of a potentially catastrophic head gasket failure.
- Transmission Fluid: On many cars, this is checked with the engine running and warm. The fluid should be bright red and should not have a burnt smell. Brown or black transmission fluid suggests it is old or the transmission has been running hot.
- Coolant: Check the level in the clear plastic overflow reservoir. The coolant itself should be brightly coloured (usually green, orange, or pink) and free of any rust or oily residue.
After checking the fluids, visually inspect the belts and hoses. The rubber belts should be free of cracks, fraying, or glazing. Squeeze the larger radiator hoses. They should feel firm, not rock-hard, brittle, or mushy. Finally, take a quick look at the battery. Check for corrosion on the terminals, which looks like a white or bluish powder. Look for a date sticker on the battery; if it is more than four or five years old, it is likely nearing the end of its life.
How the Car Performs on the Road
The test drive is where all your research and visual inspections come together. This is your chance to feel how the car performs in motion and listen for problems that are not apparent when it is parked. Before you start, turn the radio off. Your ears are one of your most valuable diagnostic tools.
As you pull away, listen for any unusual noises. Pay attention to clunks or rattles from the suspension when you go over bumps, whining sounds that change with engine speed, or grinding noises from the brakes. These sounds are the car’s way of telling you something is wrong.
Focus on how the car feels. The steering should be responsive and should not pull to one side on a flat road. When you apply the brakes, they should feel firm and bring the car to a smooth stop. A spongy brake pedal or a pulsating sensation could indicate problems with the hydraulic system or warped rotors. The process of test driving a used car is about detecting these subtle but important clues.
Evaluate the engine and transmission performance. The engine should accelerate smoothly without any hesitation or sputtering. The transmission, whether automatic or manual, should shift gears cleanly without any clunking, jerking, or slipping. Test both gentle and firm acceleration to see how the drivetrain responds under different loads. The expected performance can vary; a sports sedan will feel very different from one of the modern trucks we have reviewed designed for heavy-duty work.
Finally, ensure your test drive is comprehensive. A quick trip around the block is not enough. Plan a route that lasts at least 15 to 20 minutes and includes a mix of low-speed city driving, sharp turns, and highway speeds. Some issues, like transmission problems or wheel alignment, only become obvious at higher speeds.
Why a Mechanic’s Opinion Is Worth the Investment
After you have completed your own thorough inspection, there is one final, non-negotiable step: a professional pre purchase car inspection (PPI). Think of this as getting a second opinion from an expert before making a major financial decision. The cost, typically between $100 and $200, is a small price to pay for peace of mind and can save you from thousands of dollars in unexpected repairs.
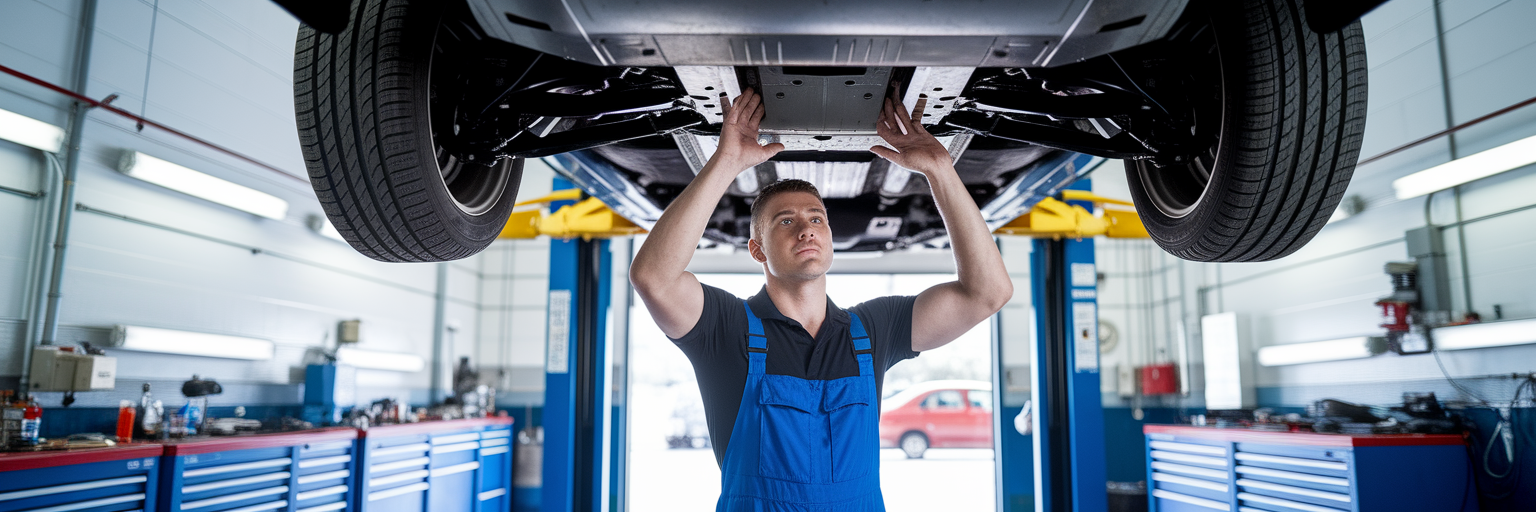
A professional mechanic can do things you simply cannot. They use specialized tools and have the experience to spot issues that are invisible to an untrained eye. The table below illustrates the difference in depth between your inspection and a professional one.
| Inspection Area | Your Visual Inspection (DIY) | Professional PPI |
|---|---|---|
| Frame & Undercarriage | Check for visible rust or obvious damage | Car is placed on a lift for a thorough check of frame integrity, hidden rust, and past collision repairs |
| Engine & Transmission | Check fluid levels/condition, listen for noises | Uses diagnostic scanner to pull trouble codes, checks compression, identifies hidden leaks |
| Brakes & Suspension | Feel for sponginess, listen for squeals | Measures brake pad/rotor life, inspects shocks, struts, and bushings for wear |
| Electrical System | Test buttons, lights, and basic functions | Scans for hidden electrical fault codes, tests battery health and alternator output |
When finding a mechanic, choose an independent shop that specializes in the car’s brand. Crucially, do not use a mechanic suggested by the seller, as this creates a clear conflict of interest. The final PPI report is not just a pass or fail grade; it is a powerful negotiation tool that gives you a clear, expert opinion on the car’s health.
Making an Informed Decision and Finalizing the Deal
With your own inspection notes and the professional PPI report in hand, you are ready to make a final decision. Before you talk numbers, ask the seller a few key questions. Simple inquiries like, “Why are you selling the car?” and “Do you have service records?” can be very revealing. A transparent seller with a folder full of maintenance receipts is always a good sign.
Next, carefully review all the paperwork. The most important document is the vehicle’s title. Confirm the seller’s name is on the title and that there are no outstanding liens from a bank. Check for any branding on the title, such as “salvage,” “rebuilt,” or “flood damage,” which severely impacts the car’s value and safety.
Now you can use your findings to negotiate. If the inspections uncovered issues, present them to the seller calmly and factually. For example, if the PPI indicates the car needs new brakes and tires, you can reasonably ask for a price reduction to cover the cost of those repairs. A fair seller will be open to negotiation based on documented evidence.
Finally, and most importantly, know when to walk away. If the PPI reveals major problems like frame damage or imminent engine failure, or if the seller is uncooperative or dishonest about the car’s history, your best move is to decline the purchase. Avoiding a bad car is a victory in itself. Remember, the right car is out there, and continuing your research on a comprehensive platform like CarPhanatics will help you find it.