A professional brake pad replacement can cost upwards of $300, but the parts themselves often represent less than a third of that bill. This guide closes that gap, showing you how to perform one of your vehicle’s most critical safety tasks yourself.
Gathering Your Tools and Parts
Taking on a brake job is an empowering experience that builds mechanical confidence and saves you a significant amount of money. The feeling of knowing you personally ensured your vehicle’s safety is hard to beat. Before you begin, success depends on having the right equipment ready. A disorganized workspace with missing tools is where simple jobs turn frustrating. This isn’t just about convenience; it’s about doing the job correctly and safely.
The fundamental steps are consistent whether you’re working on a daily commuter or one of the iconic American muscle cars. You will need a specific set of tools for changing brake pads. A torque wrench, for example, is not an optional extra. It is a non-negotiable safety device that ensures critical bolts are tightened to the exact specification, preventing failures down the road. You should also confirm the correct type of brake pads for your vehicle, typically ceramic or semi-metallic, by checking your owner’s manual or consulting an auto parts supplier. While you have the wheels off, it is the perfect time to inspect your brake rotors for deep grooves or warping, as they may need to be resurfaced or replaced.
| Item | Primary Function | Why It’s Essential |
|---|---|---|
| Hydraulic Floor Jack | To lift the vehicle off the ground. | Provides the necessary lift to remove the wheels safely. |
| Jack Stands (Pair) | To securely support the vehicle’s weight. | Crucial for safety; never work under a car supported only by a jack. |
| Lug Wrench | To loosen and tighten wheel lug nuts. | Required to remove and reinstall the wheels. |
| Socket/Ratchet Set | To remove caliper bolts and other fasteners. | The primary tool for disassembling the brake components. |
| C-Clamp or Piston Tool | To retract the brake caliper piston. | Creates space for the new, thicker brake pads. |
| Torque Wrench | To tighten bolts to manufacturer specifications. | Prevents over-tightening or under-tightening critical bolts, ensuring safety. |
| New Brake Pads & Hardware | The replacement friction components. | The core parts for the job; new hardware ensures proper fit and function. |
| Brake Cleaner & Wire Brush | To clean brake components. | Removes rust and grime, ensuring smooth operation and preventing noise. |
Safely Lifting and Securing Your Vehicle
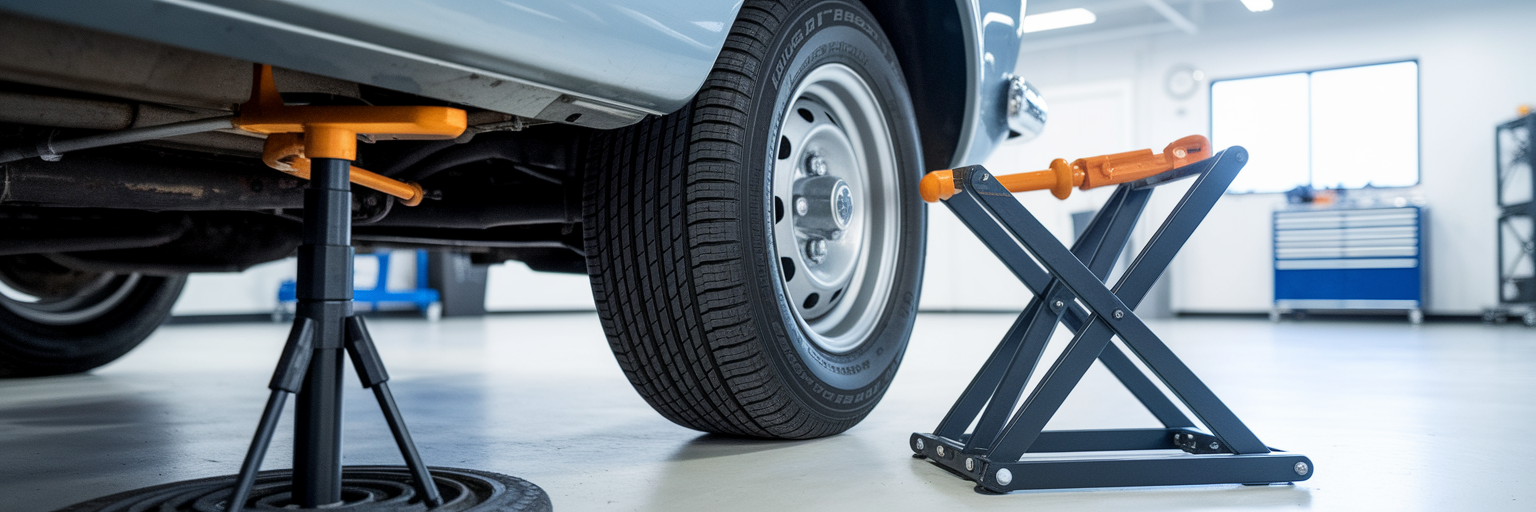
Before any wrench turns, your personal safety is the absolute priority. This phase of the job demands your full attention, as mistakes here can have serious consequences. We stand firm in our belief that jack stands are non-negotiable. Never, under any circumstance, should you place any part of your body under a vehicle supported only by a hydraulic jack, which can fail without warning.
Follow these steps methodically to create a secure work environment:
- Park your vehicle on a hard, level surface like a concrete garage floor or a flat driveway. Avoid asphalt on a hot day, as the weight can cause jack stands to sink.
- Engage the parking brake firmly. For added security, place wheel chocks behind the tires at the opposite end of the car you are lifting.
- While the tire is still on the ground, use your lug wrench to “break loose” the lug nuts. A quarter-turn is enough. This uses the vehicle’s weight to prevent the wheel from spinning freely in the air.
- Consult your owner’s manual to locate the vehicle’s official frame lift points. These are reinforced areas designed to handle the load.
- Position the floor jack under a designated lift point and raise the vehicle. Once it’s high enough, slide a jack stand under a nearby sturdy frame member and slowly lower the car until its weight rests entirely on the stand.
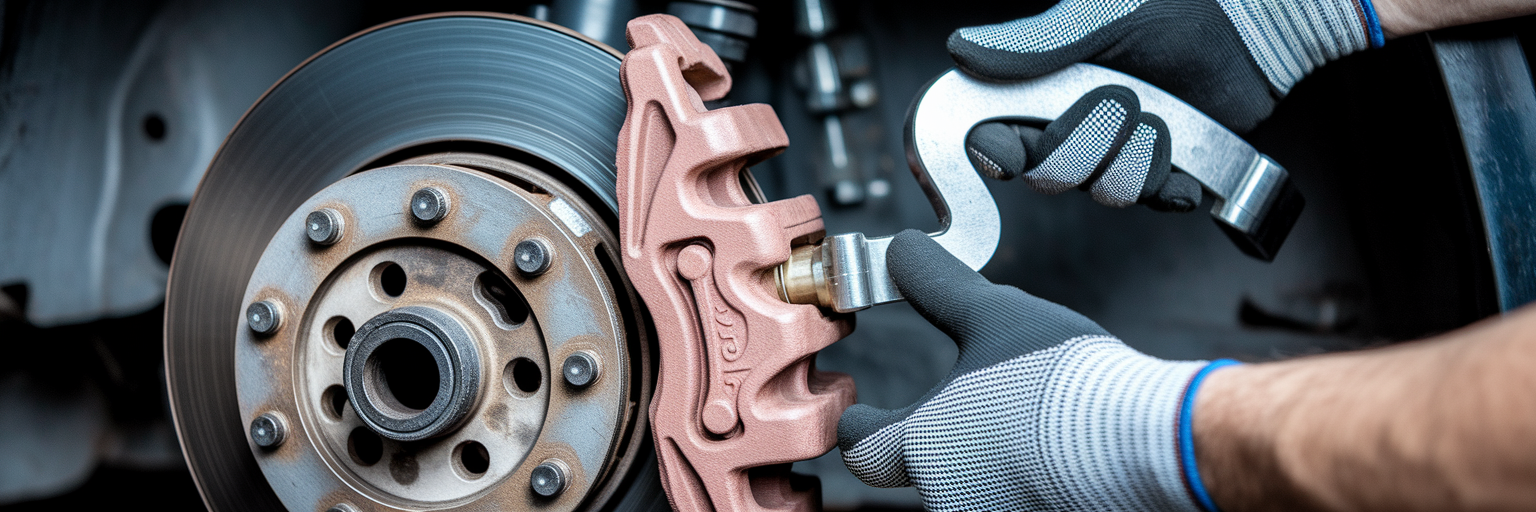
Removing the Wheel and Accessing the Caliper
With the vehicle safely supported, you can begin the disassembly. Finish unscrewing the lug nuts you loosened earlier and set them aside in a safe place, like a magnetic tray or the hubcap, so they don’t roll away. Carefully pull the wheel straight off the hub and slide it under the vehicle’s frame as an extra, albeit last-resort, safety measure.
You are now looking at the brake assembly. Identify the large, disc-like rotor and the clamp-like caliper that fits over it. The caliper is what holds the brake pads. To remove it, you will typically need to locate two slider pins or bolts on its backside. These can be tight from road grime and heat, so you may need a bit of leverage from your ratchet to get them started. These are some of the first brake pad replacement steps.
Here is a critical safety tip: once the caliper is unbolted, never let it hang by its flexible brake hose. The hose is not designed to support the caliper’s weight and can be easily damaged, leading to a dangerous fluid leak and brake failure. Use a bungee cord or a simple piece of wire to suspend the caliper securely from a nearby suspension component, like the coil spring or upper control arm. The general process is consistent across most modern vehicles, including popular trucks like the 2025 Ford F-150.
Replacing Old Pads and Resetting the Piston
This is the heart of the operation. With the caliper out of the way, you can now slide the old, worn brake pads out of the caliper mounting bracket. Take a moment to compare their thickness to the new pads. The difference is often surprising and confirms the job was necessary. Before you can fit the new, thicker pads, you must retract the caliper piston that pushed the old pads against the rotor.
p>There are two common ways to do this. You can use a large C-clamp, placing an old brake pad over the piston to distribute the pressure evenly as you slowly tighten the clamp. Alternatively, a dedicated brake piston tool works even better. As you do this, be gentle and watch that you do not damage the piston’s delicate rubber dust boot. This step is crucial for making space for the new pads, and as detailed in guides from automotive experts at Edmunds, using a C-clamp is a common and effective method for the job.
Here is a pro tip that separates amateurs from experienced mechanics: before you start compressing the piston, go to the engine bay and open the brake fluid reservoir cap. As you push the piston back, brake fluid is forced back up the lines. Opening the cap prevents pressure buildup. Keep an eye on the fluid level to ensure it doesn’t overflow, as brake fluid is corrosive to paint. If the level gets too high, use a turkey baster to siphon a small amount out. This is a key detail in learning how to change car brakes correctly.
Installing New Pads and Reassembling the Caliper
Proper reassembly is just as important as disassembly. This is where you ensure your brake job results in quiet, smooth, and long-lasting performance. Before installing anything new, take your wire brush and a can of brake cleaner and thoroughly clean the caliper bracket. You want to remove all rust and grime from the areas where the new pad’s metal tabs will sit. This ensures the pads can move freely and prevents future squeaking.
Next comes lubrication, and precision is key. Apply a thin layer of high-temperature brake lubricant to the metal backing of the new pads and on the caliper slider pins. This allows for smooth movement and dampens vibration. However, you must never get any lubricant on the pad’s friction material or the rotor surface. Contamination here will severely compromise braking power. Fit the new hardware clips and pads into the bracket, slide the caliper back over them, and reinstall the caliper bolts. Use your torque wrench to tighten these bolts to the manufacturer’s specified value.
While these steps apply to most gasoline vehicles, note that brake systems on electric cars can differ significantly due to regenerative braking, which uses the electric motor to slow the car and recapture energy.
Final Assembly and Bedding in the Brakes

You are on the home stretch. With the brake components reassembled, it is time to get the car ready for the road. Follow these final checks without fail to ensure everything is safe and secure. This is the last phase of your DIY brake pad replacement.
- Re-mount the wheel onto the hub and hand-tighten the lug nuts until they are snug.
- Carefully raise the vehicle slightly with the jack, remove the jack stand, and lower the car completely to the ground.
- With the wheel firmly on the ground, use your torque wrench to tighten the lug nuts to the specified torque. Tighten them in a star pattern to ensure the wheel is seated evenly.
- This is the most important step: Before starting the engine, get in the car and pump the brake pedal several times. It will feel soft at first and then become firm. This action pushes the caliper piston back out against the new pads, restoring brake pressure.
Finally, you need to “bed in” your new brakes. This process mates the new pad material to the rotor surface. In a safe area with no traffic, perform a series of 5 to 6 moderate stops from about 40 mph down to 10 mph. Avoid coming to a complete stop. This generates heat that cures the pads, ensuring smooth, powerful, and quiet braking for thousands of miles to come.
Troubleshooting Common Issues
Even a well-planned job can hit a snag. Knowing how to handle common issues is the mark of a smart home mechanic. If you encounter a problem, don’t panic. Most have straightforward solutions.
- Stuck Rotor: If the rotor is rusted to the hub, spray penetrating oil where it meets the hub. A few firm strikes with a mallet on the backside of the rotor will usually break it free.
- Seized Caliper Bolt: These bolts can be stubborn. A longer ratchet or a breaker bar can provide more leverage. A dose of penetrating oil and some patience can also work wonders.
- Post-Job Noise: A slight noise during the first few miles is normal as the pads bed in. However, if you’re wondering, “Why is my car squeaking when I drive?” persistently, it could point to improper lubrication or a hardware issue.
While this guide on how to replace brake pads is comprehensive, it is vital to recognize your limits. There are clear red flags that mean it is time to stop and call a professional. These include a stripped bolt head, any sign of a brake fluid leak from a hose or fitting, or a brake pedal that feels spongy and soft even after pumping it. A DIY brake job is incredibly rewarding, but your safety is always the top priority.