Recognizing the First Signs of Electrical Trouble
The first cars had simple electrical systems, but a modern vehicle can contain over 100 million lines of code. This complexity means that when something goes wrong, figuring out where to start can feel overwhelming. Before you can learn how to fix car electrical issues, you need to accurately identify the symptoms. Think of this as the diagnostic phase, where you listen to what your car is telling you.
Your car’s electrical system has three main players. The battery is like a water tank, holding the initial charge to get things started. The alternator is the pump, refilling that tank and powering everything once the engine is running. Fuses act as safety valves, protecting sensitive components from power surges. Most common car electrical problems originate with one of these three.
Often, the signs are subtle at first. You might notice your headlights dim slightly when the car is idling at a stoplight, only to brighten again as you accelerate. Other times, the symptoms are impossible to ignore. Pay attention to these specific clues:
- A clicking sound when you turn the key: This often points to a battery that has enough power to engage the starter solenoid but not enough to turn the engine over.
- A slow, sluggish engine crank: The engine struggles to turn over, sounding weak and labored. If this happens, you might wonder why won’t my car start, as the cause could be electrical or mechanical.
- Dashboard warning lights: A battery symbol or a “check engine” light is a direct signal from your car’s computer that something is wrong.
Before reaching for any tools, perform a simple visual inspection. Look for frayed wires, loose connections, or the tell-tale greenish-white powder of corrosion on the battery terminals. Sometimes, the fix is as simple as tightening a loose clamp.
Your Essential Toolkit for Electrical Repairs
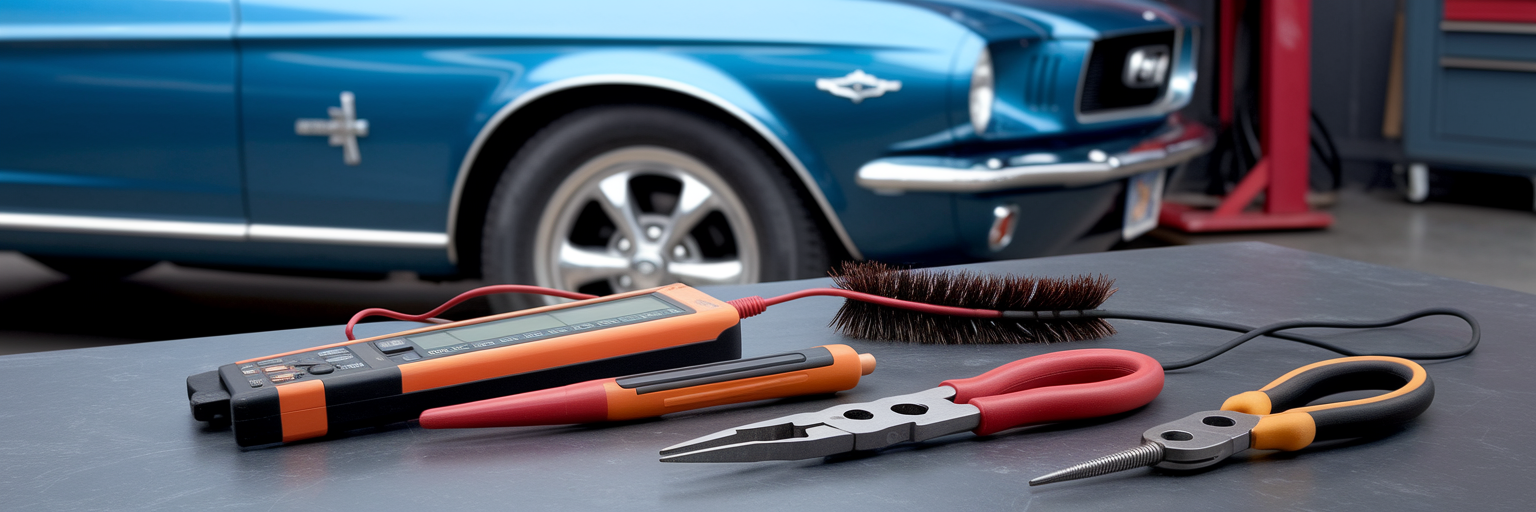
Having the right equipment is the difference between a frustrating afternoon and a successful repair. Assembling a basic set of DIY car electrical repair tools is an investment in self-sufficiency, turning a potential tow truck call into a manageable task. You don’t need a professional mechanic’s entire chest, just a few key items to handle the most frequent issues.
The single most important diagnostic tool you can own is a digital multimeter. It’s the key to taking the guesswork out of electrical troubleshooting, allowing you to measure voltage and confirm whether a component is working correctly. Without it, you are essentially flying blind.
Equally important is your safety gear. We believe that safety is non-negotiable. Insulated gloves and safety glasses protect you from the very real risks of electrical sparks and battery acid. A small splash of corrosive fluid can cause serious injury, so this is not the place to cut corners. While the tools needed are fairly universal, some vehicles present unique challenges. For example, the battery placement and heavy-duty components on many of our trucks may require additional extensions or specialized wrenches compared to a compact sedan.
| Tool | Primary Function | Why It’s Essential |
|---|---|---|
| Digital Multimeter | Measures voltage, resistance, and continuity | Allows you to test components and find faults without guessing. |
| Insulated Screwdrivers & Pliers | Handling wires and fasteners | Protects you from accidental electrical shock. |
| Wire Stripper/Crimper | Cutting, stripping, and connecting wires | Ensures clean, secure connections for any wiring repairs. |
| Socket Set | Removing and tightening nuts and bolts | Needed for disconnecting battery terminals and hold-down brackets. |
| Battery Terminal Cleaner | Scrubbing corrosion from battery posts | A common and simple fix for starting problems requires this specific tool. |
Finally, a few small items like a dedicated battery terminal brush and a fuse puller can prevent major headaches. These inexpensive tools make simple jobs much easier and safer to perform.
Testing and Servicing Your Car Battery
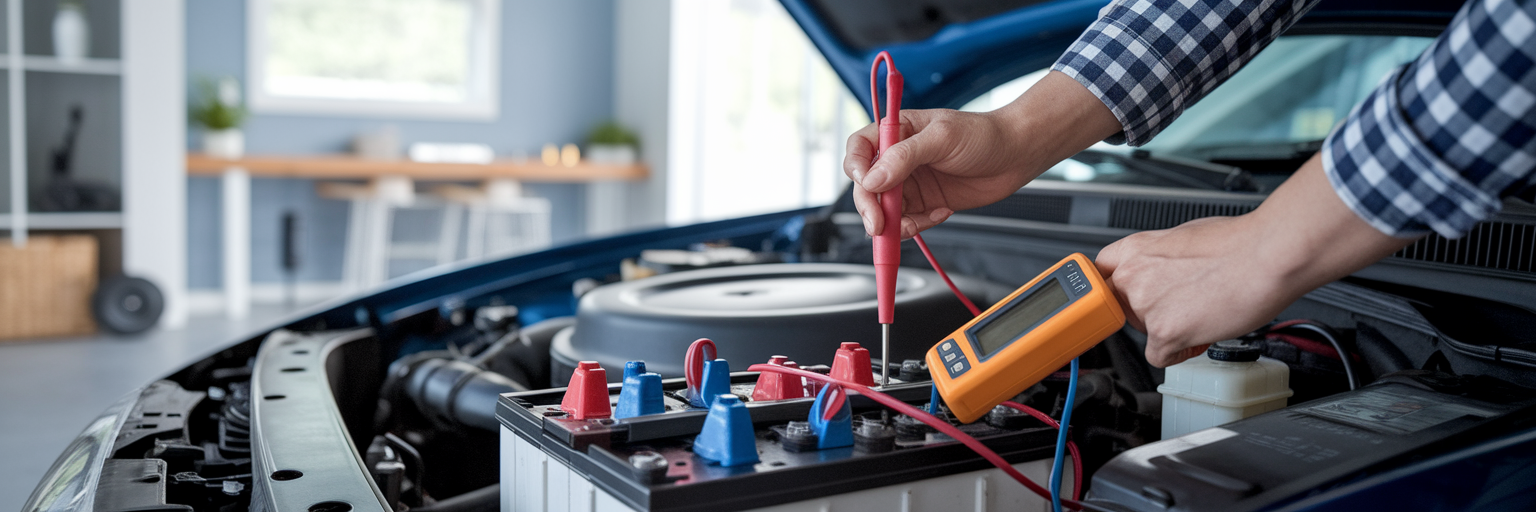
With your tools ready, the battery is the best place to start your hands-on diagnosis. It is the heart of your car’s starting system, and its health is simple to verify. Performing a car battery testing at home is a straightforward process that provides immediate, clear results.
How to Test Battery Voltage
A basic voltage test tells you the battery’s state of charge. A healthy, fully charged car battery should read around 12.6 volts or slightly higher when the engine is off. A reading of 12.2 volts indicates a 50% charge, and anything below 12 volts suggests the battery is significantly discharged and may need charging or replacement.
- Set your digital multimeter to the 20V setting in the DC volts section (VΑ).
- Touch the red probe firmly to the positive (+) battery terminal.
- Touch the black probe firmly to the negative (-) terminal.
- Read the voltage displayed on the multimeter screen.
Performing a Simple Load Test
A voltage test shows the charge, but a load test reveals the battery’s ability to deliver power under pressure. Have a helper turn the key to start the engine while you watch the multimeter. The voltage should not drop below 9.6 volts during the crank. If it does, the battery is likely failing and can no longer hold a sufficient load to start the car reliably.
Cleaning Corroded Terminals
That crusty white or greenish powder on your battery terminals is corrosion, and it acts as an insulator, blocking the flow of electricity. Cleaning it is often all that’s needed to fix a no-start condition. Always prioritize safety when working with a battery.
- Disconnect the negative (-) terminal first. This prevents accidental short circuits if your wrench touches a metal part of the car.
- Disconnect the positive (+) terminal.
- Use a paste of baking soda and water with a wire brush to scrub the terminals and clamps clean.
- Rinse the terminals with a small amount of clean water, dry them thoroughly, and reconnect the positive (+) terminal first, followed by the negative (-).
If testing confirms your battery is bad, replacing it is a manageable DIY job. Just ensure the new battery matches the specifications for your vehicle. For example, the power requirements for a modern truck like the 2025 Ford F-150, with its advanced electronics, are very different from those of a small sedan.
How to Diagnose a Faulty Alternator
If your battery checks out but your car still has electrical issues, the alternator is the next logical suspect. While the battery provides the initial power to start the engine, the alternator takes over once the car is running. It generates the electricity needed to power your lights, radio, and other accessories while also recharging the battery. Think of it this way: if the battery is a water bottle, the alternator is the faucet that keeps it full.
You can use your multimeter to diagnose a faulty car alternator. With the engine running, connect the multimeter probes to the battery terminals just as you did before. A healthy alternator should produce a charge between 13.7 and 14.7 volts. A reading below this range suggests the alternator is not generating enough power to sustain the system and recharge the battery. A reading above this range could indicate a faulty voltage regulator, which can overcharge and damage your battery.
Beyond the multimeter test, other symptoms can point to a failing alternator:
- Headlights that brighten when you rev the engine: This indicates the alternator is struggling to produce consistent power at idle.
- A persistent battery warning light: If the battery light stays on while you are driving, it’s a direct warning that the charging system is failing.
- A growling or whining noise: A failing alternator often makes a distinct mechanical noise due to worn bearings. If you are unsure about the sound, it helps to understand why is my car squeaking when I drive, as other components can produce similar noises.
It is important to remember that a deeply discharged battery can sometimes put such a heavy load on the alternator that it mimics the symptoms of failure. This is why you should always test the battery first. A proper diagnosis prevents you from replacing a perfectly good alternator when the real problem was a weak battery all along.
Quick Fixes for Fuses and Malfunctioning Lights
Not all electrical problems are complex. Sometimes, the solution is a simple, five-minute fix that can restore functionality and build your confidence. Fuses and bulbs are the most common and easily corrected electrical failures in any vehicle. Fuses are the sacrificial protectors of your electrical system. They are designed to blow and break the circuit if a power surge occurs, protecting more expensive components like computers and motors.
Following a basic car fuse replacement guide is simple. Most cars have two fuse boxes: one in the engine bay and another inside the cabin, often near the driver’s side footwell. Your owner’s manual will show you their exact locations.
- Locate the correct fuse box and remove the cover.
- Use the diagram on the inside of the cover to identify the fuse for the malfunctioning component.
- Use a fuse puller or a pair of needle-nose pliers to gently remove the fuse.
- Visually inspect the thin metal strip inside the plastic housing. If the strip is broken or melted, the fuse is blown.
- Replace it with a new fuse of the exact same amperage rating. Using a higher-rated fuse is a serious fire hazard, as it allows too much current through the circuit, which can melt wires.
When a light goes out, many people assume there is a complex wiring issue. However, the diagnostic order should always be to check the simplest things first. The bulb itself is the most common point of failure. If a new bulb does not solve the problem, the next step is to check the corresponding fuse. Only after confirming both the bulb and fuse are good should you begin to suspect a wiring or socket issue. For more tips on keeping your vehicle in top shape, from simple fixes to the latest industry news, CarPhanatics is a valuable resource for any enthusiast.
Knowing When to Call a Professional
While tackling your own repairs is empowering, knowing your limits is just as important. Some jobs are best left to certified technicians who have the specialized tools and experience to handle complex systems without causing further damage. Our experience shows that while battery and fuse replacements are excellent DIY projects, other tasks carry a higher risk.
You should consider calling a professional for these specific issues:
- Diagnosing intermittent wiring faults: Tracing a short in a complex wiring harness requires specialized scanners and extensive knowledge.
- Replacing starters on modern engines: With cramped engine bays, a starter replacement can involve removing multiple other components just to access it.
- Any work involving the ECU or control modules: Your car’s main computers are sensitive and expensive. A mistake here can be costly.
The reason for this advice is simple: professionals can avoid causing thousands of dollars in damage to sensitive electronics. They have access to vehicle-specific diagrams and diagnostic equipment that are not feasible for most home mechanics to own. The most responsible way to approach how to fix car electrical issues is to be honest about what you can handle.
We strongly recommend that any serious DIYer purchase a service manual for their specific vehicle. For factory-level repair information, services like ALLDATA DIY offer single-vehicle access to the same official diagrams and procedures that dealership technicians use. This is the ultimate guide to help you make an informed decision on what to tackle yourself and when to pick up the phone.