The confidence to work on your own vehicle starts with preparation. A successful DIY brake pad replacement is built not on speed, but on a foundation of safety and having the right equipment ready before a single bolt is turned. This isn’t just about efficiency; it’s about ensuring your personal safety from start to finish.
Gathering Your Tools and Ensuring a Safe Workspace
Before you even think about lifting the car, a thorough inventory of your equipment is the first step. The right tools for brake pad change make the job smoother, while the right safety gear makes it possible to do it again. Think of it like a chef’s mise en place; everything has its purpose and place.
Essential Tools
- Hydraulic Floor Jack & Jack Stands: The jack lifts the vehicle, but the stands are what safely support its weight. They are not interchangeable.
- Lug Wrench: To remove the wheel’s lug nuts.
- Socket/Ratchet Set: You will need this for removing the caliper bolts. Bolt sizes vary, so a set is essential.
- C-Clamp or Brake Caliper Piston Tool: Used to retract the caliper piston to make room for the thicker new pads.
- Wire Brush & Brake Cleaner: For cleaning rust and grime from the caliper assembly, ensuring a clean fit for new parts.
Safety Equipment
- Safety Glasses: Brake dust and cleaning solvents are irritants you do not want in your eyes. This is non-negotiable.
- Mechanic’s Gloves: Protects your hands from dirt, grease, and sharp metal edges.
- Wheel Chocks: These prevent the vehicle from rolling while you work.
Equally important is sourcing the correct brake pads and hardware for your specific vehicle. Using your car’s Vehicle Identification Number (VIN), make, and model at a local auto parts store or online retailer will confirm you have the right components. Finding the right parts for a popular brand like Ford is usually straightforward with this information. Finally, choose your workspace wisely. You need a flat, solid surface like a concrete garage floor or driveway, never soft ground or an incline. Engage the parking brake and place wheel chocks behind the wheels that will remain on the ground.
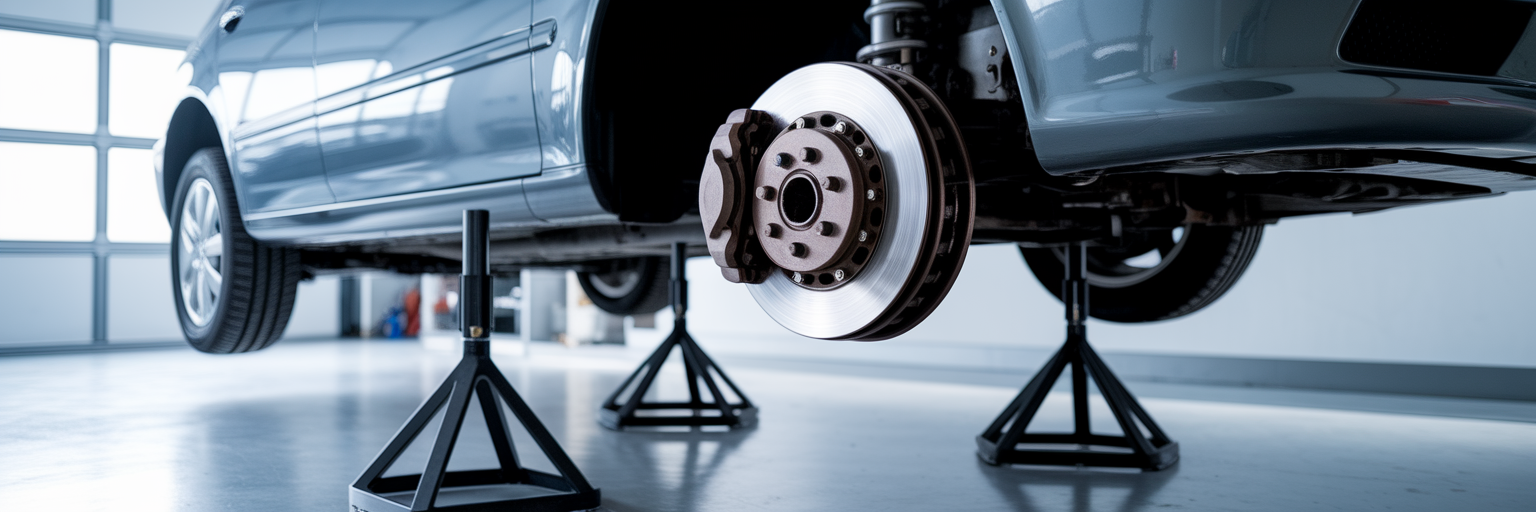
Lifting the Vehicle and Accessing the Brake Assembly
With your workspace prepared, the next phase is getting the vehicle safely in the air. Here’s a counterintuitive tip many beginners miss: loosen the lug nuts slightly while the car is still on the ground. The vehicle’s weight prevents the wheel from spinning, giving you the leverage you need without a struggle. Just crack them loose; do not remove them yet.
Next, consult your owner’s manual to locate the factory-designated lift points. These are reinforced areas on the vehicle’s frame designed to handle the load. As automotive experts at Edmunds stress, using these specific points is critical for stability. Place your floor jack under the lift point and raise the vehicle until the wheel is a few inches off the ground.
This is the most critical moment of the entire process. Immediately slide a jack stand into place next to the jack, positioning it under a solid frame rail or the designated support point. Slowly lower the jack until the vehicle’s weight rests entirely on the jack stand. We believe in this simple rule: a jack lifts, but a jack stand holds. Never work under a car supported only by a hydraulic jack. This is the core principle of any safe brake replacement guide. Heavier vehicles, like the ones in our guides for trucks, may require heavy-duty equipment and have different support points. Once the vehicle is secure, you can fully remove the lug nuts and take off the wheel to expose the brake assembly.
Removing the Old Brake Pads and Caliper
With the wheel off, you will see the brake rotor and the caliper that clamps down on it. Your first task is to locate the two bolts, often called guide pins, that hold the main body of the caliper to its mounting bracket. These are typically on the back side of the assembly. After removing them with your ratchet, the caliper should slide off the rotor.
Here is a rule you must not break: never let the brake caliper hang by its flexible rubber hose. This hose carries hydraulic fluid, and its own weight can damage the internal structure, leading to a spongy pedal or complete brake failure down the road. This is a key milestone for a successful job, a point consistently highlighted in classic repair guides from sources like Haynes. Use a dedicated caliper hanger or even a bent piece of a metal coat hanger to suspend it from the suspension spring or another sturdy component.
With the caliper safely supported, the old brake pads can be removed. They might slide right out or require a little persuasion. Pay close attention to how they came out. Note the position of any small metal pieces, which are anti-rattle clips or wear indicators. Take a moment to inspect the old pads. Are they worn evenly? If one side is significantly thinner than the other, it could signal a problem like a sticking caliper guide pin, which you will clean and lubricate in the next step. This quick diagnosis turns a simple parts swap into proactive maintenance.
Installing the New Brake Pads
Before the new pads go in, you need to make space for them. Since the new pads are much thicker than the worn ones, you must compress the caliper piston back into its housing. Place an old brake pad over the piston and use a C-clamp to slowly and evenly push it back until it is flush. This method works for most front brakes, but be aware that many rear calipers with integrated parking brakes require a special tool that simultaneously pushes and rotates the piston.
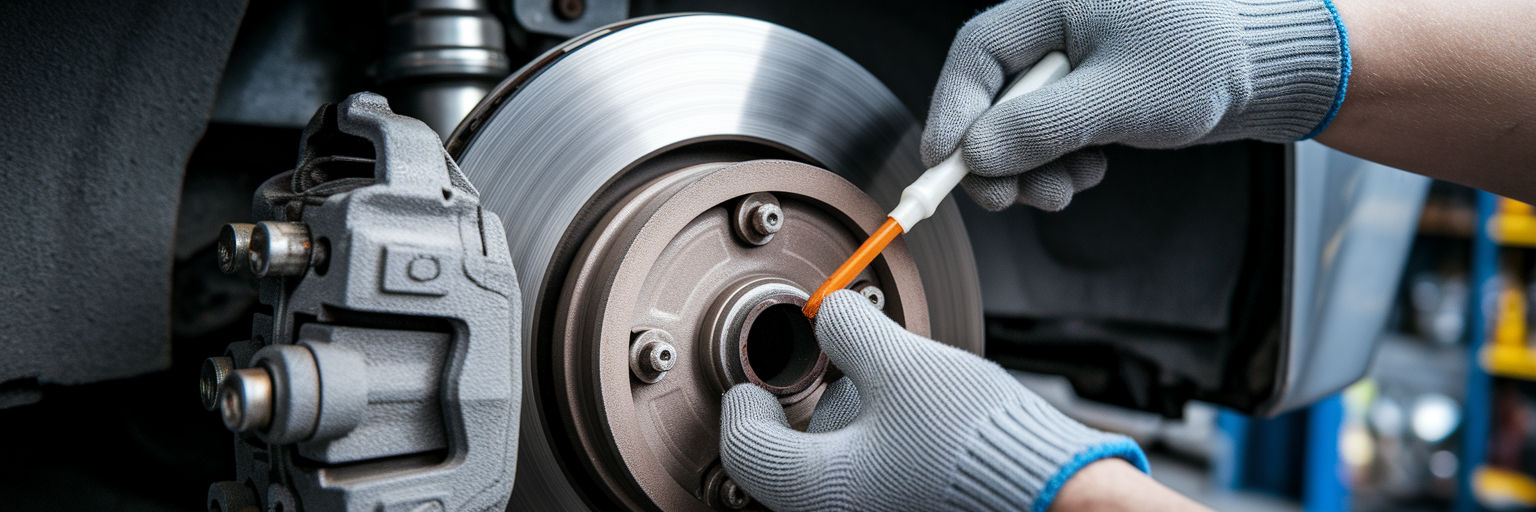
Next comes a step that separates a good brake job from a great one: cleaning. Use a wire brush to scrub away all rust and brake dust from the caliper bracket where the pads and hardware clips sit. Follow up with brake cleaner spray to remove any remaining residue. A clean surface is essential for the new hardware to sit properly and allow the pads to move freely.
Proper lubrication is the secret to a quiet brake job. However, its purpose is often misunderstood; it is meant to prevent high-frequency vibrations, not to make parts move faster. Applying the correct lubricant in the right places is a key part of changing brake pads at home. Improper application can cause the common issue of a car squeaking when you drive. Be extremely careful to avoid getting any lubricant on the face of the new pads or the rotor surface. Contamination here will severely reduce braking performance.
| Component to Lubricate | Type of Lubricant | Reason for Application |
|---|---|---|
| Back of Brake Pads | High-Temperature Brake Grease | Prevents high-frequency vibration (squeal) between pad and caliper. |
| Caliper Guide Pins | Silicone-Based Brake Lubricant | Allows the caliper to slide freely, ensuring even pad wear. |
| Brake Pad Contact Points | High-Temperature Brake Grease | Reduces friction and noise where the pad’s metal tabs touch the bracket. |
| Hardware Clip Surfaces | High-Temperature Brake Grease | Ensures pads can move smoothly within the clips without binding. |
Note: This table outlines the critical lubrication points for a quiet and effective brake job. Always use lubricants designed specifically for brake systems and apply them sparingly. Never apply any lubricant to the face of the brake pad or rotor.
With the bracket clean and lubricated, snap the new hardware clips into place and slide in your new brake pads.
Reassembling the Brakes and Final Checks
Now that the new pads are in place, you can carefully reinstall the caliper over them. It should slide on smoothly. If it doesn’t, double-check that the piston is fully retracted. Reinstall the caliper bolts and tighten them securely.
This is where a torque wrench becomes an invaluable tool. Our experience shows that proper torque is not optional; it is a core part of a professional repair. It is the only way to ensure bolts are not too loose, which is a serious safety hazard, or too tight, which can strip threads and cause damage. Look up the specific torque value for your vehicle’s caliper bolts and tighten them accordingly.
With the brake assembly complete, it is time to remount the wheel. Hand-tighten the lug nuts, then lower the vehicle just enough for the tyre to make firm contact with the ground. Now, tighten the lug nuts in a star pattern to ensure the wheel is seated evenly against the hub. Once they are snug, lower the vehicle completely and give them a final tightening with your torque wrench to the manufacturer’s specification.
Before you even think about driving, there is one last, non-negotiable step in learning how to replace brake pads. Sit in the driver’s seat and pump the brake pedal several times. It will feel soft and go to the floor on the first pump. This is normal. Keep pumping until the pedal feels firm and responsive. This action pushes the caliper piston back out against the new pads. Finally, pop the hood and check the brake fluid reservoir. Since you pushed the pistons back, the fluid level may be higher than before. If it is above the ‘MAX’ line, use a turkey baster or syringe to remove a small amount.
Bedding-In Your New Brakes for Optimal Performance
You have installed your new brakes, but the job is not quite finished. The final step, often overlooked by beginners, is the bedding-in process. Think of it as creating a perfectly matched surface between the new brake pads and the rotors. This procedure ensures you get maximum stopping power, quiet operation, and a longer life from your new components. Proper bedding in new brakes is what separates a DIY job from a professional one.
This process involves a series of controlled stops to heat the components and transfer a thin, even layer of friction material from the pads to the rotor. It must be performed in a safe area without traffic.
General Bedding-In Procedure:
- Find a safe, open road where you can perform these steps without endangering others.
- Perform 5 to 8 moderate stops from approximately 50 km/h down to about 15 km/h. Accelerate back to speed between each stop.
- Do not come to a complete stop. This is the most important rule. Stopping completely can imprint pad material unevenly on the hot rotor, causing brake judder.
- Next, perform 2 to 3 harder stops from about 80 km/h down to 15 km/h, again avoiding a full stop.
- Finally, drive for 5 to 10 minutes with as little braking as possible to allow the components to cool down completely.
You might notice a slight burning smell during this process, which is normal as resins in the new pad material cure. Once cooled, your brakes are ready for normal use. Now that you have mastered your brakes, you can continue to build your skills by exploring other maintenance topics and car news on CarPhanatics.