
Before disc brakes became standard on American passenger cars in the late 1960s and 1970s, stopping a heavy sedan required four-wheel drum assemblies that faded rapidly in the rain and demanded constant manual adjustment. Understanding the mechanics of a timely brake pad replacement gives everyday drivers direct control over the single most important safety system on their vehicle.
Understanding Brake Pad Replacement and Braking System Mechanics
Modern automotive braking systems perform an extraordinary physical feat every time you approach an intersection. While swapping worn friction components is a straightforward weekend project, executing a reliable brake pad replacement starts with understanding how your foot pressure translates into stopping power at all four corners of the chassis.
The Hydraulic Chain of Command
Stopping a moving vehicle is an exercise in energy conversion. Your car carries substantial kinetic energy down the highway, and the braking system must convert that forward momentum into thermal energy through controlled friction. When you press the brake pedal, a mechanical linkage pushes into a vacuum or electro-hydraulic brake booster, which multiplies your foot force several times over before it reaches the master cylinder.
Inside the master cylinder, pistons pressurize specialized glycol ether brake fluid. Because liquids are virtually incompressible, that hydraulic pressure travels instantaneously through steel hardlines running along the chassis and flexible rubber hoses connected to the steering knuckles. This pressurized fluid enters the brake caliper, forcing one or more steel or phenolic pistons outward. The caliper acts like a hydraulic C-clamp, squeezing the brake pads tightly against both faces of the spinning cast iron brake rotor to slow the wheel hub.
Structural Anatomy of a Modern Brake Pad
A brake pad looks like a simple block of material in the parts box, yet its construction balances extreme thermal endurance with acoustic engineering. At the foundation sits a stamped steel backing plate, usually coated in powder paint or zinc plating to fight road salt corrosion. The friction material block is bonded to this steel plate using high-temperature phenolic resin adhesives, and heavy-duty pads often incorporate mechanical retention hooks or brass rivets stamped directly into the steel to prevent the friction block from shearing off under hard braking.
Look closely at the face of a quality brake pad and you will notice two deliberate geometric features. Angled bevels on the leading and trailing edges, known as chamfers, prevent the sharp edges of the pad from digging into the rotor and causing high-frequency chatter. A vertical groove cut down the center, called an expansion slot, gives superheated gases and friction dust an escape route while preventing the pad from cracking as it expands under heat. On the back of the steel plate, manufacturers attach multi-layer rubberized stainless steel shims that act as acoustic dampers, absorbing microscopic vibrations before they can resonate through the caliper and create an annoying squeal at stoplights.
How Hybrid and Electric Vehicles Change the Duty Cycle
The rise of electrified powertrains has fundamentally altered how friction brakes age. In a conventional gas vehicle, the hydraulic brakes do nearly all the work on every stop. In hybrids and battery electric vehicles, lifting off the accelerator or pressing the brake pedal lightly engages regenerative braking first. The electric drive motor runs in reverse as a generator, capturing kinetic energy to recharge the battery pack while slowing the car down without touching the brake pads.
While regenerative braking allows factory pads to last past 80,000 or 100,000 miles, this reduced workload creates an unexpected maintenance headache. Because the pads rarely clamp hard enough to scrub the rotors clean, moisture and road salt build up on the cast iron surfaces. Drivers in northern US snow-belt states frequently find their EV rotors ruined by deep rust pitting long before the friction material wears thin, and caliper slide pins can seize up simply from lack of movement. Paying attention to these foundational mechanical assemblies is central to our analysis of why some high-mileage cars age better than others, as neglected hardware inevitably leads to expensive repairs. Every link in this hydraulic and friction chain depends on clean hardware and adequate pad thickness to keep stopping distances predictable.
Warning Signs That Indicate Brake Pads Need Inspection
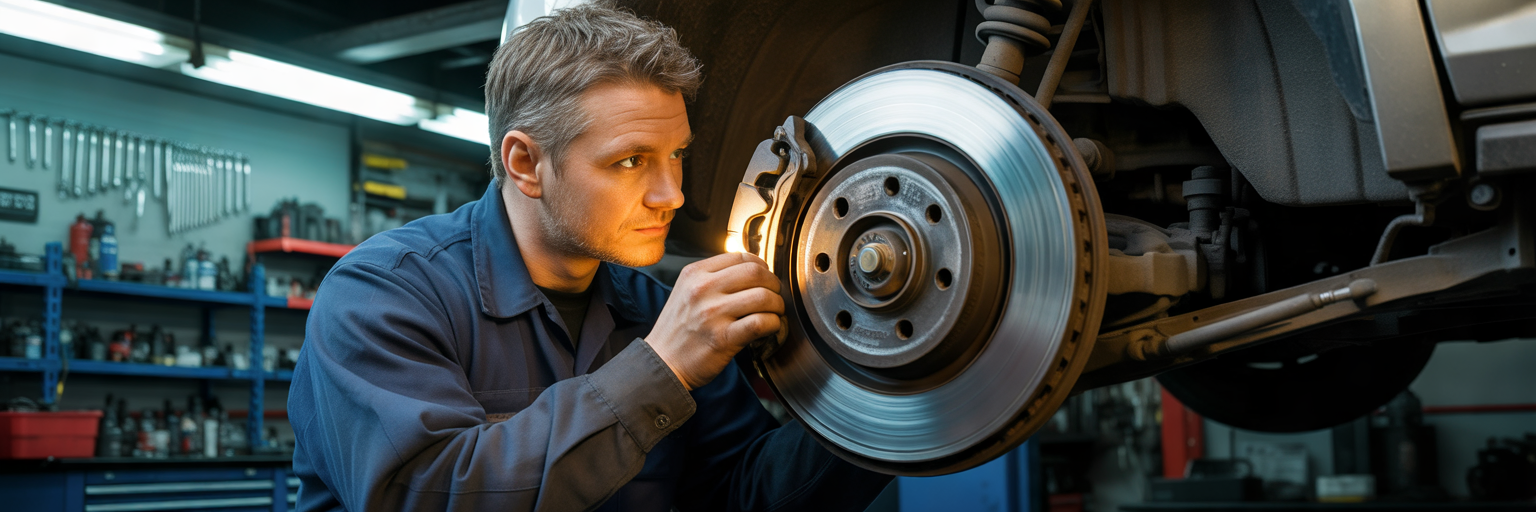
Your vehicle communicates brake wear long before you lose stopping power, provided you know what to listen and feel for during your daily commute. Catching the early signs of worn brake pads from the driver seat or the driveway saves you from destroying expensive rotors and calipers.
Auditory Cues and the Three Millimeter Rule
Most passenger car brake pads come equipped with a built-in early warning system: a small spring-steel tab riveted to the backing plate. When the friction material wears down to its service limit, the tip of this metal tab makes contact with the spinning iron rotor. It produces a high-pitched metallic chirp or harmonic squeal while the car is rolling, which often changes pitch or disappears the moment you press the brake pedal firmly. This sound is your cue to order parts.
If you ignore that initial chirp for several weeks, the sound transforms into a harsh, guttural metal-on-metal grinding noise whenever you apply the brakes. At that point, the friction compound is completely gone, and the hard steel backing plate is gouging directly into the cast iron rotor face, ruining the rotor in a single drive. Context matters when diagnosing brake noise, however. If your brakes let out a brief squeak during the first two stops on a damp morning and remain silent the rest of the day, you are just hearing the pads wipe off a microscopic film of overnight surface rust.
To verify pad health visually, apply the three millimeter rule. Peer through the spokes of your alloy wheels using a bright penlight and locate the brake caliper hugging the rotor. You will see the outer steel backing plate pressed against the friction block, which sits flush against the shiny rotor face. New pads typically start with 10 to 12 millimeters of friction material. Once that friction layer wears down to 3 millimeters, roughly the thickness of two stacked US nickels or one-eighth of an inch, heat dissipation drops sharply and the pad must be replaced.
Physical Pedal Feedback and Dashboard Alerts
Beyond sound, your hands and right foot pick up clear mechanical clues. If the brake pedal pulsates up and down under your foot or the steering wheel shimmies side to side when slowing down on a highway off-ramp, your rotors have developed thickness variation or uneven pad resin deposits from excessive heat. If the car pulls sharply to the left or right when you brake in a straight line, one caliper is likely sticking, causing the opposite wheel to do all the stopping work.
Modern dashboards also monitor the braking system through two distinct warning lights. Many European and luxury vehicles use an electronic pad wear sensor, which is a small wire loop embedded into the friction block. When the rotor wears through the pad and cuts that wire, an amber brake pad warning icon illuminates on the gauge cluster. By contrast, if the red general brake warning light flickers on during hard cornering or braking (and the parking brake is fully released), check your brake fluid level. As four sets of brake pads wear thin, the eight caliper pistons must stay extended much farther outward in their bores, which causes the fluid level in the master cylinder reservoir under the hood to drop low enough to trip the float switch.
Routine Driveway Inspection Checklist
Drivers who spend hours in heavy stop-and-go city traffic burn through friction material much faster than highway commuters, a factor we emphasized in our guide to the best cars for Uber and rideshare drivers. Run through these quick checks every time you wash your car or rotate your tires:
- Shine a flashlight through the wheel spokes to compare the friction block thickness against the steel backing plate, making sure the friction layer is at least 3 millimeters thick.
- Inspect both the inner and outer pad surfaces if your wheel design allows, since a sticking caliper can wear out the hidden inner pad while the outer pad looks fine.
- Look across the shiny swept face of the brake rotor for deep concentric grooves that look like vinyl record tracks, which indicate debris or worn-out pads scoring the iron.
- Check the outer perimeter edge of the rotor for a raised, rusty lip, which reveals that the main friction ring has worn down significantly over time.
- Compare the amount of dark brake dust accumulating on your left and right wheels, as one excessively dusty wheel often points to a dragging brake pad on that corner.
- Pop the hood and glance at the translucent master cylinder reservoir to trace how much the fluid level has dropped since your last service.
Selecting the Right Brake Pads for Your Vehicle Type
Walking into an auto parts store or browsing an online catalog reveals dozens of pad options at wildly different price points for the exact same vehicle. Choosing the right set requires matching the friction chemistry to your vehicle weight and driving environment rather than simply buying the cheapest box on the shelf.
Comparing Friction Formulations
Aftermarket and original equipment brake pads fall into three primary material categories, each engineered with a specific blend of binders, structural fibers, lubricants, and friction modifiers. When evaluating ceramic vs semi metallic pads alongside traditional organic compounds, drivers must weigh noise and dust comfort against raw stopping power under high heat.
| Friction Compound | Cold Bite and Initial Response | Heat Tolerance and Fade Resistance | Rotor Wear Rate | Brake Dust and Noise Profile | Ideal Vehicle Application |
|---|---|---|---|---|---|
| Non-Asbestos Organic (NAO) | Smooth and progressive | Low to moderate; prone to fade under heavy loads | Very gentle on cast iron rotors | Moderate dark dust; very quiet operation | Lightweight compact cars and gentle city commuters |
| Ceramic | Consistent in normal temps; less aggressive in freezing weather | High thermal stability for spirited street driving | Low; extends rotor service life | Minimal light-colored dust; ultra-quiet acoustic profile | Daily driver sedans, luxury SUVs, and family crossovers |
| Semi-Metallic | Strong, immediate cold bite | Superior heat dissipation under extreme thermal loads | Moderate to high; abrasive on softer rotors | Heavy dark metallic dust; prone to occasional squeal | Heavy-duty towing trucks, performance cars, and off-road rigs |
Matching Compounds to Your Driving Profile
Your daily driving routine dictates which material belongs on your calipers. If you drive a compact sedan, hybrid, or three-row family crossover primarily on suburban streets and interstates, ceramic brake pads are almost always the smartest choice. Formulated from dense ceramic clays bonded with fine copper or synthetic fibers, they absorb brake noise above the threshold of human hearing and produce very little visible dust, keeping silver alloy wheels clean for weeks.
Physics changes rapidly when you add mass, steep grades, or oversized tires. If you haul a travel trailer down mountain passes like the Eisenhower Tunnel grade in Colorado, ceramic pads can overheat and lose friction, a dangerous condition known as brake fade. For the rigs featured in our evaluation of the best used trucks for towing a camper, semi-metallic pads containing 30 to 65 percent steel wool, iron powder, and graphite are essential because the metal content conducts heat away from the rotor face and delivers an immediate, firm bite. The same logic applies to trail builds; the rigs we covered in our guide to the best used SUVs for off-roading often run heavy mud-terrain tires that increase rotational inertia, demanding the aggressive friction grip of semi-metallic compounds even at the cost of extra brake dust and faster rotor wear.
Verifying Fitment and Hardware Kits
Ordering brake pads by year, make, and model alone is one of the most common traps in driveway mechanics. Automakers routinely install two or three different brake systems on the exact same model year depending on trim level, engine size, drivetrain (2WD versus AWD), and factory option packages. A half-ton pickup equipped with a factory Max Tow package, or a sporty sedan with an optional handling package, will frequently use larger multi-piston calipers and 345-millimeter rotors instead of the base 320-millimeter setup.
Before placing an order, check your eighth VIN digit for engine code, verify whether you have a manual or electronic parking brake on the rear axle, and check the service parts identification sticker inside your driver door jamb or glovebox for specific brake Regular Production Option (RPO) codes. If two rotor sizes are listed for your car, take five minutes to measure your existing rotor diameter with a tape measure. Finally, always select a brake pad set that includes a new hardware kit in the box. Reusing old, heat-fatigued, rust-encrusted stainless steel abutment clips causes brand-new brake pads to bind up in the bracket, leading to dragging brakes and premature wear. Matching OEM hardware standards with a friction compound suited to your real-world load ensures reliable stopping performance.
Essential Tools Safety Gear and Workspace Preparation
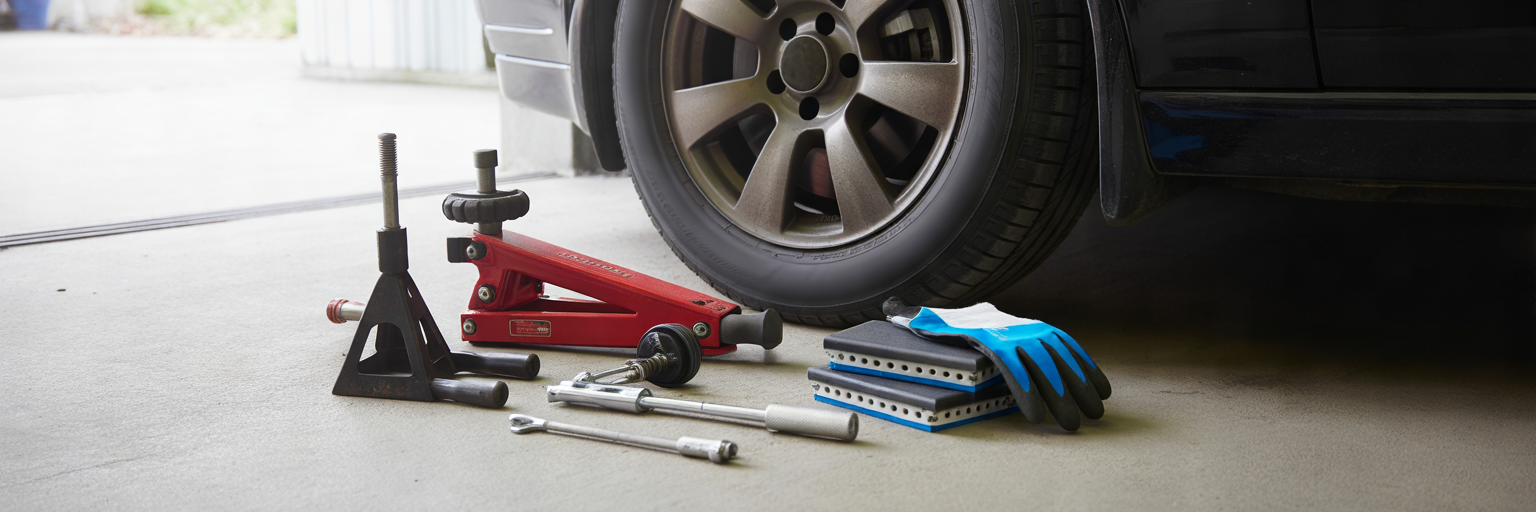
A successful DIY brake job is won or lost before the first lug nut comes off the wheel hub. Staging your workspace, wearing proper protective equipment, and following strict lifting protocols prevent driveway injuries and keep you from getting stranded mid-project with a disassembled suspension.
Personal Protective Gear and Dust Control
Working inside a wheel well exposes your hands and eyes to decades of accumulated road grime, sharp metal clips, and toxic dust. Always wear impact-rated ANSI Z87.1 safety glasses when prying off brake hardware or brushing down caliper brackets, as tensioned spring clips and flakes of rust scale can launch straight toward your face. Heavy-duty nitrile gloves protect your skin from brake fluid and solvents while maintaining the dexterity needed to thread small bolts.
Stock at least two large cans of non-chlorinated aerosol brake parts cleaner and place a wide plastic catch pan underneath the hub before spraying. While modern brake pads sold in the United States no longer use asbestos, brake dust still contains ultra-fine metallic particulates, carbon fibers, and phenolic resins that irritate lung tissue. Never use a shop air compressor or leaf blower to blast dry brake dust off a caliper assembly. Instead, douse the caliper and bracket liberally with liquid brake cleaner so the runoff washes the dust safely into your catch pan.
Safe Vehicle Lifting Protocols
Because brake work requires pulling forcefully on long breaker bars and torque wrenches, your vehicle must be supported on an immovable foundation. Only lift a car on a flat, level concrete garage floor or driveway. Never position jack stands on sloped pavement, dirt, gravel, or hot asphalt; under the concentrated weight of a two-ton vehicle, jack stand bases can sink into warm asphalt and tip the car over.
Before lifting, wedge solid rubber wheel chocks tightly in front of and behind the tires on the opposite axle that will remain on the ground. If you are replacing front brake pads, set the parking brake firmly; if you are working on the rear brakes, leave the parking brake released so the rear caliper mechanisms are not locked under tension. Position a hydraulic floor jack beneath the factory-reinforced pinch weld notch on the rocker panel or the designated frame rail jacking pad, raise the corner smoothly, and lower the vehicle weight onto a rated mechanical jack stand equipped with a secondary safety locking pin. Give the fender a firm shove before taking the wheel off to confirm the car is completely stable, and slide the hydraulic floor jack lightly under a secondary frame point as a backup failsafe.
Complete Tool Checklist and Pre Lift Steps
Having every tool laid out within arm’s reach keeps your workflow organized, much like the routine habits we recommend in our guide on keeping your car’s engine running for years. Gather the following items before lifting the vehicle:
- Metric and standard 3/8-inch and 1/2-inch drive socket sets, plus a deep thin-wall lug nut socket
- A 18-inch to 24-inch breaker bar for stubborn caliper bracket bolts and wheel lugs
- Thin open-end box wrenches to hold the inner hex flats on spinning caliper slide pins
- A large 6-inch C-clamp or a dedicated ratcheting brake pad spreader tool (plus a rear caliper wind-back tool cube or kit if doing rear brakes)
- A stiff brass or steel wire brush and a flathead screwdriver or small pry bar
- Heavy metal S-hooks, bungee cords, or mechanics wire for hanging the caliper
- 100 percent synthetic high-temperature silicone or ceramic brake grease (plus small packets of anti-seize and blue medium-strength threadlocker)
- Calibrated 3/8-inch and 1/2-inch drive click-type or digital torque wrenches
Perform two quick preparation steps while the tires are still planted on the concrete. First, use your breaker bar and lug socket to break the wheel lug nuts loose by one quarter-turn; trying to crack tight lug nuts once the wheel is spinning in the air is frustrating and stresses the transmission parking pawl. Second, pop the hood, unscrew the cap on the brake fluid master cylinder reservoir, and check the fluid level. If a quick-lube shop previously topped off the reservoir while your old pads were worn thin, pushing the caliper pistons back into their bores will force excess fluid up into the reservoir, causing it to overflow and strip the paint right off your fender well. If the fluid is already near the top line, use a clean dedicated turkey baster or fluid syringe to siphon out a few ounces before you begin. Taking fifteen minutes to stage your bay prevents nearly all stripped fasteners and shop mishaps.
Step by Step DIY Brake Pad Replacement Workflow
With the vehicle securely resting on jack stands and your tools laid out, you are ready to disassemble the wheel end. Learning how to change brake pads methodically ensures that every sliding surface moves without friction and every critical fastener returns to factory specification.
Caliper Access Removal and Suspension Support
Spin off the loosened lug nuts and lift the wheel assembly off the hub, laying it flat on the floor beside you. If you are working on the front axle, turn the steering wheel all the way toward the side you are servicing (turn left to work on the driver side, or right for the passenger side). Pivoting the steering knuckle swings the back of the brake caliper outward into the open wheel well, giving you clear sightlines and plenty of room to swing a ratchet.
Locate the two caliper guide pin bolts on the backside of the caliper housing. On most floating caliper designs, you only need to remove the lower bolt to pivot the caliper upward like a clamshell, though removing both bolts to lift the entire caliper body off is often easier. As you loosen the guide pin bolt with your socket wrench, watch the inner rubber boot; if the entire slide pin spins inside the bracket, slip a thin open-end wrench onto the hex flat just inside the rubber boot to hold it stationary. Once the bolts are out, lift the caliper off the rotor and immediately hang it from the upper coil spring using a metal S-hook. Never let a heavy caliper dangle by its flexible rubber brake hose, as the weight can tear the internal braided fabric reinforcement and cause a sudden hydraulic line rupture down the road.
Bracket Prep and Slide Pin Servicing
Pull the old inner and outer brake pads straight out of the caliper mounting bracket. Take a moment to note which pad had the metal wear indicator tab and whether it sat at the top or bottom of the bracket so you can match that orientation with the new set. Next, use a flathead screwdriver to pry the old stainless steel abutment clips out of the cast iron bracket.
This next step separates professional-grade brake work from rushed driveway jobs: take your wire brush and aggressively scrub the machined grooves (the bracket lands) where those stainless clips sit, blasting away the debris with brake cleaner. In humid or salty climates, rust scale builds up underneath the stainless clips and swells upward, pinching the ears of your new brake pads so tightly that they jam in the bracket instead of sliding smoothly. Once the bare iron is clean, apply a very thin film of silicone brake grease directly onto the metal bracket lands to block future rust jacking, then snap the new stainless steel hardware clips firmly into place.
Now grasp the two caliper slide pins protruding from the bracket and pull them straight out of their rubber accordion boots. Wipe all the old, dark grease off the pins with a clean shop towel and inspect the polished metal shafts. If the pins are smooth, coat them evenly with fresh 100 percent synthetic silicone brake lubricant and slide them back into the rubber boots, squeezing the boots lightly to burp out trapped air so the pin doesn’t hydraulic-lock. Never use petroleum-based wheel bearing grease or anti-seize inside slide pin boots, as petroleum chemistry causes synthetic rubber boots to swell up like sponges and bind the pins.
Piston Retraction for Standard and Electronic Calipers
Because your old brake pads were worn thin, the hydraulic caliper piston is currently extended far out of its cylinder bore and will not fit over the thick new pads until you retract it. Before pushing the piston back, inspect its rubber dust boot for tears or wet fluid leaks. For standard front single-piston or twin-piston calipers, lay one of your old brake pads flat across the face of the piston(s) and position a C-clamp or ratcheting pad spreader against the old pad and the back of the caliper body. Turn the clamp screw slowly and steadily until the piston seats completely flush inside its bore.
Rear brake calipers require special attention because they incorporate the parking brake mechanism. Many vehicles use an integral mechanical parking brake where the piston sits on an internal threaded spindle; if you try to crush this piston straight back with a C-clamp, you will snap the internal parking brake mechanism. Instead, look at the face of the rear piston: if it has two small notches or cross-slots cut into the metal ring, you must use a rear caliper wind-back tool or a notched brake cube on a ratchet extension to rotate the piston clockwise while pushing inward, screwing it back into its bore. If your modern vehicle has an Electronic Parking Brake (EPB) button on the center console with an electric motor mounted on the rear caliper, you must first put the car into Brake Maintenance Mode using a specific ignition-and-pedal sequence or an OBD-II scan tool. The electric motor will whir for a few seconds to wind the internal actuator back, after which you can press the piston straight in with a standard pad spreader.
Installing New Pads Hardware and Torquing Fasteners
With the bracket prepped and the piston retracted, follow this exact sequence to reassemble the corner:
- Apply a paper-thin smear of high-temperature ceramic or silicone brake lubricant onto the metal backing plate ears of the new brake pads where they touch the stainless steel abutment clips, as well as a light film on the back of the pad shims where the caliper piston and outer fingers make contact. Keep all grease strictly off the friction material and the rotor face.
- Slide the new inner and outer brake pads into the stainless steel bracket clips, curving them slightly inward so they hug the rotor face smoothly without requiring hammer blows to fit.
- Unhook the caliper body from the suspension spring, make sure the rubber brake hose is not twisted, and slide the caliper smoothly over the new pads.
- Apply a small drop of medium-strength blue threadlocker to the threads of the caliper guide pin bolts (unless new pre-coated bolts came in your kit), thread them in by hand to prevent cross-threading, and tighten them with a calibrated 3/8-inch torque wrench to your vehicle service manual specification (typically between 22 and 35 foot-pounds).
- Spray both faces of the brake rotor with non-chlorinated brake cleaner and wipe them down with a clean lint-free towel to remove any oily fingerprints left behind during assembly.
- Mount the wheel back onto the hub, snug the lug nuts in a crisscross pattern, lower the car off the jack stands onto the ground, and torque all lug nuts in a star pattern using your 1/2-inch torque wrench (typically 80 to 100 foot-pounds for passenger cars, or 120 to 140 foot-pounds for pickups).
Before you touch the ignition switch or shift into reverse, follow the single most important rule of brake service: sit in the driver seat and pump the brake pedal slowly 5 to 10 times. Because you pushed the caliper pistons all the way back into their bores, the first two pushes of the pedal will sink straight to the carpet as the pistons travel outward to close the air gap. Keep pumping until the pedal feels high and rock firm underfoot.
Rotor Inspection Bedding In Procedures and Post Job Checks
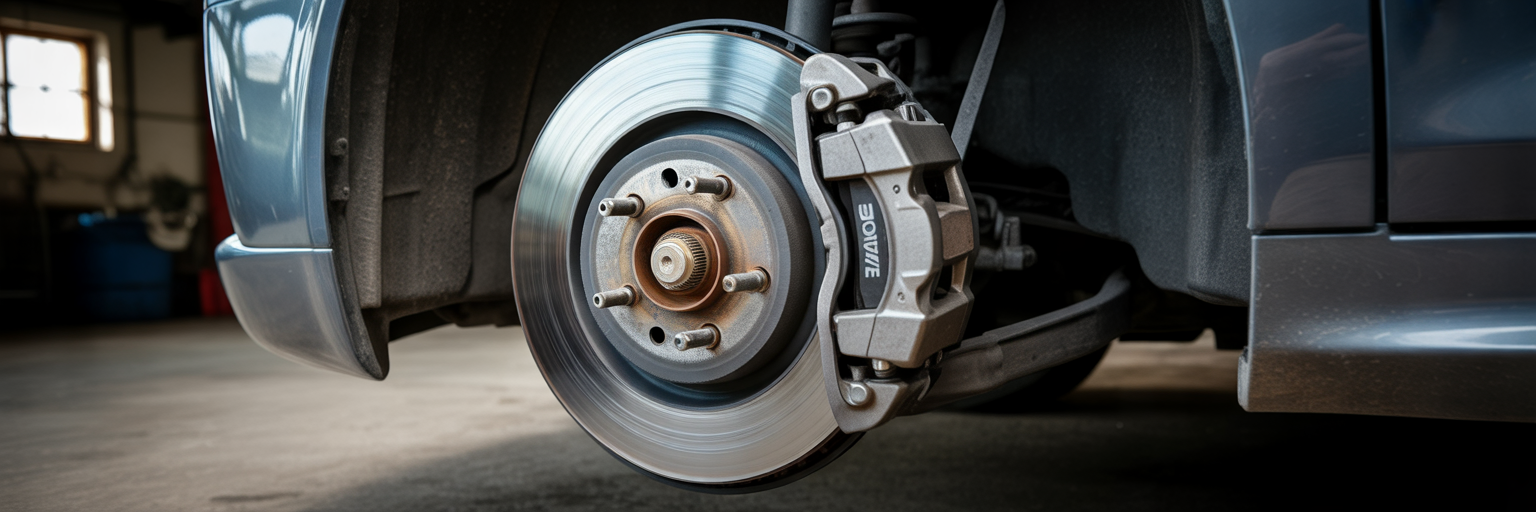
Bolting the wheels back on is not the finish line of a thorough brake service. Evaluating the cast iron rotors and performing a controlled thermal break-in procedure determines whether your new pads stop silently for 50,000 miles or develop annoying vibrations within a month.
Measuring Rotors and the Resurfacing vs Replacement Debate
Every time you install new pads, the brake rotor deserves a close mechanical inspection. Run your fingernail radially from the center hat outward across both the inner and outer friction rings; if your nail catches in deep concentric ridges, the uneven iron surface will chew up the flat face of your new brake pads and reduce initial contact area. Also inspect the iron for dark bluish-purple blotches caused by extreme localized overheating, as well as tiny hairline thermal cracks radiating outward.
In a professional shop, technicians measure rotor wear using an outside micrometer at four to six points around the friction ring, about half an inch in from the outer edge. Every rotor has a Minimum Thickness (Min Thk) specification stamped into the center hat or cast along the outer cooling vanes, usually just 1.5 to 2.0 millimeters thinner than a brand-new rotor. Decades ago, it was standard practice to unbolt worn rotors and take them to an auto parts store to be resurfaced (turned) on a brake lathe. Modern original equipment rotors, however, are cast much thinner to save unsprung weight and improve fuel economy. By the time a set of factory pads wears out, the rotor is often already near its minimum thickness limit and will warp quickly if shaved thinner on a lathe. Because high-quality aftermarket rotors with rust-preventative zinc or geomet coatings on the hat and cooling vanes are widely affordable, replacing the rotors alongside the pads—or at least every second pad swap—is the smartest path for modern DIYers.
The Tribology of Bedding In New Brake Pads
Once your parts are installed, properly bedding in brake pads is essential for peak stopping performance. Brakes do not work through raw abrasive friction alone, where a rough pad grinds away at bare metal. Once warmed up, disc brakes rely on coherent (adherent) friction. During a controlled break-in cycle, the thermal curing of the new pad resins deposits an ultra-thin, uniform microscopic transfer layer of friction polymer into the microscopic valleys of the cast iron rotor. Once that transfer film is established, the brake pad is actually gripping a layer of its own material bonded to the rotor, eliminating noise and maximizing friction.
If you skip this step and immediately slam on the brakes at a highway exit and sit at a red light with your foot pressed hard on the pedal, the superheated pad will stamp an uneven footprint of sticky resin onto one single spot of the rotor. Every time the wheel rotates past that high spot of pad material afterward, the caliper piston is kicked back slightly, creating a severe brake pedal pulsation that drivers mistakenly blame on “warped” rotors.
To execute a proper street bed-in procedure, find an open, safe stretch of suburban road or secondary highway with no traffic behind you. Accelerate to roughly 40 mph, then apply firm, steady brake pressure (about 70 percent effort, stopping just short of engaging the ABS) to slow the vehicle down to 10 mph. Do not come to a complete stop. Immediately accelerate back up to 40 mph and repeat this 40-to-10 mph deceleration cycle 5 to 6 times in a row, letting the brakes get progressively warmer with each pass. You may catch a faint whiff of curing resin, which is completely normal. After the sixth cycle, drive at steady cruising speed for 5 to 10 minutes without touching the brakes whenever possible, allowing cool airflow through the wheels to bring the rotors and pads back down to ambient temperature evenly.
Final Fluid and Road Test Verification
Park the vehicle on level ground after your cooling drive and open the hood one last time. Because your caliper pistons are now sitting back in their factory positions against full-thickness pads, the brake fluid in the master cylinder reservoir will have risen. Verify that the fluid sits right at the MAX line (topping off with a fresh, sealed bottle of DOT 3 or DOT 4 fluid as specified on your cap if you siphoned slightly too much out earlier), and twist the reservoir cap on tightly so atmospheric moisture cannot enter the system.
Take a quick peek through each wheel with your flashlight to confirm the area around the rubber brake hose banjo bolt and bleeder screw is bone dry. If you heard a faint, rhythmic metallic scraping sound that changed speed with the wheels during your initial driveway roll, do not panic. It is almost always the thin sheet-metal backing dust shield behind the rotor, which is easily nudged inward by a hand or tool during caliper removal; reaching behind the rotor with a long flathead screwdriver and pushing the tin shield back by two millimeters solves the noise instantly. Completing this break-in and inspection routine transforms a basic parts swap into a smooth, factory-grade braking system.
When Uneven Wear and Braking Problems Require a Mechanic
Replacing brake pads solves routine friction wear, yet the pads themselves often serve as the messenger for deeper mechanical or hydraulic faults. Knowing how to read your old parts and recognize system-wide failures tells you when a simple driveway pad swap is no longer enough.
Reading Old Brake Pads Like Diagnostic Clues
Before tossing your old brake pads into the recycling bin, lay all four pads out on your workbench in the exact positions they came off the car. On a healthy braking system, the inner and outer pads on both the left and right wheels should wear down evenly and remain flat across the entire friction face. When you spot uneven wear, the old pads act as a forensic map pointing directly to a failing caliper or bracket component.
| Observed Pad Wear Pattern | Visual Characteristics | Root Mechanical Cause | Required Corrective Action |
|---|---|---|---|
| Severe Inner Pad Wear Only | Inner pad worn to steel backing plate; outer pad retains 50% or more thickness | Seized caliper guide pins preventing outer housing from sliding inward | Free, clean, and relubricate slide pins and boots, or replace caliper bracket |
| Severe Outer Pad Wear Only | Outer pad depleted; inner pad shows minimal wear | Caliper piston sticking in bore or corroded abutment clip binding outer pad | Rebuild or replace brake caliper assembly and install new hardware clips |
| Tapered or Wedge Wear | Friction material worn thinner at leading edge than trailing edge (or top to bottom) | Corroded bracket lands, bent caliper mounting ears, or worn guide pin bores | File and clean bracket rust scale or replace worn caliper mounting bracket |
| Cracked, Glazed, or Delaminated Pad | Shiny glass-like friction surface, thermal fissures, or pad separating from backing plate | Extreme thermal overload from riding brakes, dragging caliper piston, or cheap compound | Inspect for dragging hydraulic caliper, replace rotors, and upgrade pad compound |
Compare the inner and outer pads from the same wheel first. If the inner pad (the one pressed directly by the hydraulic piston) is worn down to bare steel while the outer pad still has half its life left, your caliper slide pins are seized in their bores; the piston pushed the inner pad against the rotor, but the caliper housing could not slide inward on its pins to pull the outer pad into contact. Conversely, if a pad is worn into an angled wedge—say, 8 millimeters thick at the top edge and 2 millimeters thick at the bottom—either one slide pin is frozen, the caliper bracket is twisted, or rust under one abutment clip prevented one ear of the pad from moving.
Hydraulic Failures and Electronic Red Flags
Certain braking symptoms have nothing to do with friction material and cannot be cured by installing new pads. If your brake pedal feels spongy and mushy, or if it slowly sinks toward the floorboard while you hold steady foot pressure on it at a red light, you have a hydraulic integrity problem. A sinking pedal with no visible puddles under the car usually means the internal rubber cup seals inside the master cylinder are bypassing fluid, requiring immediate master cylinder replacement. A spongy pedal indicates compressible air bubbles trapped in the brake lines or old, dark-brown brake fluid saturated with moisture that boils under heat, demanding a full four-wheel hydraulic flush.
Similarly, if you pull a caliper off and find wet, oily brake fluid weeping past a torn rubber dust boot around the piston, the internal square-cut hydraulic seal has failed and the entire caliper assembly must be replaced and bled. Vehicles in the Midwest and Northeast must also be checked for crusty, rust-flaked steel brake hardlines running along the frame rails, which can burst during an emergency stop. Finally, respect modern electronic complexity: performance and luxury vehicles, including the models highlighted in our guide to the best used German cars worth owning, frequently use fixed multi-piston aluminum calipers, tight wheel speed sensor tolerances, and pressurized ABS hydraulic control modules that require a bi-directional diagnostic scan tool to cycle the internal solenoid valves during bleeding. Mastering your own pad and rotor maintenance is one of the most rewarding skills in the garage, and recognizing when to hand complex hydraulic leaks or ABS fault codes over to an ASE-certified professional with a lift is the ultimate mark of a smart car enthusiast.