
Since hydraulic disc brakes replaced traditional drum assemblies on passenger vehicles in the mid twentieth century, proper thermal conditioning has separated smooth stopping power from noisy, vibrating pedals. Understanding the mechanical bond between fresh friction pads and cast iron rotors ensures a driveway installation performs reliably when an emergency stop occurs. Knowing how to bed in brake pads transforms raw mechanical assemblies into a unified, responsive friction system.
Why Learning How to Bed In Brake Pads Matters After Installation
Every cast iron rotor leaves the factory with microscopic ridges and valleys across its machined surface, much like the grooves on a vinyl record. When you finish installing fresh hardware and begin breaking in new brakes, your primary mechanical objective is transferring a microscopic, uniform layer of friction material from the pad into those tiny valleys on the rotor face. Without this deliberate conditioning process, your braking system operates at a fraction of its engineered capacity.
Abrasive Friction Versus Adherent Friction on Cast Iron Rotors
Automotive braking systems rely on two distinct physical mechanisms to convert kinetic energy into heat: abrasive friction and adherent friction. When cold, unconditioned pads scrape directly against bare cast iron, the system relies purely on abrasive friction. This metal on compound grinding wears down both the rotor and the pad rapidly while generating high pitched metallic squealing and erratic pedal feedback.
Once you heat the system properly, a thin sacrificial film of pad compound bonds to the cast iron, shifting the system into adherent friction. Under adherent friction, the brake pad glides across a molecular layer of its own transferred material on the rotor face. As these identical chemical layers shear against each other under hydraulic pressure, the bonds continuously break and reform. This molecular interaction delivers quiet, linear stopping torque and predictable pedal modulation under heavy loads.
Thermal Curing of Bonding Resins and Preventing Green Fade
Beyond preparing the rotor face, controlled heat cycling completes the manufacturing process of the brake pad itself. Friction blocks are held together by phenolic bonding resins that require final thermal curing on the vehicle. Bringing the pads up to temperature gradually allows volatile gases and residual manufacturing solvents trapped inside the pad matrix to escape safely.
If a driver skips this gradual warm up and immediately subjects raw pads to extreme heat, those trapped gases expand rapidly and push out from the pad face. This outgassing creates a pressurized boundary layer of superheated vapor between the pad and rotor that prevents physical contact, a dangerous phenomenon known as green fade. Rapid overheating before the resins stabilize can also weaken the structural integrity of the pad matrix, leading to premature cracking. Because braking dynamics and thermal loads differ across axles during initial conditioning, reviewing our educational overview of front and rear brake pads helps clarify why front assemblies demand the majority of your attention during heat cycling.
Many weekend mechanics assume that newly installed hardware is ready for highway panic stops immediately out of the box. In reality, uncured pads mated to bare rotors suffer from significantly reduced initial friction, increasing stopping distances when you need them most. Bolting the caliper back onto the steering knuckle during a brake pad replacement is only the first half of the task, and controlled heat cycling is what truly completes the repair.
Mechanical Pre-Checks and Choosing a Safe Driving Environment
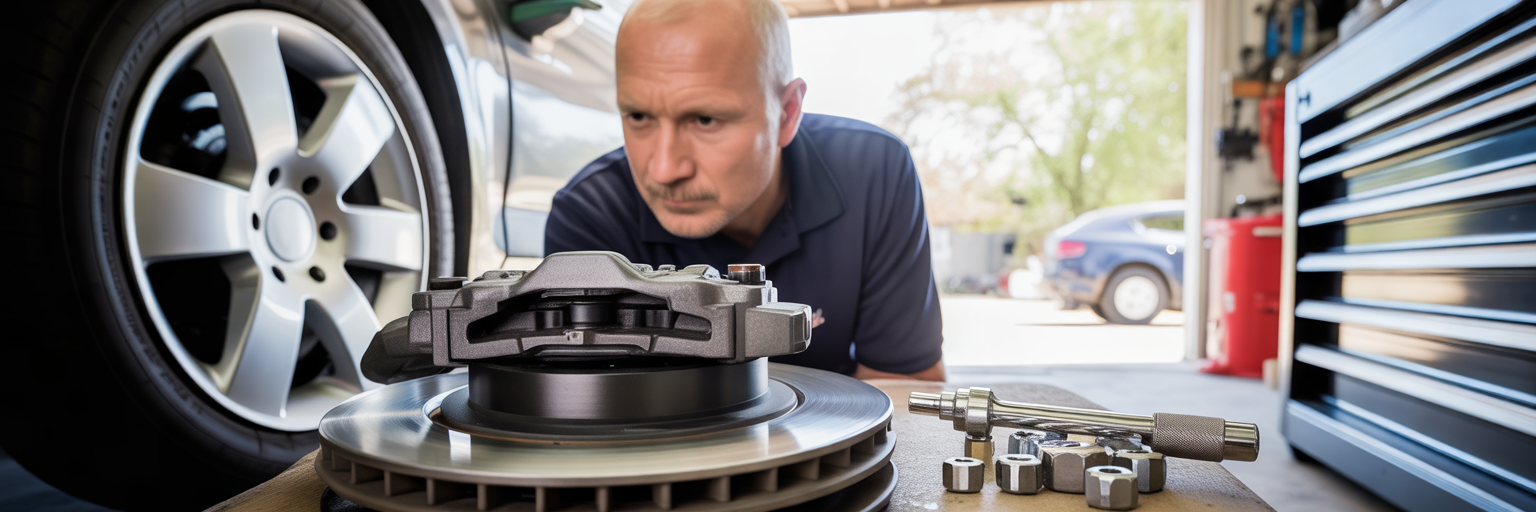
Before taking your vehicle onto public roads to build heat in the calipers, you must verify that the hydraulic and mechanical components are completely secure. Following proven DIY brake job tips in the garage prevents catastrophic hardware failures when you apply heavy pedal pressure at highway speeds.
Essential Garage Checks Before Leaving the Driveway
Your first priority before shifting the transmission into gear is restoring hydraulic piston contact. During installation, compressing the caliper pistons back into their bores creates a wide air gap between the new pad backing plates and the rotor. Depress the brake pedal slowly several times until it transitions from sinking to the floor to feeling rock solid.
Next, pop the hood and inspect the master cylinder reservoir. Retracting the caliper pistons pushes brake fluid back up the lines, which can cause an overfilled reservoir to overflow onto painted chassis components. Verify that fluid sits safely at the maximum fill line and secure the cap tightly.
You should also double check that the rotor swept area was thoroughly washed with aerosol brake parts cleaner and wiped dry with a lint free shop towel during assembly. Many replacement rotors ship coated in heavy anti rust oils or protective zinc films. If left on the friction ring, these contaminants bake into the porous pad material during the first heat cycle and ruin its frictional coefficient. Finally, lower the vehicle to the ground and verify every wheel lug nut with a calibrated torque wrench so uneven clamping forces do not distort the rotor hat. As you roll down the driveway at five miles per hour to test initial pedal bite, roll the windows down and listen closely; if you notice any unusual metallic pops, consult our troubleshooting guide on steering and front suspension clunking noises before attempting high speed decelerations.
Selecting an Open Roadway and Ideal Weather Conditions
Executing repeated decelerations from sixty miles per hour down to ten miles per hour requires an environment where erratic speed changes will not endanger other motorists or draw unwanted attention from local highway patrol. Tailgaters and sudden traffic stops will ruin the thermal profile you are trying to build.
Look for an empty suburban industrial park on a Sunday morning, a flat and straight rural county highway with clear sightlines in both directions, or an open access day at a local motorsport facility. Weather conditions are equally critical for a successful break in run. Never attempt to condition new brakes in the rain, on wet pavement, or along roads with standing puddles. Splashing cold puddle water onto a scorching hot cast iron rotor causes rapid thermal shock, inducing immediate metallurgical stress and surface cracking.
- Pump the brake pedal repeatedly with the engine off until firm hydraulic resistance returns at the top of the pedal stroke.
- Inspect the master cylinder fluid reservoir to confirm fluid has not spilled over the seams after piston retraction.
- Confirm both inner and outer rotor faces were stripped of factory shipping oils or non directional protective coatings.
- Torque all lug nuts in a star pattern to the factory specification using a calibrated click or beam torque wrench.
- Perform a five mile per hour driveway roll test to verify hydraulic clamping and listen for loose caliper bracket bolts.
- Wait for dry weather and completely dry pavement to eliminate the risk of cold water splashing onto hot iron.
- Map out a flat, unpopulated stretch of road with zero stop signs or traffic lights for at least three miles.
The Step-by-Step Progressive Brake Bedding Procedure
Once your mechanical checks are complete and you have reached an open stretch of dry road, you can begin the behind the wheel execution sequence. Following a structured brake pad bedding procedure ensures that thermal energy builds evenly across the entire mass of the rotor and caliper without shocking the friction compound.
Phase One: Initial Warm-Up Decelerations
The first stage of the driving protocol focuses on bringing the cold cast iron rotors and fresh pads up to a stable baseline operating temperature. Accelerate smoothly to approximately forty miles per hour, check your rearview mirror to confirm the roadway behind you is completely clear, and apply moderate brake pressure.
Use roughly fifty percent pedal effort to slow the vehicle steadily down to fifteen miles per hour. Do not let the vehicle come to a complete halt. Once you hit fifteen miles per hour, release the brake pedal immediately and accelerate back up to cruising speed. Repeat this moderate forty to fifteen mile per hour slowdown four to five times in total.
Between each application, drive normally for thirty to forty five seconds without touching the brake pedal. These brief cruising intervals allow the initial wave of frictional heat to soak evenly through the thick cast iron rotor plates and into the pad backing plates, preventing localized thermal hot spots that could scorch the uncured surface of the pad.
Phase Two: High-Load Transfer Snubs and Outgassing Cues
Immediately after completing the fifth warm up deceleration, transition directly into the high load transfer phase without letting the brakes cool down. Bring the vehicle up to sixty miles per hour and apply firm, aggressive pressure to the brake pedal to decelerate rapidly down to ten or fifteen miles per hour.
Your goal during these high load snubs is achieving eighty to ninety percent threshold braking effort. Push the pedal hard enough to pitch the weight of the vehicle forward firmly, staying just beneath the traction limit where the tires chirp or the Anti Lock Braking System begins pulsating under your foot. If the ABS engages, ease off the pedal slightly on the next repetition.
Perform six to eight of these aggressive sixty to ten mile per hour decelerations back to back. Keep the driving intervals between these hard snubs as short as your engine acceleration allows so that thermal energy stacks rapidly inside the rotor mass, pushing the system to peak transfer temperature.
By the sixth or seventh aggressive slowdown, the vehicle will provide distinct sensory feedback confirming the chemical reaction is underway. You will likely smell a pungent, acrid chemical odor of curing phenolic resins drifting through the cabin vents, and you may even see a faint wisp of smoke rising from the front wheel wells if you glance in your side mirrors. Simultaneously, the brake pedal will feel slightly softer underfoot, requiring a fraction more leg pressure to achieve the same deceleration rate. This mild green fade and distinct smell are positive indicators that the resins are outgassing and the friction transfer layer is actively bonding to the cast iron.
- Warm Up Speed Targets: Accelerate to 40 mph and brake smoothly down to 15 mph for 4 to 5 consecutive cycles.
- Warm Up Pedal Effort: Maintain a moderate 50 percent pedal pressure with 30 to 45 seconds of cooling drive time between stops.
- High Load Speed Targets: Accelerate to 60 mph and brake firmly down to 10 or 15 mph for 6 to 8 consecutive cycles.
- High Load Pedal Effort: Apply 80 to 90 percent threshold braking effort, staying just below ABS engagement with minimal intervals between snubs.
- Sensory Confirmation Cues: Watch for a sharp chemical resin odor in the cabin and a slight softening of the pedal on the final two cycles.
Why You Must Avoid Complete Stops and How to Cool the System

When your final high load deceleration from sixty miles per hour drops down to ten miles per hour, the cast iron rotors and brake pads are operating at several hundred degrees Fahrenheit. What you do during the next fifteen minutes dictates whether your brakes feel silky smooth for the next forty thousand miles or shake violently every time you touch the pedal.
The Physics of Pad Imprinting and Pedal Pulsation
The single most destructive mistake a home mechanic can make during the break in sequence is bringing the vehicle to a dead stop while the brakes are superheated and holding the brake pedal down. When a glowing hot caliper clamps a curing brake pad stationary against one isolated footprint on the rotor face, heat can no longer dissipate into passing air.
This localized heat trapping bakes an excessive, thick deposit of friction material directly onto that exact spot on the rotor ring, resulting in uneven brake pad transfer. Furthermore, the trapped thermal energy can alter the crystalline structure of the cast iron underneath the pad footprint, transforming soft grey iron into a hard, brittle compound called cementite.
Once the system cools, that raised pad imprint creates a microscopic high spot known in automotive engineering as Disk Thickness Variation. Every time the wheel rotates and that raised chemical spot passes through the caliper jaws, the pistons are forced backward by a few ten thousandths of an inch, sending a hydraulic shockwave up the brake line. Weekend mechanics almost universally misdiagnose the resulting steering wheel shake and severe pedal pulsation as a warped rotor, when the metal is actually straight and simply suffers from a permanent pad imprint.
Tactics for Traffic Interruptions and the Highway Cool-Down Cruise
Because public roads are unpredictable, you need a defensive strategy in case a slow moving farm vehicle or an unexpected red traffic light appears ahead right as you finish your eighth aggressive deceleration. Always scan a quarter mile ahead and leave a generous buffer zone between your bumper and any distant traffic.
If a traffic light turns red in the distance, take your foot off the accelerator early and coast in gear at three to five miles per hour, timing your arrival so the light turns green before your tires stop rolling. If you are completely boxed in and forced to pause on flat pavement, shift an automatic transmission into neutral or depress the clutch on a manual transmission and take your foot completely off the brake pedal so the hot pads release their grip on the rotor face.
Once you clear the area, transition immediately into a steady highway cool down cruise at fifty to sixty miles per hour for ten to fifteen minutes. Just as human physiology requires a gradual, controlled transition after intense thermal stress, as explored in this analysis of contrasting hot and cold recovery approaches, superheated cast iron rotors need steady ambient airflow through the wheel wells to shed thermal energy evenly without warping or cracking. Avoid touching the brake pedal during this cruise, and when you finally pull into your driveway, chock the tires with a wooden block rather than setting the parking brake if your vehicle uses rear calipers or drum in hat shoes that are still warm.
How Pad Compounds and Old Rotors Change the Bedding Approach
While the progressive forty and sixty mile per hour sequence works for the vast majority of passenger cars, friction chemistry is not identical across every box at the auto parts counter. Adapting your thermal targets to match the specific chemical formulation of your pads and the condition of your rotors prevents accidental glazing or incomplete film transfer.
Ceramic and Organic Street Pads Versus Semi-Metallic Truck Compounds
Replacement brake pads generally fall into three primary chemical families: Non Asbestos Organic, Ceramic, and Semi Metallic. Everyday commuter sedans typically rely on organic or ceramic formulations engineered for quiet operation, low wheel dust, and dependable cold bite on frosty mornings. Because these street compounds utilize softer binding resins and lower thermal thresholds, they require a gentler hand during conditioning. Subjecting a budget organic pad to ten back to back threshold stops from seventy miles per hour will overheat the binder and cook the surface before a uniform film can adhere.
Conversely, heavy duty semi metallic compounds contain high percentages of steel wool, copper, and iron powder sintered together to withstand the massive kinetic energy of heavy trucks and performance cars. If you are outfitting one of the best used trucks for towing a camper, those semi metallic truck pads demand substantially higher thermal energy to initiate molecular transfer onto the iron. If you baby a heavy duty towing or motorsport compound with gentle thirty mile per hour slowdowns, the rotor will never reach the six hundred degree threshold required to lay down an adherent layer, leaving the system stuck in noisy, abrasive friction mode.
Prepping Used Rotors and Navigating Factory Break-In Coatings
Before heading out to the road, always read the paper insert tucked inside your brake pad box. Several modern manufacturers apply a specialized factory break in coating or a rough abrasive strip across the face of the new pad, while others factory scorch the compound in industrial ovens to pre cure the resins. Abrasive coated pads are designed to mechanically scrub the rotor clean during the first few stops and often require shorter, milder heat cycles than uncoated raw pads.
You must also adjust your strategy if you are performing a budget pad slap by installing brand new pads onto old, unmachined rotors that still have plenty of thickness remaining. Used rotors feature microscopic concentric grooves worn into the iron by the previous set of pads. Until the flat face of your new pad physically wears down to match the contour of those existing grooves, it will only touch the high ridges of the rotor, preventing full thermal transfer across the entire swept area.
Furthermore, old rotors carry a baked on chemical transfer layer from the previous pad compound. If you switch from an old semi metallic pad to a new ceramic pad without prepping the iron, the two incompatible chemical films will repel each other and cause severe judder. Always scrub healthy used rotors thoroughly in a cross hatch pattern using 120 grit to 150 grit aluminum oxide sandpaper or a garnet abrasive pad, followed by a heavy rinse with brake parts cleaner, to strip away the old transfer ring before bolting on the new calipers. Allow a hundred miles of gentle suburban driving to seat the flat pads into the old rotor contours before executing your high heat transfer run.
| Pad Compound | Target Peak Temperature | Recommended Snub Intensity | Primary Bedding Risk |
|---|---|---|---|
| Non Asbestos Organic | 350 to 450 Degrees F | 4 to 5 Moderate Stops from 40 MPH | Rapid resin glazing from overheating |
| Ceramic Street | 500 to 650 Degrees F | 6 Firm Stops from 50 to 15 MPH | Uneven film deposit if underheated |
| Heavy Duty Semi Metallic | 650 to 850 Degrees F | 8 Aggressive Stops from 60 to 10 MPH | Pad imprinting during hot stationary stops |
| Motorsport Track Compound | 900 to 1200 Degrees F | 10 Threshold Stops from 70 to 15 MPH | Abrasive rotor wear if run cold on street |
Temperature ranges and deceleration profiles reflect standard friction material testing parameters from aftermarket brake manufacturers like Centric and Wilwood for street and performance passenger vehicles. Reviewing the thermal profiles in the table highlights why matching your driving intensity to your hardware chemistry is essential. While a daily commuter car with organic pads only needs moderate forty mile per hour slowdowns to reach its four hundred degree window, a heavy pickup running semi metallic hardware needs aggressive sixty mile per hour snubs to reach seven hundred degrees and bond properly.
Inspecting Your Rotors and Fixing Common Brake Bedding Mistakes
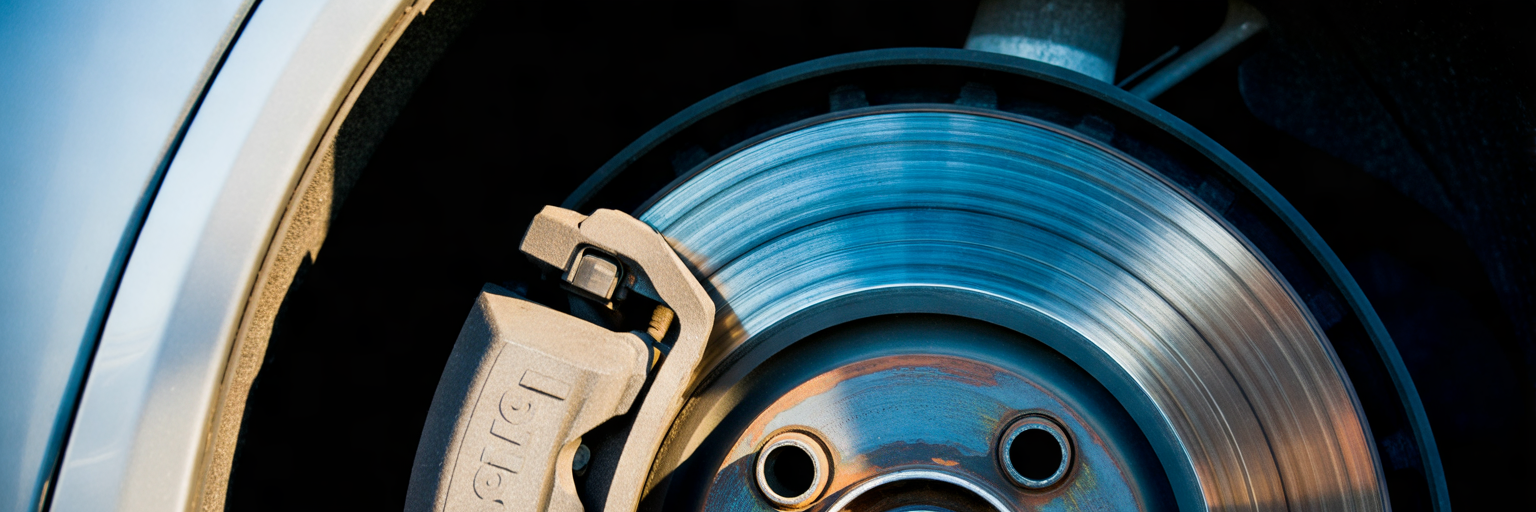
After your vehicle has sat parked in the driveway for a few hours and the calipers are cool to the touch, step outside with a flashlight in natural daylight to inspect the rotor faces through the wheel spokes. The visual appearance of the cast iron tells you immediately whether your transfer layer succeeded or requires corrective maintenance.
Reading the Rotor Face: Uniform Transfer Rings Versus Glazing and Smearing
A properly conditioned brake rotor displays a smooth, uniform bluish gray or charcoal tinted transfer ring spanning the entire swept surface from the inner hat to the outer edge. When you run a fingernail across the cold metal, it should feel satin smooth, and the brake pedal will deliver silent, progressive deceleration from the very top of its travel.
If something went wrong during the heat cycle, the rotor face will reveal one of three distinct failure modes. Surface smearing appears as dark, blotchy streaks, uneven clouds of black deposit, or a literal outline of the brake pad stamped onto the iron, accompanied by a rhythmic thumping underfoot during highway braking. Brake glazing occurs when uncured pads are overheated too rapidly without an initial warm up phase, crystallizing the phenolic resin into a glassy, mirror bright sheen on both the pad and rotor that squeals loudly and feels wooden underfoot. In extreme cases of rapid overheating, you may even spot pad chunking, where boiled resins cause the outer edges of the friction block to crack and crumble away from the steel backing plate.
Actionable Remedies for Botched Break-In Cycles
Discovering blotches or squealing brakes after your first drive does not mean you need to throw away your new parts. If you notice mild surface smearing or faint dark streaks from a brief pause in traffic, you can often scrub the uneven deposit away on the road. Once the system has cooled completely, take the car back out and execute a second, slightly more aggressive set of sixty to ten mile per hour snubs. The intense abrasive shear of a hard deceleration will often scrape away a thin high spot and lay down a fresh, uniform film during the subsequent cool down cruise.
When rapid overheating has crystallized the friction compound into a mirror finish, executing a reliable glazed brake pads fix requires pulling the wheels back off in the garage. Unbolt the caliper, remove the pads, and lay a full sheet of coarse 80 grit emery cloth or aluminum oxide sandpaper flat on a smooth concrete garage floor or steel workbench. Place the friction face of the pad flat onto the sandpaper and push it back and forth in figure eight motions until the shiny, glassy top layer is ground away and fresh, dull matte compound is exposed.
While the caliper is off, use 120 grit sandpaper or a conditioning disc to scrub the mirror sheen off both sides of the rotor in a cross hatch pattern, wash the metal thoroughly with brake cleaner, and reassemble the hardware for a proper two stage break in run. If severe pad imprinting has persisted for weeks and created deep physical thickness variation that sanding cannot remove, remove the rotors and take them to a local auto parts store or machine shop to have a few thousandths of an inch skimmed off on a precision brake lathe.
| Visual Rotor Appearance | Physical Braking Symptom | Root Cause During Bedding | Corrective DIY Remedy |
|---|---|---|---|
| Uniform bluish gray ring | Firm linear pedal and silent stops | Proper thermal ramp and cool down | No action needed system is ready |
| Mirror bright glassy sheen | High pitched squeal and weak bite | Rapid overheating without warm up | Sand pad face flat on 80 grit paper |
| Dark blotches or pad outline | Steering shake and pedal pulsation | Holding brake pedal down at a stop | Scrub rotor with garnet pad and rebed |
| Uncoated shiny silver streaks | Reduced stopping power and pulling | Incompatible old compound or oil residue | Degrease rotor sand crosshatch and repeat |
Diagnostic criteria and remediation steps are based on technical service bulletins from automotive brake engineering suppliers regarding friction material transfer defects. Use these quick reference remedies to address specific visual defects on your rotors:
- Faint Dark Streaks: Let the system cool completely, then perform 6 aggressive 60 to 10 mph snubs to shear off minor surface deposits.
- Glazed Pad Surfaces: Remove the pads and sand them flat against 80 grit paper on a flat workbench until the glassy crust disappears.
- Contaminated Rotor Rings: Strip residual oils with aerosol brake cleaner, sand the iron in a cross hatch pattern with 120 grit paper, and rewash.
- Severe Pedal Judder: Have the rotors resurfaced on a professional brake lathe if localized cementite hard spots resist hand sanding.
Mastering the thermal conditioning and diagnostic side of brake work separates rushed parts swapping from craftsmanship that protects your family on the highway. Just as following our preventative maintenance advice on keeping your car engine running for years preserves powertrain longevity, taking thirty minutes to properly condition your friction surfaces guarantees crisp, silent, and dependable stopping power for thousands of miles to come.