Shifting into reverse only to be met with a black screen is more than just an inconvenience. Since 2018, backup cameras have been a federally mandated safety feature on all new vehicles in the United States, and for good reason. When your backup camera is not working, it compromises your awareness. The good news is that the cause is often a simple issue you can diagnose yourself before heading to a mechanic.
Start with the Simplest Fix: The Camera Lens
Before you start worrying about complex electrical faults, the most common culprit is often the most overlooked: the camera lens itself. It lives a tough life, exposed to all the dirt, grime, and weather your car endures. A simple physical check can often solve the problem in minutes, without any tools required.
Initial Visual Inspection for Obstructions
Your first step should always be a thorough cleaning. Over time, a film of road dust, mud, or pollen can build up, causing a blurry or completely obscured image. In the Midwest and Northeast, road salt during winter is a major offender, leaving a crystalline crust that blocks the view. In drier regions like the Southwest, fine dust can be just as effective at blinding the camera.
To clean it properly, use a soft microfiber cloth to avoid scratching the delicate lens coating. If water alone doesn’t do the trick, a bit of diluted car soap on the cloth will work. Avoid using harsh chemicals like glass cleaner or all-purpose household sprays, as their ammonia content can permanently damage the anti-glare coating on the lens, making future visibility even worse.
Identifying Physical Damage to the Camera Housing
While you’re cleaning, take a close look at the camera and its housing. Even a minor tap from a shopping cart or a stray basketball can crack the lens or knock the unit out of alignment. High-pressure car washes can sometimes force the housing askew or damage its seals. Look for visible cracks, chips, or any signs that the camera is no longer sitting flush with the vehicle’s body.
The location of the camera varies by vehicle type. On a sedan like a Honda Accord, it’s often integrated into the trunk handle or lip. For an SUV like a Ford Explorer, you’ll typically find it just above the license plate. On a pickup truck like the Ford F-150, it’s usually mounted on the tailgate handle. Knowing where to look helps you quickly assess for any obvious physical damage.
Understanding Moisture Intrusion and Fogging
If your screen is foggy or looks like you’re viewing the world through a steamy bathroom mirror, moisture has likely gotten inside the camera unit. This happens when the weather seal around the lens fails, allowing condensation to form on the inside. This can cause an intermittent backup camera signal, where the picture is clear on dry days but foggy or completely gone after rain or a car wash.
You can perform a quick diagnostic test to confirm this. Using a hairdryer on a low heat setting, gently warm the camera from a safe distance for a minute or two. If the fogging clears up, you’ve confirmed that moisture is the problem. However, this is not a permanent fix. The fog will return as soon as the temperature changes. A foggy lens indicates a compromised seal, and the only long-term solution is to replace the camera unit to prevent a future black screen backup camera issue and protect the internal electronics from corrosion.
Checking the System’s Power Supply
If cleaning the lens did nothing, the next logical step is to see if the camera system is receiving power. A black screen backup camera is a classic symptom of a power delivery problem. Fortunately, there are a few simple checks you can perform to narrow down the cause without needing specialized tools.
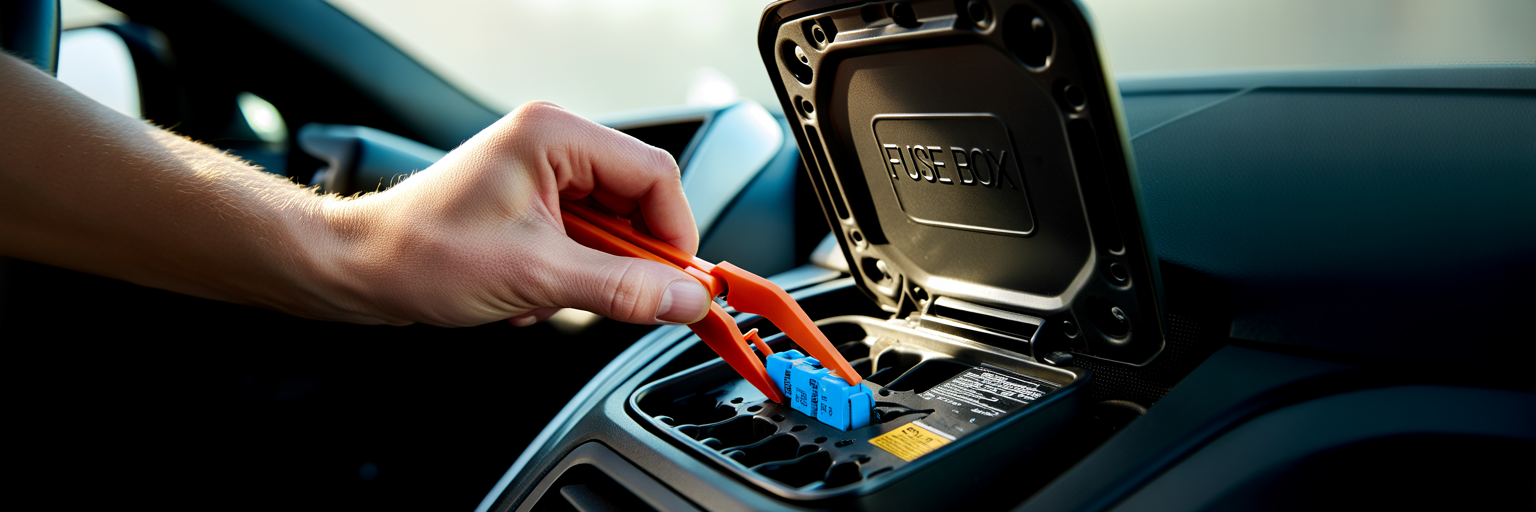
Locating and Inspecting the Correct Fuse
The fuse is a tiny, inexpensive component designed to protect your car’s electronics from power surges. If it blows, it cuts power to the circuit. Most cars have at least two fuse boxes: one under the hood and another inside the cabin, often in the driver’s side footwell or behind the glove box. Your owner’s manual is your best friend here; it will have a diagram showing you exactly where the fuse boxes are and which fuse corresponds to the backup camera or infotainment system.
Once you locate the correct fuse, pull it out with a fuse puller (often included in the fuse box) or a pair of needle-nose pliers. Hold it up to the light. A good fuse has an intact metal strip running through it. A blown fuse will have a broken or melted strip. If it’s blown, you must replace it with a new fuse of the exact same amperage rating, which is printed on the top. Using a higher-rated fuse is a serious fire hazard, as it allows too much current through the circuit, potentially melting wires.
The Reverse Light Circuit Connection
Here is a simple yet powerful diagnostic test. Many factory-installed backup cameras are wired into the same circuit as the reverse lights. The circuit provides the 12-volt power needed for the camera to operate and also sends the signal to the infotainment screen to switch to the camera view. With your vehicle safely parked and the parking brake fully engaged, turn the ignition to the “on” position (without starting the engine) and shift into reverse. Ask a friend to stand behind the car and check if the white reverse lights turn on.
If the reverse lights do not illuminate, you’ve likely found your problem. The issue isn’t with the camera itself but with the reverse light circuit. This could be due to the fuse you just checked, a faulty reverse light switch, or a wiring issue. If the lights do work, it means the circuit is getting power, and the problem lies elsewhere, specifically with the camera’s wiring or the unit itself.
Understanding the Role of a Poor Ground Connection
Every electrical circuit needs a complete loop to function. In a car, power flows from the battery through a component and then returns to the battery through the vehicle’s metal frame, which acts as the “ground.” Think of it like a light switch; it needs both a hot wire and a neutral wire to work. If the ground wire connecting the camera to the chassis becomes loose or corroded, the circuit is incomplete.
A poor ground is a common cause of strange electrical behavior, including a flickering picture, static lines, or an intermittent signal that cuts in and out. While finding the exact ground point for the camera can be difficult without a wiring diagram, understanding the concept helps explain why a seemingly random issue might be occurring. The connection can be affected by vibrations, moisture, and time, leading to an unreliable signal.
Investigating Wiring Harnesses and Connectors
After confirming the camera is clean and the system has power, the next area to investigate is the physical wiring. Wires and connectors are susceptible to wear and tear, especially in areas that move frequently. This is the most common reason for an intermittent backup camera signal, where the display works one moment and fails the next.
The High-Stress Point: Trunk and Tailgate Hinges
On sedans, SUVs, and minivans, the wiring for the backup camera runs from the vehicle’s body into the trunk lid or tailgate. This wiring is bundled inside a flexible rubber boot or conduit to protect it. However, after years of opening and closing the trunk or tailgate, the wires inside this boot can fatigue, chafe, and eventually break. The outer boot may look perfectly fine, but the delicate wires inside can be severed.
To inspect this, carefully peel back the rubber boot where it meets the car’s body and the tailgate. You don’t need to remove it completely. Gently pull the wiring out slightly and look for any signs of damage: cracked insulation, exposed copper strands, or a completely broken wire. If you see a damaged wire, you have almost certainly found your culprit. Wiggling this harness while the camera is supposed to be on is a great way to see if the picture flickers, confirming a break.
Checking for Loose or Corroded Connectors
The camera signal travels through several connection points on its way to your dashboard screen, and any one of them can be a point of failure. The two most accessible connectors are the one plugged directly into the back of the camera module and the video input on the back of your infotainment head unit. Accessing the camera’s plug may require removing an interior trim panel on the trunk or tailgate.
Once you access a connector, unplug it and inspect the pins. Look for a white or greenish crust, which is a sign of corrosion from moisture. If you see any, you can clean it carefully with a small brush and a dedicated electrical contact cleaner spray. When you plug it back in, make sure you push it firmly until you hear or feel a “click,” which confirms it is securely seated. A loose connection can easily cause a “no signal on backup camera” message.
A Note on Safe Electrical Diagnosis
When you start unplugging components like the head unit, it’s wise to take a simple precaution. Before disconnecting any major electrical plugs, disconnect the negative terminal of your car’s battery. This prevents the risk of an accidental short circuit, which could fry sensitive and expensive electronics. This step is a cornerstone of responsible car care, much like the practices that help you keep your car’s engine running for years. Knowing your limits is important; focus on visual and tactile checks you are comfortable with. If you’re not confident, it’s better to stop and seek professional help.
Software Glitches and Head Unit Faults
Modern cars are essentially computers on wheels, and their infotainment systems run on complex software. Just like your phone or laptop, this software can sometimes glitch, freeze, or develop bugs that affect performance. If all the physical checks haven’t revealed an issue, the problem might be digital.
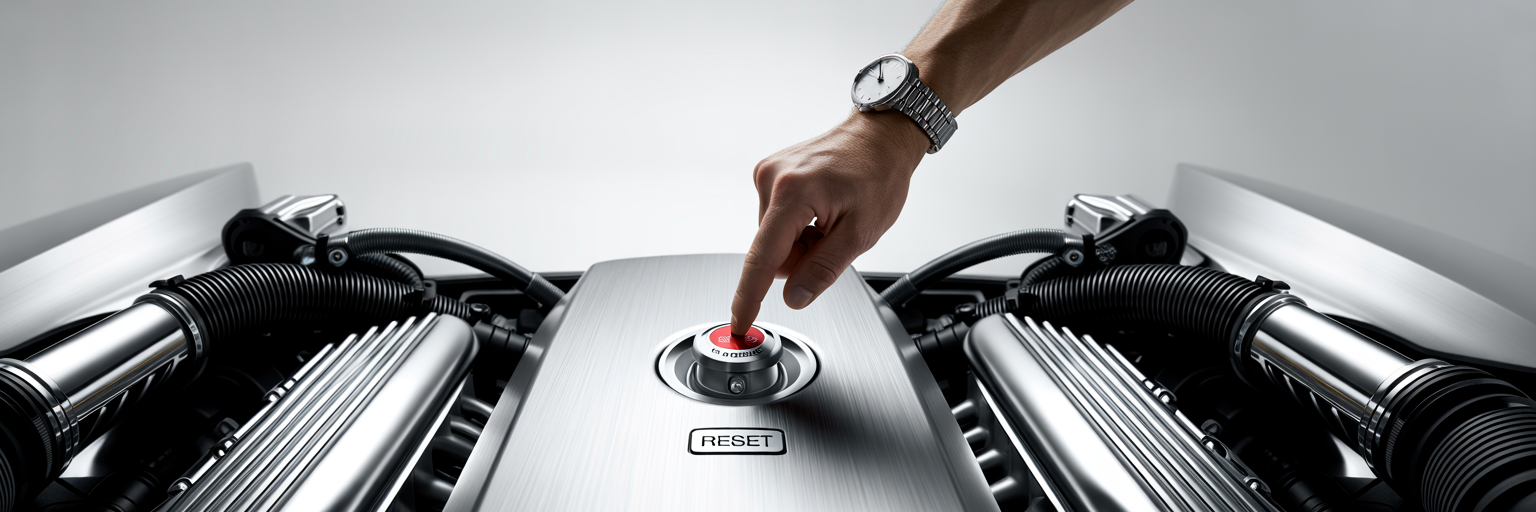
The ‘Turn It Off and On Again’ Approach
The oldest trick in the IT handbook often works for cars, too. A simple power cycle can clear temporary glitches in the system’s memory. The first method is a full vehicle reset: turn the car off, remove the key from the ignition, open and then close the driver’s door (this signals most cars to fully shut down accessory power), and wait for five minutes before restarting. This allows all the electronic modules to completely power down and reset.
The second method is an infotainment “soft reset.” This reboots the head unit without affecting the rest of the car. For many vehicles, you can do this by pressing and holding the power or volume knob for about 10 to 20 seconds until the screen goes black and the manufacturer’s logo reappears. The exact procedure varies, so consult your owner’s manual to find the specific steps for your car.
Distinguishing a Camera Fault from a Display Fault
A black screen doesn’t automatically mean the camera is broken. You need to determine if the problem is with the camera’s input or the display itself. Here’s a simple logic test: if your radio, navigation, Bluetooth, and settings menus all appear on the screen and function perfectly, but the display only goes black or shows a “no signal on backup camera” message when you shift into reverse, then the display unit is likely fine. The fault is almost certainly with the camera, its wiring, or the signal it’s supposed to be sending.
Conversely, if the entire screen is black all the time, is unresponsive to touch, or shows distorted graphics on all menus, the problem is likely with the head unit itself. In this case, the backup camera is probably working, but the screen that’s supposed to show its image has failed.
Firmware Updates and System Incompatibility
Sometimes, a backup camera issue is a known bug in the infotainment system’s software. Manufacturers and dealerships occasionally release firmware updates to fix these kinds of problems, improve performance, and patch security holes. The reliability of these complex systems depends on a solid technological framework. As noted in a strategic guide to scalable franchise IT infrastructure, the principles of robust design are universal for preventing glitches in any complex tech system, including automotive electronics. If you suspect a software bug, you can check with your local dealership to see if any service bulletins or updates are available for your vehicle’s model year.
This is also a common issue with aftermarket components. If you’ve recently installed a new head unit or a non-OEM camera, they may not be fully compatible with each other, leading to a black screen or other malfunctions. Ensure that any aftermarket parts are specifically listed as compatible with your vehicle’s make and model.
Advanced Diagnostics and When to Call a Professional
If you’ve worked through the basic checks and still have a backup camera not working, the problem likely requires more advanced tools and knowledge. This section is for the more confident DIYer and also serves as a guide for when it’s time to hand the keys to a professional.
Systematically Isolating the Faulty Component
By now, you’ve followed a logical process. You’ve confirmed the lens is clean, the fuse is good, the reverse lights work, and a system reset did nothing. This process of elimination tells you the fault is almost certainly located in one of three areas: the camera unit itself has failed, there is a break in the wiring harness you couldn’t see, or the head unit has a specific fault with its video input. To help you pinpoint the issue, this troubleshooting matrix matches common symptoms to their most probable causes.
| Symptom | Most Likely Cause(s) | First Action to Take | Next Steps if Unresolved |
|---|---|---|---|
| Black Screen (No Signal) | 1. Blown Fuse 2. No power from reverse circuit 3. Broken wire in harness |
Check fuse for backup camera/infotainment system. | Verify reverse lights work. Inspect trunk/tailgate wiring harness. |
| Intermittent or Flickering Picture | 1. Damaged wire in hinge area 2. Loose connector 3. Poor ground connection |
Gently move trunk/tailgate while camera is on to see if picture cuts out. | Inspect wiring harness in rubber boot. Check connectors at camera and head unit. |
| Blurry, Foggy, or Distorted Image | 1. Dirty/obstructed lens 2. Moisture inside camera 3. Physical damage to lens |
Clean the camera lens thoroughly with a microfiber cloth. | Inspect for cracks or internal fogging. The camera unit may need replacement. |
| Screen Works, But Not for Camera | 1. Software glitch 2. Faulty camera unit 3. Broken video signal wire |
Perform a soft reset of the infotainment system. | Check wiring harness for damage. Test camera power (advanced). |
| Entire Infotainment Screen is Black | 1. Head unit fuse blown 2. Major software failure 3. Internal head unit fault |
Check main infotainment/display fuse. Perform a hard reset (if comfortable). | This likely requires professional diagnosis of the head unit itself. |
Introduction to Multimeter Testing (with Caution)
For those comfortable with electronics, a multimeter is the next tool in the diagnostic process. It can confirm if the camera is receiving 12-volt DC power and check for breaks in a wire using the continuity setting. However, using a multimeter incorrectly can cause further damage to your car’s electronics. This is a tool for users who are already familiar with its operation and safety protocols. For a safe and comprehensive overview, guides on how to test automotive electronics from publications like Edmunds are an excellent starting point.
Knowing Your Limits: When to Visit a Mechanic
There is no shame in knowing when to call a professional. Deciding how to fix backup camera issues often comes down to time and tools. Auto electricians have access to vehicle-specific wiring diagrams and specialized equipment that can trace a fault in minutes, a task that might take you hours. Making a smart choice to visit a mechanic can save you time, frustration, and prevent costly mistakes. It’s the same logic that applies to choosing a vehicle in the first place; picking one of the best used luxury SUVs that won’t destroy you on repairs is about avoiding future headaches.
Understanding Repair Costs and Options
If you do need a professional repair, it helps to have an idea of potential costs. A simple wiring repair in the trunk hinge area might cost between $150 and $300. Replacing a failed OEM camera unit can be more expensive, often running from $400 to over $800, depending on the make and model. A faulty head unit is typically the most expensive repair, potentially costing $1,000 or more. For older vehicles out of warranty, a quality aftermarket camera can often be installed for a fraction of the cost of an OEM replacement, offering a budget-friendly solution.
A Final Checklist for Restoring Your Rear View
Working through a car problem can feel daunting, but by following a methodical process, you can successfully diagnose and often fix your backup camera. This final section summarizes the key steps and offers advice to keep your camera working for years to come.
Recap of the Troubleshooting Flow
This backup camera troubleshooting guide is designed to be followed in order, from easiest to most complex. If you’re ever faced with this issue again, here is the flow to follow:
- Clean and inspect the camera lens and housing for dirt or damage.
- Check the appropriate fuse and confirm the vehicle’s reverse lights are working.
- Carefully inspect the wiring harness inside the rubber boot at the trunk or tailgate hinge.
- Check for loose or corroded connectors at both the camera and the back of the head unit.
- Perform a soft reset of the infotainment system and a full vehicle power cycle.
Preventative Maintenance for Your Backup Camera
A few simple habits can help prevent future problems. Make it a routine to wipe the camera lens with a microfiber cloth whenever you stop for gas. When loading large items into your trunk or cargo area, be mindful of the wiring harness to avoid pinching or straining it. On older vehicles, it’s a good idea to periodically inspect the visible parts of the harness for signs of wear and tear, especially before winter sets in.
The Importance of a Functional Camera
Restoring your backup camera’s function is about more than just bringing back a convenience feature. It’s an essential part of your vehicle’s safety system, designed to give you a clear view of the area behind you and help prevent tragic back-over accidents. Taking the time to diagnose and repair it ensures your car remains as safe as it was designed to be.
We hope this guide has empowered you to tackle your backup camera issue. For more guides and insights into vehicle maintenance and repair, explore our other informative articles.