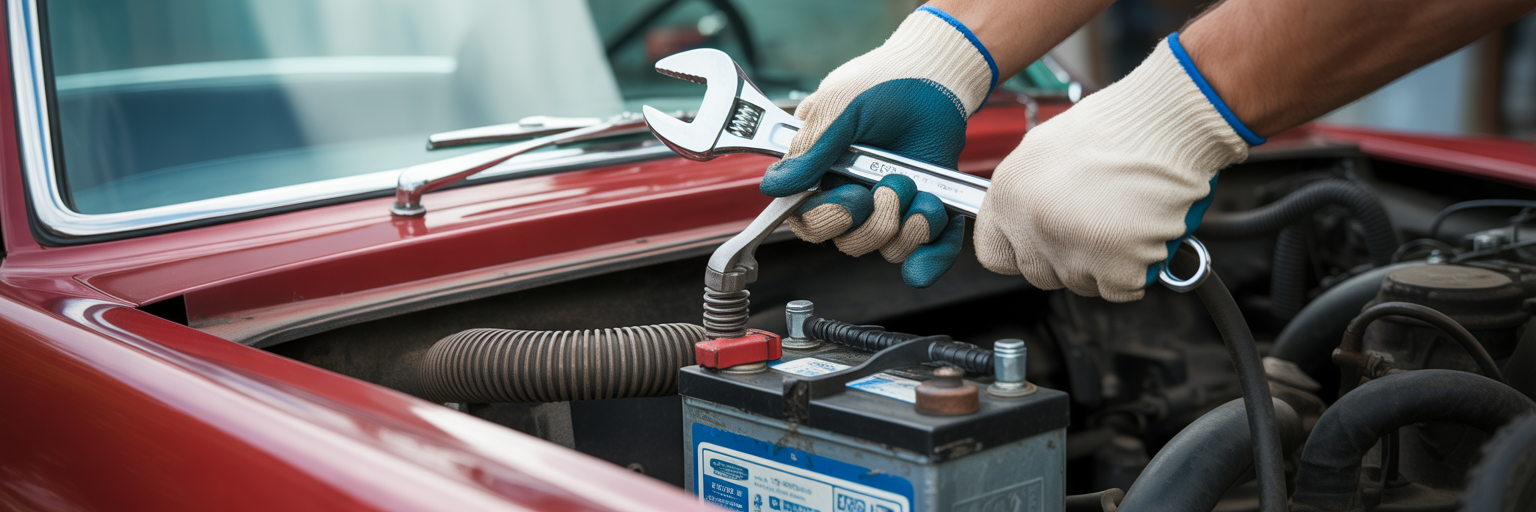
That classic, pop-out cigarette lighter in an older car is more than just a power port. It’s a satisfyingly mechanical piece of automotive history. When it stops working, it can be frustrating, but learning how to fix my cars cigarette lighter is often a surprisingly manageable DIY project. Before you can diagnose the problem, it helps to understand how these vintage components were designed to function.
Understanding Your Car’s Classic Cigarette Lighter
The reason a car cigarette lighter not working can be tricky to diagnose is that its original design was for a single, high-heat purpose, not for powering a dozen different gadgets. This makes its failure points different from the 12V power outlets in modern vehicles. Understanding these differences is the first step toward a successful repair.
Differentiating Classic Lighters from Modern 12V Outlets
A modern 12V outlet is just a simple socket. You plug something in, and it gets power. A classic cigarette lighter is a two-part system: the socket and the removable lighter element. The magic is in the socket, which contains a bimetallic strip. When you push the lighter in, this strip holds it against the power contacts. As the coil heats up, the strip also heats, bends, and releases the lighter with that signature “pop.” If your lighter gets stuck or won’t stay in, the problem is likely this mechanical strip, not just the electricity.
The Basic Electrical Circuit Explained
Don’t let the phrase old car electrical problems intimidate you. The circuit for a cigarette lighter is one of the simplest in your vehicle. Think of it like a household lamp: you have a power source (the car battery), a switch (the ignition), a safety device (the fuse), wiring to carry the current, and the device itself (the lighter socket). A failure in any one of these components will break the circuit and stop it from working. Most of the time, the problem is a simple and cheap fix, like a blown fuse or a loose wire.
How the Heating Element Works
The part that glows red is a small coil made of nichrome wire. This material has high electrical resistance, meaning it fights the flow of electricity. This fight generates intense heat very quickly. To get hot enough, it draws a significant amount of current for a few seconds. This high-current draw is precisely why a small piece of debris, like a coin, can cause a short circuit and instantly blow the fuse. The fuse is designed to be the weak link to protect the wiring from melting. Understanding these aging components and their quirks is part of the experience of owning a classic vehicle, much like knowing why some high-mileage cars age better than others.
Essential Safety Before You Touch Any Wires
Before you even think about grabbing a tool, we need to talk about safety. Working on a car’s electrical system, even a simple circuit, requires respect. A moment of carelessness can cause personal injury or expensive damage to your vehicle. These steps are not optional.
The Golden Rule: Disconnecting the Battery
This is the absolute first step. Always disconnect the negative (-) terminal of your car battery. Why? It completely removes the risk of an accidental short circuit. If a metal tool slips and touches the wrong two points in a live circuit, you could blow every fuse in the box, spark a fire, or even damage sensitive electronics like your car’s Engine Control Unit (ECU). Having to reset your radio stations and clock is a tiny inconvenience compared to the cost of a new ECU. Make this a non-negotiable habit for any electrical work.
Personal Protective Equipment (PPE) for Electrical Work
You don’t need a full bomb-disposal suit, but a couple of items are essential. Safety glasses are a must. You never know when a spark might fly or a brittle piece of old plastic might snap and head for your eye. Insulated gloves are also a good idea, providing an extra layer of protection against any stray voltage if you make a mistake. The goal is to finish the project with both you and your car in perfect working order.
Working in a Safe Environment
Make sure you’re working in a well-lit and, most importantly, dry area. Electricity and water are a dangerous combination. Also, resist the temptation to poke around inside the socket with a key or screwdriver to “see what’s in there.” This is the most common way people cause a short circuit. Taking care of your car is important, but so is taking care of yourself. After spending time in an awkward position under the dash, some people find that recovery practices, like those detailed by Personal Recovery Lab, can help ease the strain.
Gathering the Right Tools for the Repair
Having the right tools on hand before you start turns a frustrating job into a smooth one. You don’t need a professional mechanic’s entire toolbox, but a few specific items will make diagnosing and fixing your cigarette lighter much easier. Using the correct tool for each step prevents damage to your vehicle and makes the repair safer.
The key is not just having the tools, but understanding why each one is the best choice for the task. For example, using a screwdriver to pry off a dashboard panel on an older car is a recipe for cracked, brittle plastic. A cheap set of plastic trim tools will pop it off without leaving a mark. Similarly, a multimeter gives you precise information, while a simple test light gives you a quick yes-or-no answer about power. Both are useful for a 12v socket repair.
| Tool | Primary Use in This Repair | Pro Tip |
|---|---|---|
| Digital Multimeter | Testing for 12V power at the socket and checking fuse continuity. | Set to 20V DC (V⎓) for testing the socket. The continuity setting (looks like a sound wave) is for testing fuses out of the car. |
| 12V Test Light | A simpler alternative to a multimeter for quickly checking if power is reaching the socket. | Clip the ground lead to a bare metal part of the car’s frame and probe the center contact of the socket. If it lights up, you have power. |
| Plastic Trim Removal Kit | Safely prying off dashboard or console panels to access the back of the socket. | Plastic tools prevent scratching or cracking vintage interior plastics, which can be very brittle. |
| Needle-Nose Pliers | Removing fuses from the fuse box and manipulating small wires or connectors. | Some fuse boxes have a small plastic ‘fuse puller’ tool clipped inside; look for that first. |
| Electrical Contact Cleaner | Cleaning corrosion from inside the socket and on electrical connectors. | Spray it on and use a small brush to scrub away buildup. It evaporates without leaving a residue. |
| Non-Metallic Picks (Wood/Plastic) | Safely removing coins, dirt, or other debris from inside the socket. | Never use a metal tool for this, as it can easily cause a short circuit and blow the fuse. |
Initial Troubleshooting: The Visual Inspection

Before you break out the multimeter, start with the simplest checks. Often, the reason a car cigarette lighter is not working can be spotted with a good flashlight and a careful look. These issues are the easiest to fix and require no special tools, potentially solving your problem in minutes.
The Most Common Culprit: Debris in the Socket
Over the years, all sorts of things can fall into a cigarette lighter socket: dirt, food crumbs, and the number one offender, coins. A penny is almost the perfect size to wedge itself inside and bridge the positive contact at the bottom with the negative contact on the side wall. This creates a direct short circuit, which will blow the fuse instantly. It’s the first thing you should always check for.
Safely Cleaning Out the Socket
If you spot debris, it’s crucial to remove it safely. Follow these steps to avoid causing a short circuit or further damage:
- Ensure the battery is disconnected. We can’t stress this enough. This step is mandatory before you put anything inside the socket.
- Use a flashlight to get a clear view of what you’re dealing with.
- Use non-metallic tools like a wooden skewer, a plastic toothpick, or plastic tweezers to gently pry out any debris.
- Once the large debris is gone, a blast of compressed air can clear out any remaining dust or dirt.
Checking the Lighter Element and for Corrosion
Pull out the removable lighter element and inspect it. The heating coil should be intact. If it’s broken, warped, or looks burnt, the element itself has failed and needs to be replaced. Next, look inside the socket for corrosion. This usually appears as a white, green, or bluish powdery substance. Corrosion acts as an insulator, preventing electricity from flowing properly. If you see significant buildup, it could be the source of your problem.
How to Diagnose and Replace a Blown Fuse
If your visual inspection didn’t reveal any obvious issues, the next logical step is to check the fuse. A fuse is a safety device designed to fail, protecting your car’s wiring from damage. This is one of the most common solutions when a car cigarette lighter not working, and it’s a simple fix.
Locating Your Car’s Fuse Box
Most cars have at least two fuse boxes: one in the engine bay and one inside the cabin. The fuse for the cigarette lighter is almost always in the interior fuse box, typically located under the dashboard on the driver’s side, in the glove box, or on the side of the dash. Your owner’s manual is the best resource for finding it. The inside of the fuse box lid usually has a diagram that maps out what each fuse controls. Look for a label like “CIG,” “LTR,” or “ACCESSORY.”
Identifying and Testing the Correct Fuse
Once you’ve identified the correct fuse, pull it out using the small plastic puller tool often found in the fuse box or with a pair of needle-nose pliers. There are two ways to check if it’s blown. The first is a visual inspection: hold the fuse up to the light and look at the small metal strip inside. If the strip is broken or has a dark smudge, the fuse is blown. For a more definitive test, you can use a multimeter set to the continuity setting. Touch a probe to each blade of the fuse. If the meter beeps, the fuse is good. If it’s silent, the fuse is bad. This is a key step in learning how to replace car fuse correctly.
Why Amperage Matters: The Key to a Safe Fix for My Car’s Cigarette Lighter
This is the most critical part of replacing a fuse. The replacement fuse must have the exact same amperage rating as the one you removed. The amp rating is printed on top of the fuse. If the old fuse was 15A, the new one must also be 15A. Using a higher-rated fuse, like a 20A or 30A, is a serious fire hazard. The fuse is designed to blow when the current exceeds a safe limit. A higher-rated fuse won’t blow, allowing the wires to overheat, melt their insulation, and potentially start a fire. If you replace the fuse and it blows again immediately, stop. As sources like Lifewire note, this indicates a persistent short circuit in the socket or wiring that needs to be investigated.
Using a Multimeter to Test the Electrical Circuit

If the fuse is good but the lighter still doesn’t work, it’s time to see if power is actually reaching the socket. This is where a digital multimeter becomes your best friend. It takes the guesswork out of electrical diagnostics and tells you exactly where the problem lies. This process is the core of any 12v socket repair.
Setting Up Your Multimeter for a 12V DC Test
Using a multimeter is easier than it looks. For this test, you’ll need to set it up to measure DC voltage. Plug the black probe into the “COM” (common or ground) port and the red probe into the “V” (voltage) port. Then, turn the dial to the 20V DC setting. This is usually marked as “V⎓” or “DCV.” The 20V setting is perfect because a car’s electrical system runs at around 12-14 volts.
Testing for Power at the Socket
For this test, you’ll need to reconnect the battery and turn the car’s ignition to the “Accessory” or “On” position. Be extremely careful not to let your probes touch each other or the side wall of the socket at the same time.
Gently touch the tip of the red probe to the small metal contact at the very bottom center of the socket. At the same time, touch the tip of the black probe to the inner metal side wall of the socket.
Look at the multimeter’s screen. If you see a reading close to 12V, it means the socket is receiving power. The problem is likely the lighter element itself or corrosion preventing a good connection. If the meter reads 0V or a very low number, it means no power is reaching the socket, and the issue is upstream in the wiring or a bad ground.
Checking for a Good Ground Connection
A bad ground is a common and frustrating electrical issue. The circuit needs a solid connection back to the car’s chassis to be complete. To test for a bad ground, keep the red probe on the center contact pin in the socket. Now, instead of touching the black probe to the socket wall, touch it to a known good ground, like an unpainted metal bolt head under the dash. If your multimeter now reads 12V, you’ve found your problem: the socket’s ground wire is broken or disconnected.
Replacing the Socket and Repairing Damaged Wires
If your tests point to a faulty socket or damaged wiring, you’ve reached the most hands-on part of the repair. This involves getting behind the dashboard or center console. While it may seem daunting, moving slowly and carefully makes it a very achievable task. The goal is a durable, long-lasting repair.
Gaining Access Behind the Dashboard
First, you need to remove the trim panel surrounding the cigarette lighter. This is where your plastic trim removal tools are essential. Gently pry around the edges of the panel until the clips release. Take your time to avoid cracking the old plastic. Once the panel is loose, you should be able to see the back of the cigarette lighter socket.
Inspecting Wires for Heat Damage or Breaks
With the socket exposed, carefully inspect the wires connected to it. Look for signs of overheating, such as melted plastic insulation, discoloration, or wires that feel brittle and cracked. Decades of heat cycles and vibration can take their toll. Also, gently tug on the connectors to ensure they are seated firmly. A loose connector is a common point of failure. The socket itself is usually held in place by either a threaded nut on the back or pressure clips on the side. Unscrew the nut or squeeze the clips to remove it.
Splicing in a New Socket Securely
If you’re installing a universal replacement socket, you’ll need to splice it into the existing wires. For a reliable connection, avoid the temptation to just twist the wires together and wrap them in electrical tape. Instead, use crimp-style butt connectors. Slide a piece of heat-shrink tubing over the wire, insert the stripped wire ends into the connector, and crimp it down firmly. Slide the heat-shrink tubing over the connector and use a heat gun to shrink it. This creates a secure, insulated, and moisture-proof connection that will last. This focus on doing the job right is a core principle of good maintenance, similar to the practices needed to keep your car’s engine running for years. Before you reassemble everything, reconnect the battery and test your new socket. This simple step can save you the headache of having to take the dash apart again.
When the Problem Points to a Bigger Issue
Most of the time, fixing a cigarette lighter is a straightforward DIY job. However, sometimes the symptom points to deeper old car electrical problems. Knowing when to stop and call a professional is just as important as knowing how to do the repair yourself. It’s about recognizing your limits and prioritizing safety.
Red Flags of a Deeper Electrical Fault
There are a few clear signs that your issue is more than just a bad socket or fuse. Be on the lookout for these red flags:
- Fuses that blow repeatedly: If you install a new, correctly rated fuse and it blows immediately or after a short time, you have a persistent short circuit somewhere in the system.
- A distinct smell of burning plastic: This is a serious warning sign that wires are overheating somewhere behind the dash. This is a fire risk and should be addressed immediately.
- Other dash lights or gauges flickering: If other electrical components act up when you try to use the lighter, it could indicate a broader problem with the car’s wiring harness or grounding points.
DIY vs. Professional Repair Costs
The cost difference is significant. A DIY fix, including a new socket, fuses, and connectors, will likely cost you less than $30. If you take your car to a professional auto electrician, the diagnosis and repair could range from $100 to $250 or more, depending on the complexity and labor time. You’re not just paying for the part; you’re paying for their diagnostic expertise, specialized tools, and the guarantee of a safe repair.
Making the Call: When to See a Mechanic
If you encounter any of the red flags mentioned above, or if you’ve followed all the steps and still can’t find the problem, it’s time to consult a professional. There is no shame in it. Complex electrical diagnostics can be tricky even for experienced mechanics. This is especially true for vehicles with more advanced systems, where professional help is often the wisest choice, much like with some of the best used luxury SUVs that won’t destroy you on repairs.
Frequently Asked Questions About Cigarette Lighter Repair
Here are quick answers to some of the most common questions that come up during this repair.
Can I just keep replacing the fuse?
No. A fuse is a safety device, and a blown fuse is a symptom of an underlying problem. Continuously replacing it without finding the root cause is not a fix and can be dangerous, as it ignores the short circuit that’s causing it to blow.
Why does my cigarette lighter keep blowing fuses?
The most common reasons are debris (like a coin) in the socket creating a short, a faulty device being plugged into it that draws too much power, or a short in the wiring behind the socket. As highlighted in a Lifewire analysis, these are the primary culprits to investigate when a 12V socket repeatedly fails.
Is it safe to work on my car’s electrical system myself?
For simple tasks like checking fuses or visually inspecting a socket, yes, as long as you disconnect the battery first. When it comes to testing live circuits or splicing wires, you should only proceed if you are comfortable and understand the risks. If you have any doubt, consult a professional.
Can I convert my old lighter socket to a modern USB charging port?
Absolutely. This is a very popular and easy upgrade. Many companies sell direct-fit USB port kits that are designed to replace the original cigarette lighter assembly, often using the same wiring and fitting perfectly into the existing dashboard hole.