
High-performance engines generate extreme thermal loads and mechanical stress that can silently degrade internal components long before the odometer hits 50,000 miles. Knowing how to inspect a used sports car before signing a bill of sale separates a thrilling weekend driver from an immediate financial disaster.
How to Inspect a Used Sports Car Paperwork and History
Evaluating a daily commuter usually requires little more than verifying oil change stickers and checking tread depth. That baseline approach fails completely when buying a used sports car. High-revving powerplants, stiffened chassis setups, and oversized multi-piston braking systems operate closer to their mechanical limits, meaning they experience accelerated wear even during spirited weekend canyon runs. Learning how to inspect a used sports car properly starts at the kitchen table with a forensic review of the vehicle’s paper trail before you ever turn a wrench or start the engine.
Auditing Service Invoices Versus Dealer Stamps
Sellers frequently wave a stamped maintenance booklet as proof of pampered ownership. While dealer stamps confirm the car visited a service bay, they rarely tell you what work actually occurred. You need to audit the physical, dated service invoices complete with part numbers and fluid specifications. High-performance machinery relies on strict replacement intervals for high-stress fluids and consumables that standard sedans rarely worry about.
Look closely for documented flushes of the limited-slip differential fluid and manual or dual-clutch transmission oil, which degrade rapidly under high torque and heat. Verify that the brake system received regular high-temperature DOT 4 brake fluid flushes every two years, as old moisture-laden fluid boils under heavy braking and corrodes internal ABS valves. Furthermore, check the invoices for spark plug and ignition coil replacements. Forced-induction and high-compression engines chew through spark plug electrodes much faster than economy blocks, and neglected ignition components often mask deeper misfire issues.
Cross-Referencing VIN Reports Across State Lines
Once you organize the physical binder of receipts chronologically, place them side by side with a digital VIN history report. As we detail in our breakdown on how vehicle history reports assist buyers, cross-referencing these two sources exposes the narrative gaps a dishonest seller hopes you will miss. Compare the dates and mileage recorded on shop invoices against state registration renewals to ensure the numbers climb steadily. If you notice a sudden three-year silence in the paperwork or conflicting odometer readings between states, review our guide on spotting odometer rollback in history reports to see if someone installed a mileage blocker or swapped instrument clusters.
Pay attention to title transfers across state lines, particularly when a car moves from a strict emissions state like California to a jurisdiction without annual testing. A sudden sale following a failed smog check often points to removed catalytic converters or a tampered engine control unit. Similarly, remember that minor track incidents or single-car street collisions paid out of pocket will never appear on a digital report, though body shop invoices for alignment shims or bumper brackets tucked into the glovebox might give them away. If the seller claims the dog ate the receipts on a modified or high-horsepower platform, treat that absence as an immediate cue to walk away. If the car is completely stock with verifiable dealer history but lacks recent fluid documentation, use the missing paperwork as financial leverage to deduct the cost of a full baseline fluid service from your offer.
Spotting Signs of Previous Track Use and Hard Driving
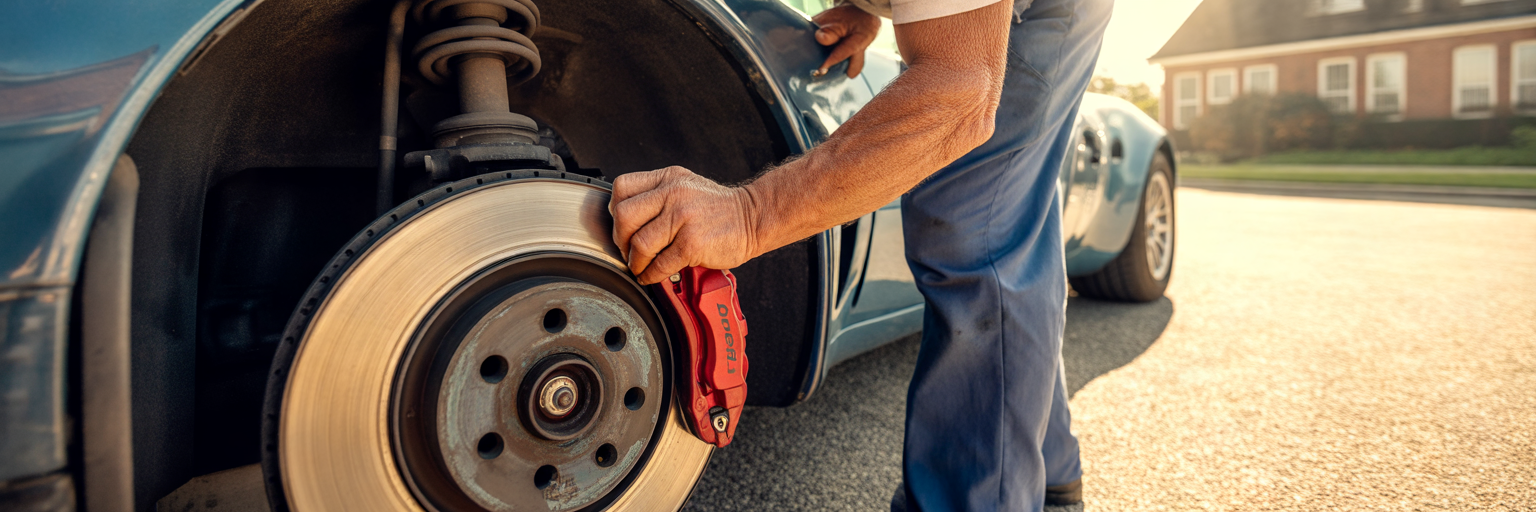
A clean stack of service records proves a car received maintenance, yet it rarely reveals how hard the previous owner pushed the chassis between shop visits. Many buyers panic at the mere mention of a racetrack, assuming any circuit time ruins a vehicle. In reality, occasional high-performance driver education events are not an automatic dealbreaker if the owner performed obsessive post-event fluid changes and cooling checks. The real financial trap is concealed track abuse, where a seller strips off racing parts and passes off an exhausted track rat as a gentle Sunday cruiser. Knowing how to spot track car wear protects you from buying a fatigued chassis at retail prices.
Exterior and Wheel Well Clues of Circuit Driving
Even the most thorough detailer misses the microscopic scars left by triple-digit speeds on an asphalt circuit. Start your exterior walkaround at the nose of the car, bringing your eyes level with the front bumper cover, lower splitter, and headlights. Years of highway commuting leave isolated stone chips, whereas high-speed drafting inches behind sticky racing tires produces a uniform, sandblasted peppering across the paint and a fine pitting across the windshield glass that catches the afternoon sun.
Next, reach your hand inside the rear wheel well liners and run your fingers along the upper suspension control arms and inner fender lips. On a racetrack, hot slick and semi-slick tires shed sticky chunks of rubber off the racing line. Finding melted black rubber marbles stuck to the rear suspension links or tucked behind the splash guards confirms the car spent time at the limit. Peer through the wheel spokes at the brake calipers as well. Repeated extreme thermal cycles bake factory caliper paint, turning bright red finishes into a dull maroon or dark brown, while radiant rotor heat turns silver zinc-plated hardware a golden straw color and cracks the rubber dust boots surrounding the caliper pistons.
Cabin Modifications and Tire Wear Patterns
Enthusiasts pour their personal identity into their builds, and the modifications they choose often leave permanent marks on the vehicle, much like how people commemorate major life events and personalize memorial tattoos for milestones. When an owner returns a track-prepped cabin back to stock before listing it for sale, the interior trim still holds the memory of that equipment. Pull back the floor mats and examine the carpet behind the front seats and along the rear shock towers in the trunk. Look for small, neatly cut slits in the fabric or plugged bolt holes in the sheet metal where a four-point roll bar, racing harness eye-bolts, or an aluminum fire extinguisher bracket once sat.
Return outside and inspect the tire tread across all four corners. Aggressive cornering rolls the tire onto its outer edge, creating feathered outer shoulders, torn tread blocks known as chunking, and wear that extends down onto the sidewall indicator triangles. Do not let deep tread grooves fool you on a low-mileage tire. Press your fingernail firmly into the rubber compound. Tires subjected to repeated track heat cycles lose their chemical oils and cure into a rock-hard, bluish-gray surface that offers zero grip on cold pavement. If you uncover these track clues after the seller promised the car never saw redline, confront them calmly with your findings. You can either walk away from the dishonesty or demand a steep discount to cover fresh wheel bearings, brake rebuilds, and fresh rubber.
Essential Tools and Cold Start Engine Health Checks
Once the exterior and cabin pass muster, your attention must shift to the mechanical heart of the vehicle. A comprehensive used sports car checklist relies on objective data and sensory observation rather than the seller’s assurances. To properly check engine health used car buyers need to arrive prepared with the right diagnostic gear and a strict protocol for the initial ignition sequence.
The Portable Pre-Purchase Inspection Tool Kit
Showing up to inspect a performance car with nothing but your hands leaves you blind to hidden electronics and chassis filler. Pack a dedicated canvas bag with these portable diagnostic tools before heading to the seller’s driveway:
- A bidirectional OBD2 scanner capable of reading manufacturer-specific fault codes, live fuel trims, and emissions readiness monitors
- A high-lumen LED inspection flashlight with a slim profile to illuminate dark engine valleys and subframe mounts
- A digital paint depth gauge to measure clearcoat and primer thickness in microns across every metal body panel
- A telescoping mechanics mirror for peering behind cylinder heads, firewall heat shields, and lower radiator hoses
- A mechanical or digital tire tread depth gauge to measure uneven wear across the inner, middle, and outer tread blocks
- Several pairs of heavy-duty nitrile gloves so you can touch greasy suspension links and undertrays without hesitation
When you book the appointment, instruct the seller to leave the car completely unstarted for at least twelve hours prior to your arrival. A warm engine masks a multitude of expensive sins, as thermal expansion closes up internal clearances and thins out sluggish fluids. Before the seller puts the key in the ignition, pop the hood and carefully touch the upper radiator hose or hold the back of your hand near the exhaust manifold heat shield. If the rubber hose feels warm or radiant heat rises from the block, the seller warmed the car up to hide a rough cold start.
Acoustic Diagnostics and Exhaust Smoke Decoding
The first thirty seconds of a dead-cold start tell you more about internal engine wear than an hour of highway driving. Stand in front of the open hood while the seller cranks the starter. Listen closely for how fast the starter motor spins the flywheel and how quickly oil pressure builds to quiet the valvetrain. A sharp, metallic rattling sound during the first two or three seconds often indicates timing chain slap against worn or broken plastic guides due to a leaking hydraulic chain tensioner. On platforms equipped with variable valve timing, such as BMW VANOS units or Ford modular cam phasers, listen for a distinct marbles-in-a-tin-can clatter from the top front of the engine. You should also listen for a hollow, rhythmic knocking from the middle of the block known as piston slap, which is common on engines with forged pistons and usually quiets down as the aluminum expands. Catching these acoustic warnings early is fundamental to our philosophy on keeping a car engine running for years without suffering catastrophic failure.
Immediately after listening to the engine bay, walk to the rear bumper and watch the exhaust tailpipes. Cold condensation naturally produces a thin white water vapor that evaporates within a few feet of the bumper and smells clean. If you see a puff of dense, acrid blue smoke upon initial start that clears up after a minute, engine oil is seeping past hardened valve stem seals overnight or leaking through worn turbocharger shaft seals. Conversely, thick white clouds that hang heavy in the air and carry a sweet, syrupy odor mean pressurized coolant is breaching the head gasket and burning inside the combustion chamber. Wrap up your cold start check by plugging your OBD2 scanner into the dashboard port. Check the readiness monitors right away. If five or six emissions monitors show as incomplete or not ready, the seller recently disconnected the battery or cleared a pending check engine light just before you pulled into the driveway.
Under-Hood Inspection for Fluid Leaks and Cooling Systems
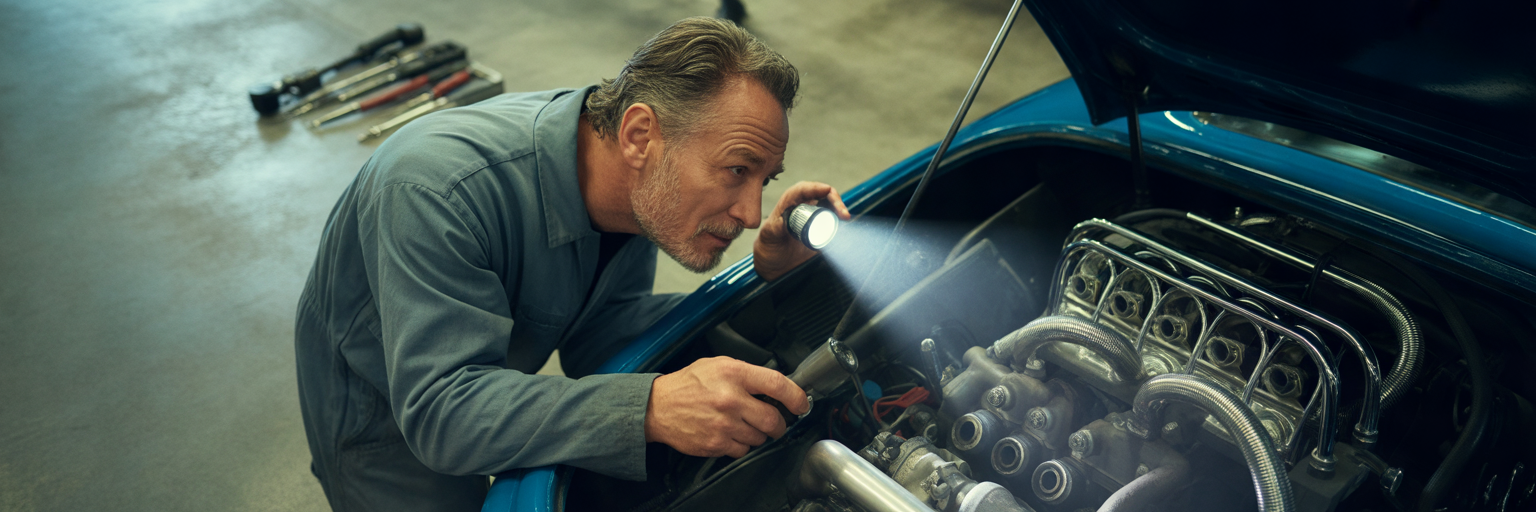
After the engine idles for a few minutes and you shut it off, the heat and brief pressurization make active fluid leaks much easier to spot. Modern sports cars cram massive engines into tight bays and cover everything with acoustic plastic shrouds. With the seller’s permission, pop off the cosmetic engine cover or use your flashlight and telescoping mirror to peer underneath the intake plenum where heat concentrates and rubber degrades.
Tracing Oil Seepage and Pressurized Cooling Faults
Gravity and airflow push leaking fluids downward and backward, so always start your visual sweep at the highest point of the engine block. Trace the entire perimeter of the valve cover gaskets, paying special attention to the back corners near the firewall where oil pools and drips onto hot exhaust collectors. Shine your light down the front of the engine to inspect the timing cover seam and crankshaft pulley seal, then look down at the oil filter housing and cooler adapter. Distinguish between a dry, dusty film of oil vapor accumulated over five years and wet, glistening black droplets that indicate an active pressurized leak.
Shift your gaze to the cooling system, which endures immense thermal expansion cycles in high-output cars. Pressurized coolant rarely leaves wet puddles on a warm engine because the liquid evaporates quickly, leaving behind telltale mineral trails. Look for crusty white, bright pink, or chalky green deposits clinging to the crimped seams where plastic radiator end tanks meet the aluminum core. Use your mirror to inspect the underside of the water pump snout around the weep hole and trace the plastic thermostat housing necks for hairline stress cracks.
Fluid Cross-Contamination and Model-Specific Weak Points
When oil and coolant mix, repair bills escalate from weekend DIY gaskets to four-figure engine teardowns. Unscrew the engine oil filler cap and flip it over in the light. A thick, milky tan froth resembling mayonnaise points to water contamination inside the crankcase, though you should keep in mind that cars driven exclusively on five-minute winter trips can develop a thin trace of moisture under the cap from normal condensation. Once the cooling system depressurizes enough to safely open the expansion tank—or by shining your high-lumen light through the translucent plastic reservoir—look at the surface of the coolant. A floating rainbow sheen or dark brown sludge clinging to the reservoir walls signals a breached head gasket or a ruptured internal heat exchanger inside the oil cooler.
Every enthusiast platform harbors its own Achilles heel that you must research before leaving home. On pushrod American V8s like the Chevrolet Corvette, watch the lower harmonic balancer pulley while the engine idles to see if the outer metal ring wobbles rhythmically due to delaminated internal rubber. On European performance machines, as we frequently highlight in our breakdown of the best used German cars worth owning, turbo heat turns factory plastic charge pipes, coolant expansion tanks, and braided vacuum lines brittle enough to snap under gentle finger pressure.
| Visual or Physical Symptom | Primary Inspection Location | Suspected Mechanical Failure | Repair Urgency and Financial Impact |
|---|---|---|---|
| Crusty white or pink residue | Radiator end tanks and water pump snout | Seeping plastic seams or failing pump shaft seal | High urgency to prevent sudden overheating |
| Milky tan froth or oily film | Underside of oil cap and coolant expansion tank | Breached head gasket or internal oil cooler crack | Critical walk-away issue or major rebuild |
| Rhythmic wobble at idle | Lower crankshaft pulley and serpentine belt path | Delaminated rubber in harmonic balancer | Immediate repair required before belt throws |
| Dark wet oil accumulation | Oil filter housing and lower timing cover | Heat-hardened rubber profile gaskets | Moderate cost but high fire risk if dripping on exhaust |
This diagnostic table synthesizes common under-hood failure modes observed during professional pre-purchase inspections on high-mileage performance engines, helping buyers prioritize repair urgency. While minor age-related gasket sweating on a ten-year-old block is a routine bargaining chip, any active leak positioned above a catalytic converter or serpentine belt requires immediate remediation before you drive the car home.
Evaluating Suspension Wear, Steering, and Chassis Integrity
A healthy 400-horsepower engine means very little if worn suspension links cause the car to wander unpredictably across highway lanes. Sports cars rely on precise suspension geometry, stiff spring rates, and low-profile tires that transmit sharp road impacts directly into the chassis hardware. Evaluating the unsprung components and underbody structure reveals how well the car handles cornering loads and whether it ever slid off the pavement.
Damper Inspection and the Wheel Shake Test
Old-school advice suggests pushing down on each fender corner and watching how many times the body bounces to test the shock absorbers. On a modern sports car equipped with high-rate coil springs and thick anti-roll bars, the fender will barely budge even if the dampers are completely blown. Instead, shine your flashlight through the wheel spokes or under the fender arch directly at the shock body or coilover strut. The metal damper shaft and outer tube should be dry and uniformly dusty. If you see wet hydraulic oil coated in thick black road grit running down the strut body, the internal pressure seal has failed and the damper needs replacement.
With the seller’s permission, use a floor jack and jack stand to safely lift one front corner of the car until the tire clears the pavement by two inches. Grip the tire firmly at the 12 o’clock and 6 o’clock positions and rock it back and forth with your upper body weight. Any clicking, clunking, or free play in this vertical plane points to a failing wheel bearing or a worn lower ball joint. Next, move your hands to the 3 o’clock and 9 o’clock positions and push alternating sides. Looseness here isolates worn inner or outer tie rod ends or internal play inside the steering rack itself. If you feel play here, review our diagnostic guide on steering wheel clunking noises to understand how these worn joints behave once the car is moving.
Bushings, Aftermarket Upgrades, and Undercarriage Damage
While the wheel is raised, inspect the rubber bushings pressed into the control arms, tension struts, and rear subframe mounts. Under heavy braking and cornering, these rubber cushions tear, sag off-center, or leak dark hydraulic fluid if they are fluid-filled hydro-bushings. Pay close attention if a previous owner replaced the factory rubber with colorful polyurethane bushings or solid metal spherical bearings. While solid bearings and stiff coilovers deliver razor-sharp turn-in response on smooth asphalt, they also transmit relentless noise, vibration, and harshness into the cabin and can eventually crack the sheet metal chassis mounting points when driven over pothole-riddled city streets.
Drop down onto a foam mat or creeper and slide your head beneath the rocker panels and front bumper. Look along the metal pinch welds behind the side skirts to see if careless mechanics crushed or folded the jacking points without using proper jack pads. Trace the aluminum front subframe and lower oil pan for deep directional gouges caused by bottoming out over speed bumps or steep driveways. Finally, examine the main longitudinal frame rails for ripples, fresh black undercoating sprayed over only one section, or grass and gravel packed tightly into the underbody plastic trays, which are classic hallmarks of an off-track agricultural excursion.
Transmission, Clutch, and Drivetrain Performance Checks

Power means nothing without a reliable gearbox and differential to put torque to the pavement. Drivetrain repairs on sports cars often rival engine rebuilds in cost, especially with complex transaxles and dual-clutch units. Assessing how the transmission engages and transfers power requires systematic testing both in the driveway and out on the road.
Manual Gearbox Synchros and High-Load Clutch Slip Tests
When inspecting a three-pedal manual sports car, start with the engine idling in neutral. Press the clutch pedal slowly to the floor with your left foot. The hydraulic resistance should feel smooth and linear, free of any gritty binding from a worn release bearing guide tube or a spongy dead zone at the top that indicates air or moisture in the clutch fluid. Pay attention to where the clutch friction disc begins to bite as you release the pedal in first gear. While hydraulic self-adjusting clutches maintain a fairly consistent pedal height, an engagement point right at the very top millimeter of pedal travel alongside a heavy, stiff pedal effort often signals a worn-out pressure plate and thin friction disc.
As you pull out onto the street, test the brass or carbon synchronizer rings inside the gearbox. Shift briskly from first to second, and then from second to third at moderate RPM. The shifter should slot into the gates cleanly without a metallic crunch, double-click notchiness, or partial lockout. Second-gear synchros take the worst beating from aggressive drivers trying to chirp the tires. Once you reach an open road cruising around 35 to 40 mph, perform the definitive high-load clutch slip test. Shift early into fourth or fifth gear so the engine RPM drops low into the torque band, then press the accelerator pedal firmly to the floor. Watch the tachometer and speedometer simultaneously. If the tachometer needle surges upward by 500 RPM while the car’s road speed barely climbs, the clutch disc is slipping against the flywheel under peak torque load.
Dual-Clutch Behavior and Limited-Slip Differential Health
Modern dual-clutch transmissions and performance torque-converter automatics require a completely different evaluation mindset. Begin in a flat parking lot by releasing the brake pedal and letting the car creep forward and backward at idle without touching the throttle. A healthy dual-clutch unit should engage smoothly. Violent bucking, juddering, or erratic RPM hunting during low-speed parking maneuvers points to glazed clutch packs or failing mechatronic pressure solenoids. Measure the delay when shifting from Reverse to Drive, which should take no more than a second or two. Crucially, you must evaluate automatic shifting behavior both when the transmission fluid is cold and after twenty minutes of driving, as internal valve body seals and solenoids frequently malfunction only after the fluid thins out at full operating temperature.
Before leaving the empty parking lot, test the mechanical limited-slip differential and rear half-shafts. Turn the steering wheel to full lock and drive in slow, tight figure-eight loops. Listen to the driven axle. While aggressive aftermarket racing differentials naturally chatter and skip the inside tire during tight turns, a factory helical or viscous differential should operate quietly. Loud metallic banging, heavy drivetrain binding that slows the car down, or a rhythmic clicking sound from the outer wheels indicates worn differential clutch packs or failing constant-velocity axle joints.
Test Drive Techniques and When to Hire a Specialist
Too many buyers treat the test drive as a casual joyride, blasting the stereo and chatting with the seller while overlooking subtle mechanical feedback. Treating your time behind the wheel as a disciplined validation of your used sports car checklist ensures you catch speed-dependent faults before money changes hands. When a car passes your initial road test, scheduling a professional pre purchase car inspection provides the final layer of financial protection.
Structuring a Three-Stage Road Test and Brake Evaluation
Insist on driving the car yourself, or if insurance rules forbid it, direct the seller through this exact three-stage route while you sit in the passenger seat:
- Stage 1 covers rough, low-speed city streets at 15 to 30 mph with the radio, exhaust valves, and climate control blower turned completely off, allowing you to listen for dry suspension clunks, interior trim rattles, and differential whine over expansion joints.
- Stage 2 moves to a clear highway on-ramp only after the engine oil temperature gauge—which lags behind coolant temperature by ten minutes—reaches normal operating range, where you execute a smooth full-throttle pull toward redline in second or third gear to verify linear turbo boost buildup, crisp variable cam changeover, and zero high-RPM ignition misfires.
- Stage 3 settles into a steady 65 to 75 mph cruise in top gear on smooth highway pavement, letting you relax your grip on the steering wheel to feel for rhythmic wheel shimmy caused by bent inner barrel rims, unbalanced tires, or worn driveshaft carrier bearings.
During the highway or rural road segment, verify that no traffic is following behind you and perform a firm, decisive brake application from 60 mph down to 20 mph without triggering the ABS. Keep a light hand on the steering wheel during deceleration. If the steering wheel shakes rapidly left and right in your hands, the front brake rotors suffer from uneven pad material transfer or lateral runout, which you can diagnose further using our guide on knowing when rotors need replacing with brake pads. If the entire chassis pulls sharply toward one lane under braking, a seized caliper piston or collapsed rubber brake hose is starving the opposite wheel of hydraulic clamping force.
Assessing Modifications and Booking a Pre-Purchase Inspection
If the sports car features aftermarket upgrades, judge the quality of the parts and the transparency of the installation. Reversible bolt-on upgrades from established motorsport engineering brands—such as cat-back exhausts, forged wheels, or documented suspension kits accompanied by four-wheel alignment printouts—often add value for an enthusiast buyer. Walk away immediately from cars running unbranded turbochargers, spliced wiring harnesses, deleted emissions hardware, or mystery engine control unit tunes where the seller cannot provide a dyno sheet or the name of the tuning shop.
Even the sharpest driveway evaluation has physical limits. Once you decide you want to buy the car, pay an independent marque specialist $250 to $400 to perform a comprehensive pre purchase car inspection on a two-post shop lift. Ask the technician to run a cylinder compression and leak-down test alongside a fiber-optic borescope inspection to check for cylinder wall scoring on susceptible aluminum blocks.
| System Evaluated | Driveway DIY Inspection Method | Independent Specialist PPI Procedure | Hidden Issues Uncovered by Specialist |
|---|---|---|---|
| Internal Engine Health | Cold start listening, exhaust smoke check, basic OBD2 scan | Cylinder compression test, leak-down test, borescope camera | Scored cylinder walls, burnt exhaust valves, worn piston rings |
| Chassis and Subframe | Flashlight peek under rockers and single-corner jack shake test | Two-post lift inspection with pry bar load testing on all joints | Hairline rear subframe cracks, weeping inner rack seals, bent arms |
| Braking and Wheel Hubs | Visual pad thickness check and highway pedal feel test | Micrometer rotor thickness measurement and dial indicator runout check | Warped hub flanges, seized inner caliper pistons, glazed inner pads |
| Electronics and Tuning | Checking dashboard warning lights and basic readiness monitors | Factory diagnostic software interrogation of all control modules | Shadow fault codes, logged over-rev events, flashed aftermarket ECU tunes |
This comparison illustrates why a thorough driveway evaluation filters out obvious lemons, while a paid specialist inspection remains essential for verifying internal mechanical tolerances before finalizing payment. When the specialist hands you an itemized estimate for weeping gaskets, worn thrust arm bushings, or logged mechanical over-revs stored in the engine computer, hand a copy directly to the seller. Objective, printed repair quotes remove emotion from the negotiation, frequently saving you triple the cost of the inspection fee before you drive your new sports car home.