
Modern passenger vehicles convert significant kinetic energy into heat every time you press the pedal, pushing friction materials past 500 degrees Fahrenheit during routine highway stops. Paying attention to early brake pad warning signs ensures your braking system handles that thermal stress safely before minor wear damages expensive hardware.
Recognizing Early Brake Pad Warning Signs Through Sound
Understanding what your vehicle is trying to tell you starts with the basic anatomy of a disc brake pad. Every pad consists of two distinct components working together inside the caliper bracket. A rigid stamped steel backing plate provides structural integrity and transfers clamping force from the caliper piston, while a thick block of sacrificial friction material is bonded or riveted to the face of that steel plate. Depending on your vehicle, this friction compound is formulated from quiet ceramic fibers, heat conductive semi metallic alloys, or organic resins designed to wear down gradually over tens of thousands of miles so your cast iron brake rotor stays intact.
Because the front axle handles up to 75 percent of the stopping load as momentum pitches the weight of the vehicle forward, front pads typically wear down and trigger acoustic alerts much sooner than the rear set. You can explore the mechanical reasons behind that workload split in our foundational guide on front and rear brake differences before diagnosing specific wheel noises.
The Mechanics of High Pitched Squealing and Wear Tabs
When drivers first notice squealing brakes when stopping at neighborhood intersections, the culprit is usually a tiny piece of intentional engineering rather than an immediate failure. Most brake pad manufacturers rivet or clip a small spring steel tab, known as a mechanical wear indicator, directly onto the edge of the steel backing plate. The tip of this metal tab sits recessed at a precise depth alongside the friction block.
Once daily driving wears the sacrificial friction lining down to roughly 2 to 3 millimeters of thickness, the recessed tip of that spring steel tab finally makes physical contact with the spinning cast iron rotor. Just like running a fingernail across a chalkboard, the thin spring steel vibrates at a high frequency against the metal disc, producing a piercing metallic chirp or squeal whenever you apply light to moderate pedal pressure. As highlighted in the safety maintenance guidance from AAA Automotive, these built in mechanical wear indicators scrape against the rotor specifically to alert drivers while a thin safety buffer of friction compound still remains. Another key acoustic quirk of a mechanical wear tab is that the squealing noise often changes pitch or disappears temporarily when you press the pedal harder, or it may chirp faintly while rolling slowly with your foot completely off the brake.
Harmless Morning Noise Versus True Mechanical Wear
Not every high pitched noise coming from your wheel wells means you need to order parts immediately. Bare cast iron brake rotors are completely exposed to the atmosphere, and it takes only a few hours of overnight humidity, morning dew, or a heavy rainstorm for a microscopic layer of orange surface rust oxidation to form across the swept metal face. During your first two or three stops at the end of the driveway, the brake pads scrape away that thin film of iron oxide, creating a brief, crisp squeak or mild scraping sound. If the noise vanishes completely once the rotors are swept clean and warmed up, your pads are functioning normally.
Compound formulation also plays a major role in everyday acoustic behavior. Drivers of heavy duty trucks, European sport sedans, or performance cars equipped with aggressive semi metallic pads frequently experience low speed squeals during cold morning commutes. High concentrations of steel wool, copper, and brass sintered into semi metallic pucks generate harmonic vibrations against cold cast iron until the brakes reach operating temperature, even when the pads have plenty of life left.
Metal on Metal Grinding and Hardware Rattling
Ignoring an acoustic wear tab eventually leads to a harsh, unmistakable grinding noise when braking. Grinding is both an auditory roar and a coarse mechanical rumble that signifies the sacrificial friction material has worn away completely. At this stage, the bare steel backing plate is gouging directly into the cast iron rotor face every time hydraulic pressure clamps the caliper shut. Steel grinding against cast iron provides vastly inferior coefficients of friction compared to engineered pad compounds, lengthening your stopping distances while carving deep concentric trenches into the rotor that ruin the disc beyond resurfacing.
Between high pitched squeals and harsh grinding lies a gray area of intermittent clicking, clattering, or metallic rattling when driving over rough pavement or applying light pedal pressure. Disk brake pads do not bolt solidly into place. Instead, their mounting ears slide back and forth along stainless steel abutment clips and anti rattle hardware shims snapped into the caliper bracket. When road salt, brake dust, and thermal cycling corrode or fatigue those spring clips, the pad sits loosely in its track. Hitting a pothole makes the loose pad clatter vertically inside the bracket, while touching the brake pedal produces a sharp single click as the pad slams forward against the mount.
Paying close attention to the specific character of these sounds lets you separate normal environmental rust and cold performance compounds from urgent mechanical wear. A consistent high frequency chirp points directly to a 3 millimeter wear tab doing its job, a rattle over bumps reveals fatigued abutment clips, and a guttural metallic grind warns that friction lining is gone altogether.
Pedal Feel Changes Including Vibration and Sponginess
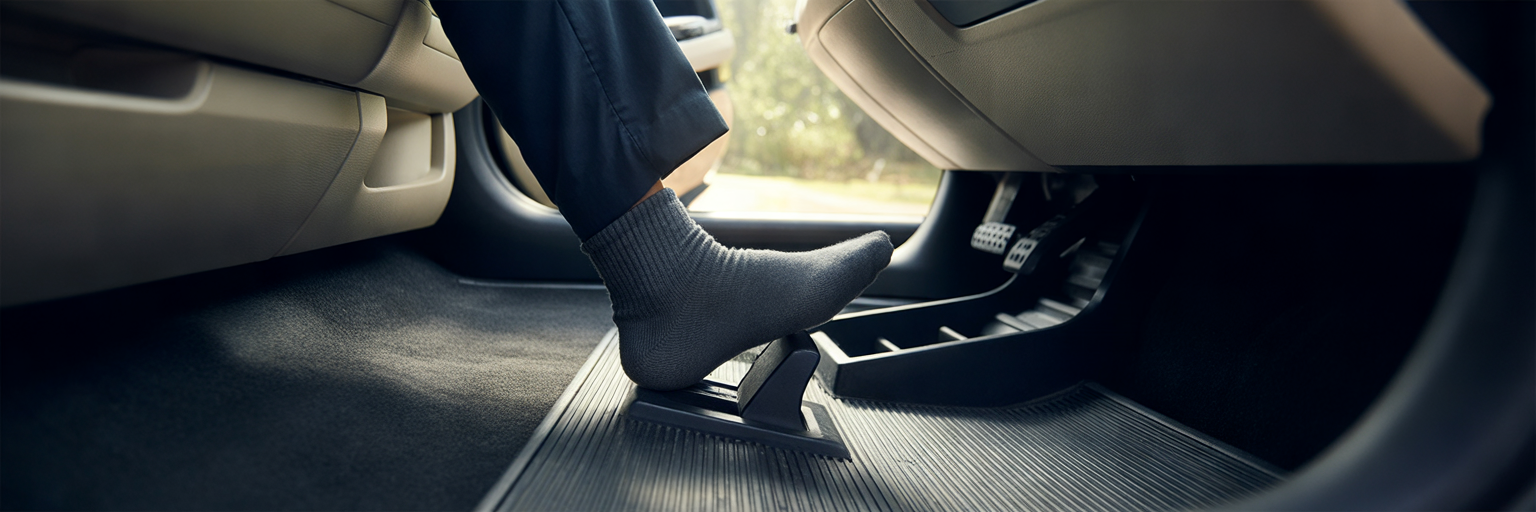
Acoustic warnings are not the only way a vehicle communicates deteriorating brake health. Long before a pad grinds down to bare steel, physical changes in the friction interface and hydraulic circuit travel straight up the brake linkage and steering column, giving your right foot and hands direct mechanical feedback.
Brake Pedal Pulsation and Disc Thickness Variation
Few sensations unsettle a daily commuter faster than stepping on the brakes along a high speed interstate off ramp and feeling a rapid rhythmic thumping through the brake pedal accompanied by a shimmy in the steering wheel. For decades, casual automotive talk has blamed this shudder on warped rotors, conjuring up the image of a solid cast iron disc twisting out of shape like a vinyl record left in the summer sun. In reality, cast iron passenger car rotors rarely warp from heat alone.
What you actually feel under your foot is a mechanical condition called Disc Thickness Variation, abbreviated by technicians as DTV. When you brake hard from highway speeds and then sit stationary at the bottom of the exit ramp with your foot firmly holding the overheated brake pad clamped against one spot on the scorching rotor, microscopic amounts of resin and friction material bake unevenly onto the metal face. That baked transfer layer alters the metallurgical structure and thickness of the rotor at that exact spot by just a few ten thousandths of an inch. Improperly torqued lug nuts or rust scale trapped behind the rotor hat can also induce lateral wobble, causing the spinning disc to brush against the pads rhythmically and wear high and low spots around the circumference.
As those thick and thin sections pass through the clamped caliper thousands of times per minute, the high spots physically shove the caliper pistons backward into their bores. That rapid hydraulic displacement travels up the brake lines and pushes the brake pedal up and down against the sole of your shoe. Avoiding this uneven resin deposition starts on day one of any brake job, which is why following our guide on proper bedding procedures is vital for transferring an even, thermally stable layer of friction material across the entire rotor face.
Diagnosing a Soft or Spongy Brake Pedal
Instead of vibrating, a compromised braking system may develop a long, mushy pedal stroke that requires you to press your foot much closer to the floorboard before the car begins to slow down. Examining the primary spongy brake pedal causes reveals a direct interaction between mechanical pad thickness and hydraulic physics.
As your brake pads wear down from half an inch thick to a fraction of a millimeter, the caliper pistons must extend much further outward from their bores to keep the pads resting near the rotor. Simultaneously, severely thinned pads lose their thermal insulation capacity. Heat from hard stops transfers rapidly through the remaining sliver of friction material and steel backing plate right into the caliper housing, cooking the brake fluid inside. Because standard DOT 3 and DOT 4 glycol ether brake fluids are hygroscopic, they absorb atmospheric moisture through microscopic pores in rubber hoses over time. When overheated by thin pads, that absorbed water flashes into compressible steam bubbles inside the caliper. Instead of transferring solid hydraulic force to clamp the rotors, your foot pressure simply squeezes spongy pockets of vapor or air inside aged lines. Restoring a crisp, confident bite at the top of the pedal stroke requires bleeding out contaminated fluid and performing a complete brake pad replacement to retract the pistons back into their optimal operating range.
Directional Pulling and Abnormally Hard Pedal Resistance
Sometimes the pedal height feels acceptable, yet pressing it causes the vehicle to veer sharply into the adjacent lane. Directional pulling under braking occurs whenever clamping force becomes unequal between the left and right wheels on the same axle. Note that the car will always pull toward the side with the healthy, functioning brake and away from the side that has lost friction. Common mechanical culprits include a floating caliper with corroded, seized slide pins that prevent the outer pad from clamping the rotor, an internally deteriorated flexible rubber brake hose whose inner lining has peeled away to block fluid flow like a one way check valve, or an axle seal leak that has soaked one set of brake pads in slick gear oil or grease.
Conversely, you might step on the pedal and encounter a rock hard lever that barely moves and requires tremendous leg effort just to nudge the speedometer downward. If the engine is running and the pedal feels like you are pressing against a cinder block, the primary suspect is a failed vacuum brake booster, a cracked vacuum check valve, or a split vacuum supply hose depriving the diaphragm of engine assist. However, if vacuum assist checks out fine and the pedal still feels wooden and ineffective, the brake pads themselves have likely suffered thermal glazing. Riding the brakes down a long grade overheats the friction resin past its temperature ceiling, crystallizing the surface of the pad into a mirror smooth, glassy crust that slides effortlessly over the rotor instead of biting into the metal.
Paying attention to how the pedal pushes back against your foot turns every routine stop into a diagnostic check. Rapid pulsations point to uneven rotor thickness or pad deposits, a sinking spongy stroke signals extreme pad depletion or boiling moisture inside the fluid, lateral tugging exposes an imbalance across the axle, and a wooden pedal warns of booster failure or glazed linings.
Dashboard Alerts and Electronic Brake Wear Sensors
While acoustic tabs and tactile pedal changes rely on driver awareness, modern vehicles add a layer of digital oversight right on the instrument cluster. Automakers supplement mechanical brakes with electrical circuits and fluid level monitors designed to catch worn linings before metal meets metal.
How Sacrificial Electronic Wear Sensor Loops Work
Many late model domestic trucks, luxury sedans, and European imports replace or pair traditional metal squealer tabs with electronic brake pad wear sensors. An electronic sensor is a compact, heat resistant polyamide plastic clip housing a tiny loop of insulated copper wire. During assembly, a technician snaps this clip into a machined notch directly in the center of the brake pad friction block, routing a short pigtail harness up along the steering knuckle to plug into the main chassis wiring loom.
In its normal state, the vehicle body control module sends a tiny reference current through that continuous wire loop, verifying a closed electrical circuit every time you turn the ignition on. Once the brake pad wears down to roughly 3 millimeters of remaining friction material, the outer plastic housing of the sensor clip rubs against the spinning cast iron rotor. Within a few dozen miles of contact, the abrasive rotor face grinds straight through the plastic shell and severs the internal wire loop. Breaking that circuit opens the loop and immediately illuminates a persistent warning message or icon on the dashboard gauge cluster.
Decoding US Spec Dashboard Brake Warning Symbols
Looking down at an illuminated warning light on the dash can cause confusion because several distinct symbols share similar shapes and colors across United States specification dashboards. Knowing which system triggered the light prevents unnecessary panic while highlighting true emergencies.
A dedicated electronic brake pad wear warning symbol typically illuminates in amber or yellow and looks like a circle flanked on the left and right by three dashed parentheses, mimicking the curved profile of brake shoes or pads pressing against a rotor. This amber icon indicates that a sacrificial wear sensor loop has been cut and you should schedule pad service soon. By contrast, the main red BRAKE warning light, often paired with an exclamation point inside a circle, monitors the hydraulic system and the mechanical or electronic parking brake. If the parking brake is fully released and the red BRAKE light stays glowing, the vehicle is warning you of dangerously low hydraulic fluid levels or a loss of pressure in half of the dual circuit master cylinder. Meanwhile, an amber light spelling out ABS indicates a fault within the antilock braking wheel speed sensors, tone rings, or modulator pump, meaning your normal mechanical brakes still function, though computer controlled anti skid pulsing is disabled. To verify the exact icons and warning behavior for your specific make and model, you can consult factory resources such as the official vehicle safety support guide from Chevrolet.
Low Fluid Level Triggers and Sensor Placement Blind Spots
Even if your vehicle does not have electronic wear wires clipped to the pads, the red hydraulic BRAKE warning light on your dash can still act as an indirect pad wear indicator. The brake hydraulic circuit is a sealed system. When all eight brake pads across all four wheels start out thick and brand new, the caliper pistons sit pushed all the way back inside their bores, and the brake fluid sits right at the MAX line inside the translucent plastic master cylinder reservoir under the hood.
As those eight pads lose thickness over 40,000 miles of driving, the caliper pistons gradually extend outward to take up the slack. Fluid from the master cylinder reservoir flows down into the caliper bores to fill the expanding space behind those pistons. When all four corners approach the end of their service life simultaneously, the fluid level in the reservoir can drop low enough to trip the magnetic reed float switch at the bottom of the tank, flickering the red BRAKE light during hard cornering or braking. Because of this hydraulic relationship, you should never blindly top off a low brake fluid reservoir without inspecting your brake pads and lines first. Adding fluid masks worn pads or a dangerous hydraulic leak, and when you eventually retract the caliper pistons during a pad swap, all that extra fluid will gush out of the reservoir cap and strip the paint right off your engine bay.
Electronic pad sensors also carry a notable blind spot that catches many car owners off guard. To keep manufacturing costs down, most automakers do not install electronic sensors on all eight brake pads. Instead, a typical four wheel disc setup uses just two sensors diagonal from one another: one clipped into the front left inner pad and one clipped into the rear right inner pad. If a front right caliper slide pin seizes up from winter road salt, that unmonitored front right pad can grind all the way down to bare metal without ever tripping a dashboard light. Furthermore, whenever you replace rear pads on modern vehicles that bundle electronic wear sensors with motorized parking actuators, you must follow proper retraction steps like those detailed in our electronic parking brake guide, and always install a brand new sensor harness since the old severed wire loop cannot be reset.
How to Perform a Visual Inspection of Your Pads and Rotors
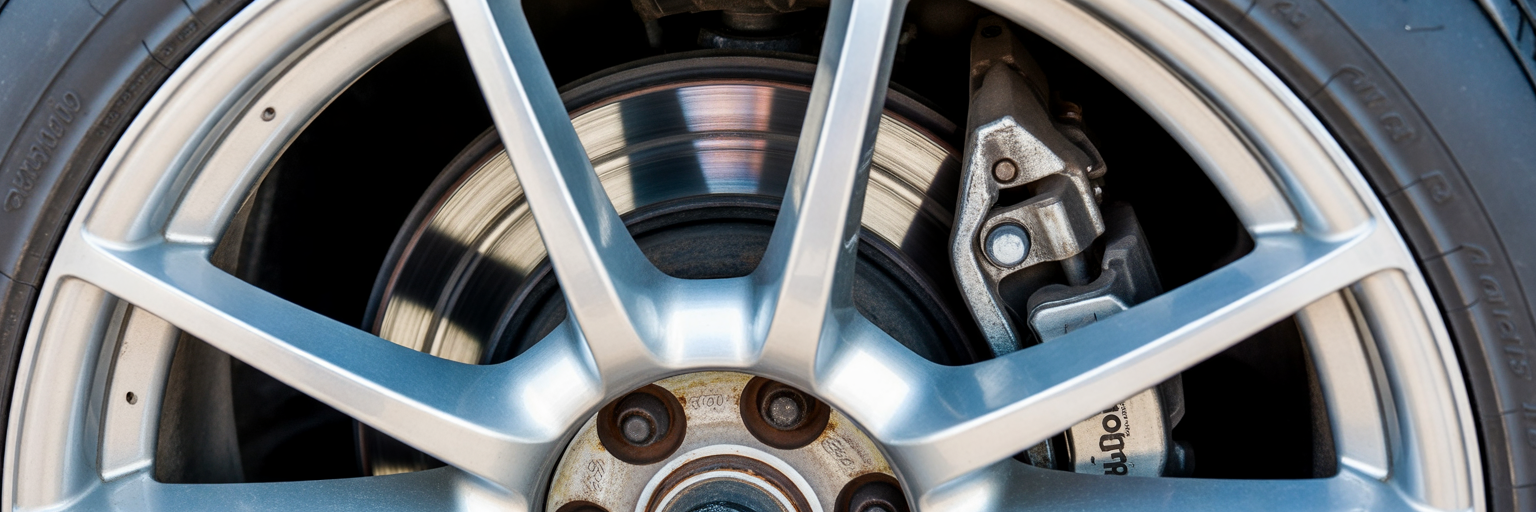
Sounds, pedal vibrations, and dashboard lights provide vital warning flares, yet nothing replaces putting your own eyes on the friction hardware. Performing a direct visual check in your driveway takes less than ten minutes and confirms the exact mechanical condition of your brakes before you buy parts or visit a mechanic.
Checking Pad Thickness Through Wheel Spokes With Simple Tools
On most modern sedans, crossovers, and pickup trucks equipped with open spoke aluminum alloy wheels, you do not even need to lift the vehicle with a floor jack or pull the lug nuts off to inspect worn brake pad thickness. Peering straight through the gaps between the wheel spokes with a high lumen LED flashlight gives you a clear line of sight to the brake caliper straddling the outer edge of the rotor. Gathering a small pocket flashlight, an angled telescopic inspection mirror, and an inexpensive set of color coded metal feeler blades from our first time DIYer brake tool checklist makes driveway diagnostics fast and repeatable.
Knowing the exact numerical benchmarks in both metric and standard measurements removes all guesswork concerning when to replace brake pads:
- Brand new passenger vehicle brake pads typically measure 10 to 12 millimeters of friction material thickness, which equals roughly three eighths to nearly half an inch of lining bonded to the steel plate.
- Mid life pads sit comfortably between 6 and 8 millimeters, or one quarter to five sixteenths of an inch.
- The yellow caution zone begins at 4 to 5 millimeters, roughly five thirty seconds to three sixteenths of an inch, signaling that it is time to order replacement parts and plan a weekend garage session.
- Mandatory replacement occurs at 3 millimeters, or one eighth of an inch, which is the threshold where mechanical wear tabs scrape, electronic sensors sever, and state safety inspectors fail a vehicle.
Follow these 6 steps to perform an accurate visual brake inspection right in your driveway:
- Park your vehicle on level pavement, shift the transmission into Park or first gear, set the parking brake firmly, and allow the brakes to cool down completely for at least 30 minutes if you have just driven home.
- Kneel beside the front wheel and shine your LED flashlight through the widest gap between the wheel spokes, aiming the beam directly at the metal brake caliper assembly clamped over the shiny cast iron rotor disc.
- Locate the outer inspection profile or cutout window on the caliper housing where the curved edge of the brake pad sits pressed flat against the face of the rotor.
- Visually separate the two layers of the brake pad so you do not misread the thickness: identify the painted or bare stamped steel backing plate closest to the caliper fingers (usually about 5 millimeters thick itself), and then focus exclusively on the dark gray block of friction material sandwiched between that steel plate and the rotor surface.
- Compare the friction block thickness against a household reference or press a color coded brake lining gauge (green for 8 to 12 millimeters, yellow for 4 to 6 millimeters, red for 2 to 3 millimeters) straight through the wheel spokes against the backing plate to get a precise measurement.
- Slide a telescopic angled inspection mirror through the wheel spokes behind the rear face of the rotor and bounce your flashlight beam off the glass to examine the hidden inboard brake pad and verify that both sides of the caliper are wearing evenly.
Evaluating the Hidden Inboard Pad and Rotor Surface Health
Skipping that sixth step with the inspection mirror is the single most common rookie mistake in driveway maintenance. Most everyday commuter cars utilize single piston floating calipers. When you step on the brake pedal, hydraulic fluid pushes the single piston located on the inside of the wheel directly against the hidden inboard brake pad first. Once that inner pad contacts the rotor, the entire caliper body slides inward along two greased steel pins to pull the visible outboard pad against the outer face of the disc. If road grime or torn rubber boots cause those slide pins to bind up, the inboard pad absorbs nearly all of the braking force and can wear down to 1 millimeter while the easily visible outer pad still looks half full through the wheel spokes.
While your flashlight is aimed at the wheel assembly, inspect the swept metallic face of the brake rotor as well. A healthy rotor displays a smooth, uniform silver surface with only faint microscopic swirl lines. Run your eyes from the center hub outward to the perimeter edge of the disc. If you spot deep concentric grooves resembling the tracks on an old phonograph record, a sharp raised metal lip protruding along the very outer perimeter edge where the pad does not reach, dark bluish purple blotches indicating severe thermal hotspots, or heavy flakiness creeping inward from the rust ring, your rotors have suffered structural wear. You can compare those visual clues against the criteria in our dedicated guide on determining rotor replacement to decide whether to install fresh discs alongside your new pads.
Use the diagnostic table below to match your driveway pad measurements and rotor observations with the right maintenance action.
Brake Pad Thickness Benchmarks and Visual Rotor Diagnostics
| Remaining Friction Thickness | Standard Measurement Equivalent | Color Gauge Zone | Visual Rotor Surface Condition | Recommended Action |
|---|---|---|---|---|
| 10 mm to 12 mm | 3/8 inch to 1/2 inch | Green | Smooth metallic swept face with uniform crosshatch | Healthy new or near new condition; inspect at next oil change |
| 6 mm to 8 mm | 1/4 inch to 5/16 inch | Green | Minor surface lines; no noticeable outer perimeter lip | Normal mid life wear; measure again at next tire rotation |
| 4 mm to 5 mm | 5/32 inch to 3/16 inch | Yellow | Faint outer metal lip forming; light glazing possible | Order replacement parts soon and check inboard pad wear closely |
| 3 mm | 1/8 inch | Red | Wear tab touching rotor; visible grooves or rust edge | Schedule replacement now before backing plate contacts rotor |
| Under 2 mm or 0 mm | Less than 1/16 inch | Red | Deep gouging, metal shavings, or blue thermal spots | Stop driving immediately; replace both pads and damaged rotors |
Thickness benchmarks reflect standard automotive aftermarket and state safety inspection thresholds for passenger vehicles, where 3 millimeters (roughly 1/8 inch) represents the minimum safe operating limit before thermal breakdown and backing plate contact occur.
Critical Scenarios Requiring You to Stop Driving Immediately
Most early brake pad symptoms give you a generous window of several hundred miles to order parts or book an appointment at a trusted repair shop. Certain severe mechanical failures, however, strip away your safety margin instantly and make a vehicle far too dangerous to drive even two miles down the boulevard.
Red Line Mechanical Failures and Thermal Cascade Risks
You must park the vehicle immediately and refuse to drive it any further if you encounter three non negotiable red line conditions: a brake pedal that sinks all the way to the carpet with minimal resistance, active puddles or drips of clear to amber oily brake fluid pooling along the inner sidewall of a tire, or violent metal on metal grinding accompanied by a noticeable drop in stopping power.
Attempting to limp a vehicle home or push through one more week of commuting on completely depleted pads triggers a destructive mechanical cascade inside the wheel assembly. Sacrificial brake pad friction material does more than create stopping friction. It also serves as a physical spacer and a vital thermal barrier between the scorching rotor and the hydraulic caliper. Once the friction puck wears down to zero and the thin steel backing plate grinds straight against the cast iron rotor, friction temperatures skyrocket past 1,000 degrees Fahrenheit in seconds. With no insulating material left, that extreme heat conducts straight through the steel backing plate into the hollow steel or phenolic caliper piston.
First, the intense heat melts and chars the rubber dust boot encircling the piston, allowing abrasive metal shavings and road grit to enter the precision cylinder bore. Second, the heat boils the brake fluid trapped behind the piston, filling the hydraulic line with compressible gas vapor that causes the brake pedal to drop to the floor with zero stopping force. Finally, as both the steel backing plate and the rotor face grind away to paper thin dimensions, the caliper piston extends beyond its engineered stroke limit. Under hard pedal pressure, the overextended piston can cock sideways, jam inside the bore, or pop completely out of the caliper housing, dumping all hydraulic pressure instantly or wedging the thinned backing plate into the spinning wheel to lock the tire at highway speed.
Recognizing a Seized Caliper and Executing Safe Emergency Stops
You can also face an immediate roadside hazard even before the pad wears down to zero if a brake caliper seizes in the clamped position while you are driving. When a corroded piston or frozen slide pin refuses to release pressure after you lift your foot off the pedal, the brake pad drags continuously against the revolving rotor at 65 miles per hour. Within a few miles of highway travel, a dragging brake emits a sharp, acrid chemical odor resembling burned carpet, electrical insulation, or an overheated manual clutch. Pulling over safely often reveals thin wisps of gray smoke drifting out from the wheel spokes, intense radiant heat that you can feel on your hand from a foot away without ever touching the wheel, and in severe nighttime cases, a brake rotor glowing dull cherry red behind the rim.
If you are driving in live traffic and experience sudden brake fade from boiling fluid or a ruptured hydraulic line, follow these 5 emergency driving steps to bring the vehicle to a controlled stop:
- Lift your foot completely off the accelerator pedal immediately, cancel cruise control if active, and switch on your four way hazard flashers to alert surrounding drivers that your vehicle is in distress.
- Pump the main brake pedal rapidly and firmly several times in quick succession to build residual hydraulic pressure inside the secondary chamber of your dual circuit master cylinder and compress any vapor pockets inside the lines.
- Downshift the transmission progressively into lower gears by moving an automatic shifter into Manual, Sport, or L modes (or tapping the steering wheel downshift paddles) so the mechanical compression of the engine slows the drive wheels without relying on wheel friction.
- Apply the parking brake smoothly and progressively to engage the rear mechanical cable or electronic actuator, keeping your hand on the release lever or switch so you can modulate pressure and prevent the rear tires from locking up into a spin.
- Steer the vehicle steadily toward a wide highway shoulder, an uphill exit ramp, or an open parking lot clear of cross traffic, using natural upward road grades to bleed off remaining momentum before calling a flatbed tow truck.
Never touch a smoking wheel hub or pour cold water onto an overheated brake rotor, as thermal shock will crack the cast iron disc instantly. Let the vehicle cool down on the shoulder and have it winched onto a rollback tow truck rather than gambling with highway safety.
Cost Implications of Delayed Maintenance and Inspection Schedules
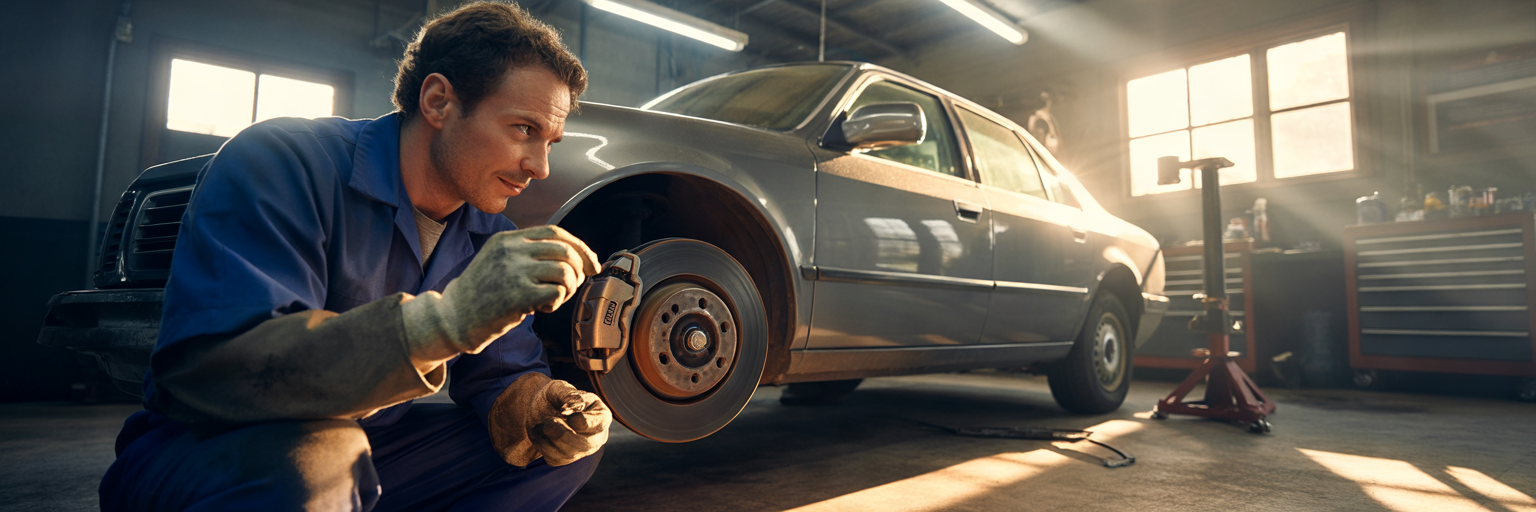
Beyond the unmistakable safety risks on the road, how quickly you respond to early brake warnings dictates whether you spend a modest sum on routine wear items or pay well over a thousand dollars to rebuild a heat damaged corner of your suspension. Catching pad depletion while 3 to 4 millimeters of lining remains keeps the repair confined to consumable friction parts. Ignoring squeals and pedal pulsations until steel grinds against iron or calipers overheat forces you to replace expensive hydraulic castings, rubber lines, and sometimes even sealed wheel hub bearings whose internal grease was Liquefied and cooked out by radiating rotor heat.
Review the 2026 cost comparison below to see how timely action in your own garage or at a local repair shop protects your maintenance budget. If you prefer having factory trained technicians handle the job, you can also review our breakdown of dealership brake service pricing to understand how OEM parts and hourly shop labor rates stack up against independent garages.
Estimated US Repair Costs: Proactive Pad Service vs. Neglected Brake Failure
| Service Scenario | Components Replaced | Typical DIY Parts Cost (Per Axle) | Average US Shop Parts and Labor (Per Axle) | Long Term Mechanical Impact |
|---|---|---|---|---|
| Proactive Pad Swap (Caught at 4 mm) | Brake pads, hardware clips, slide pin lubricant | $45 to $90 | $180 to $320 | Preserves existing rotors and hydraulic seals |
| Standard Pad and Rotor Refresh (Caught at 3 mm) | Brake pads, two cast iron rotors, hardware kit | $130 to $260 | $350 to $650 | Restores factory stopping distance and eliminates pedal pulsation |
| Delayed Grinding Repair (0 mm Backing Plate Contact) | Pads, scored rotors, electronic wear sensor harness | $170 to $330 | $450 to $800 | Risks metal contamination on wheel finish and longer stopping distances |
| Severe Overheating and Seized Caliper Cascade | Pads, rotors, remanufactured calipers, rubber hoses, brake fluid flush | $350 to $650 | $850 to $1,500+ | Extreme heat can also degrade wheel bearings and ABS wheel speed sensors |
Cost ranges reflect typical 2026 United States aftermarket parts pricing for mainstream passenger cars and light trucks compared against independent repair shop and dealership labor rates per axle.
How US Driving Environments and Pad Compounds Impact Longevity
Ask ten different drivers how many miles a set of brake pads should last and you will get answers ranging from 25,000 miles to 70,000 miles. That massive spread comes down to where you drive across the United States and what friction compound is bolted into your calipers.
A commuter creeping through heavy stop and go urban traffic along Interstate 405 in Los Angeles or the Kennedy Expressway in Chicago taps the brake pedal hundreds of times per trip, wearing down friction linings through constant low speed abrasion far faster than a rural driver cruising open two lane highways in Nebraska. Similarly, descending steep high altitude mountain grades like the Eisenhower Tunnel approach along Interstate 70 in Colorado, especially with a loaded pickup truck or travel trailer attached to the hitch, subjects pads and rotors to sustained thermal stress that can glaze inferior compounds in a single afternoon. Meanwhile, drivers across the Midwest and Northeast Rust Belt battle an entirely different enemy: winter road salt and liquid calcium chloride brine. Even when highway commuters in Michigan or Pennsylvania barely touch their brakes, corrosive winter slush creeps behind rubber caliper boots, seizing slide pins and rusting cast iron rotor cooling vanes from the inside out long before the friction pad actually wears thin.
Matching your replacement brake pad compound to your specific geographic and driving reality maximizes both longevity and stopping performance. Ceramic brake pads, molded from dense clay fibers and non ferrous fillers, operate with whisper quiet smoothness and shed very little fine, light colored dust that will not stain alloy wheels, making them the ideal choice for daily commuter sedans, hybrids, and family crossovers in urban and suburban traffic. Semi metallic brake pads, blended with 30 to 65 percent steel, iron, and copper fibers, trade a slight increase in dark brake dust and cold morning noise for superior heat dissipation, sharper initial cold pedal bite, and high resistance to thermal fade, making them the smart pick for full size pickup trucks, three row SUVs, mountain driving, and regular towing duties.
Setting a Preventative Tire Rotation Inspection Routine
The simplest way to ensure you never hear metal grinding or stare down a four figure caliper repair bill is to pair brake inspections directly with your tire rotation calendar. Most tire manufacturers and automakers recommend rotating your tires every 5,000 to 7,500 miles, which coincides neatly with standard synthetic oil change intervals.
Whenever the wheels come off the hubs for a rotation, whether the car is up on jack stands in your home garage or sitting on a two post lift at a local tire shop, all four brake assemblies sit completely exposed at eye level. Taking two minutes with a millimeter gauge while the wheels are off allows you to check both the outboard and hidden inboard pads across all four corners, inspect the flexible rubber brake hoses for dry rot cracks, and spot uneven taper wear early. Furthermore, drivers in northern snow states or humid coastal regions should schedule a dedicated preventative brake service once a year right after winter ends: pull the caliper bracket bolts, slide the pads out of their tracks, brush away crusty corrosion from the stainless steel abutment clips, and apply a fresh coat of high temperature silicone brake grease to the caliper slide pins alongside a quick electronic moisture strip test of the brake fluid in the master cylinder.
Staying ahead of brake maintenance does not require specialty shop equipment or guesswork. By listening for the early high pitched chirp of a 3 millimeter wear tab, paying attention to subtle pulsations or sponginess under your right foot, respecting dashboard circuit alerts, and shining a flashlight on your pads at every tire rotation, you keep your stopping distances short, your rotors smooth, and your repair budget firmly under control.